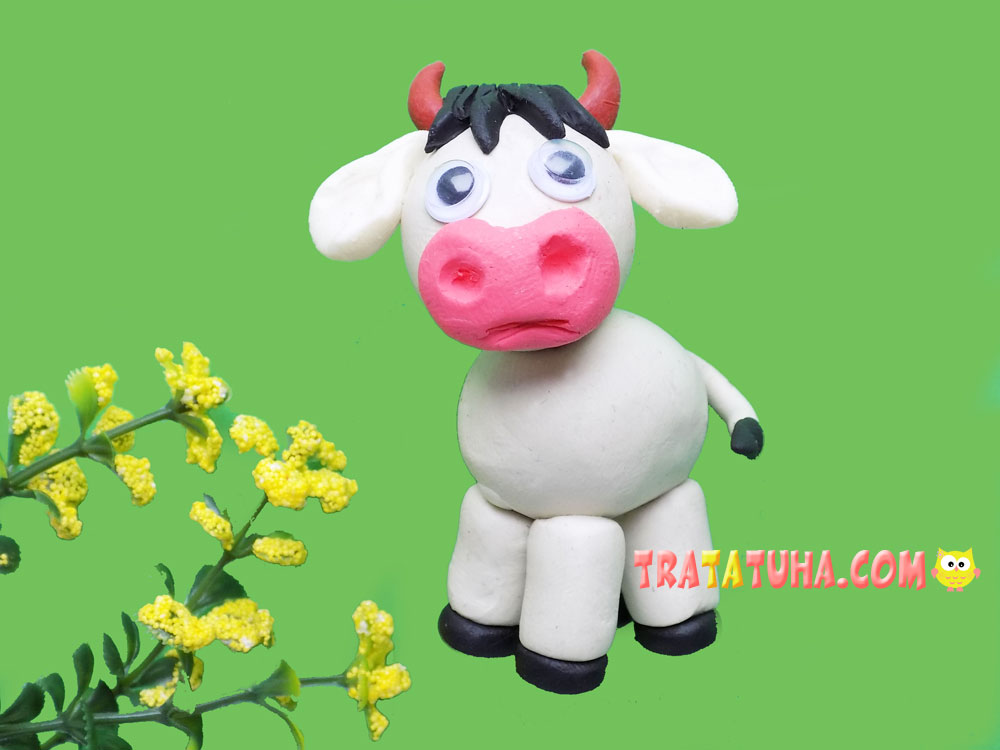
A simple bull made of clay for kids. A step-by-step tutorial on the theme of clay animals.
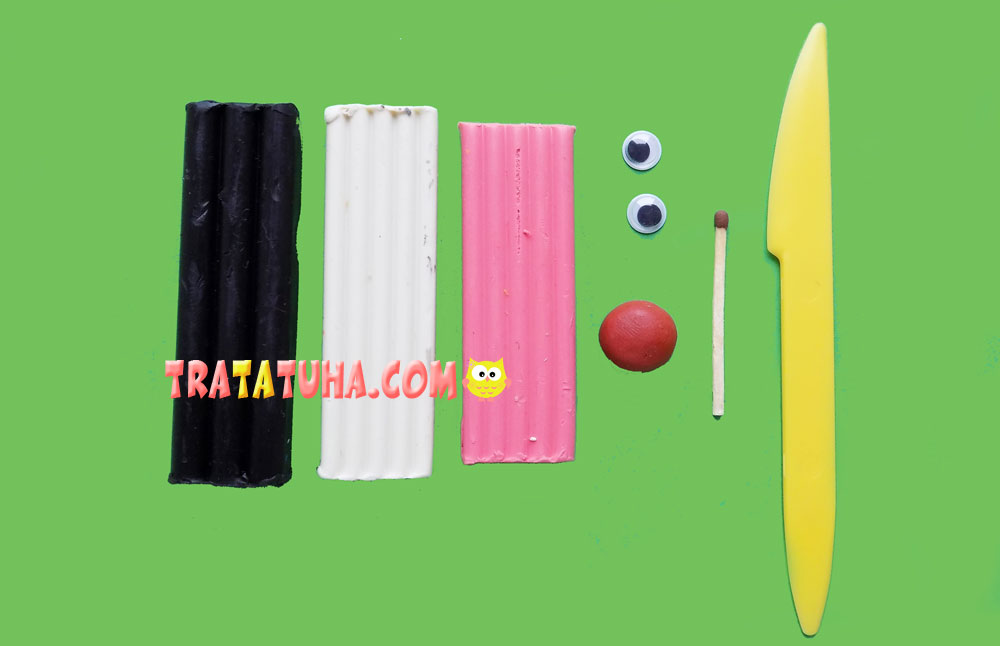
You will need:
- clay of the desired color;
- plastic stack;
- decorative eyelets;
- match.
Clay Bull Step by Step
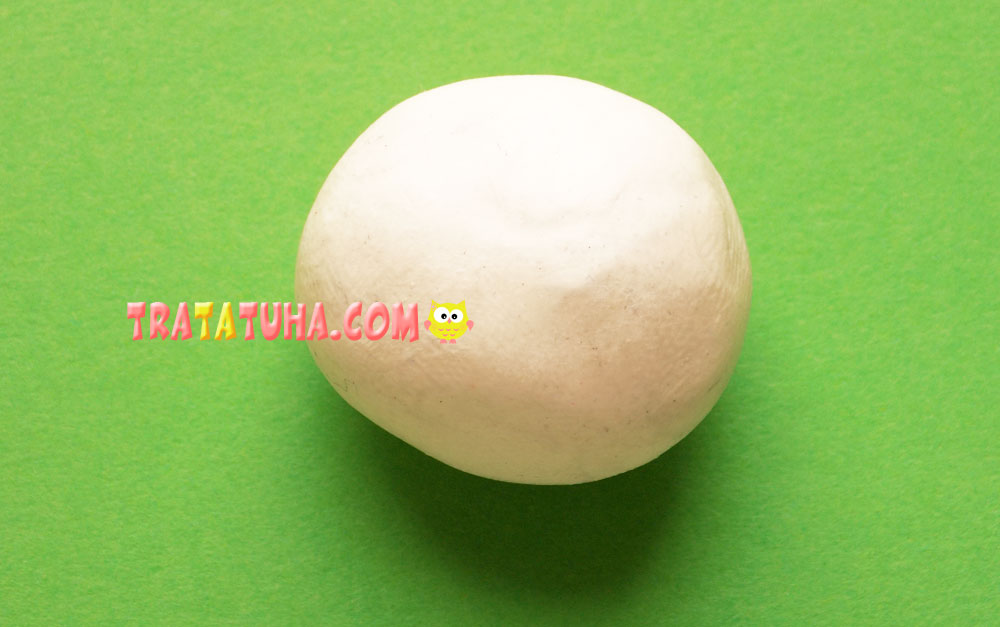
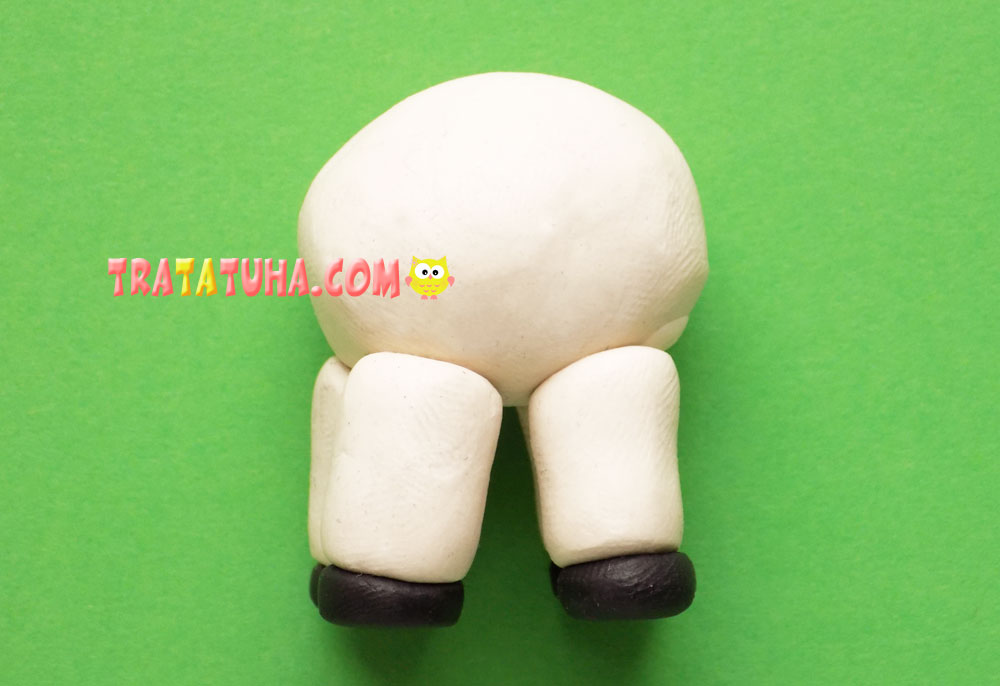
First, we will make a blank for the body of the bull. It will be an oval made of white clay.
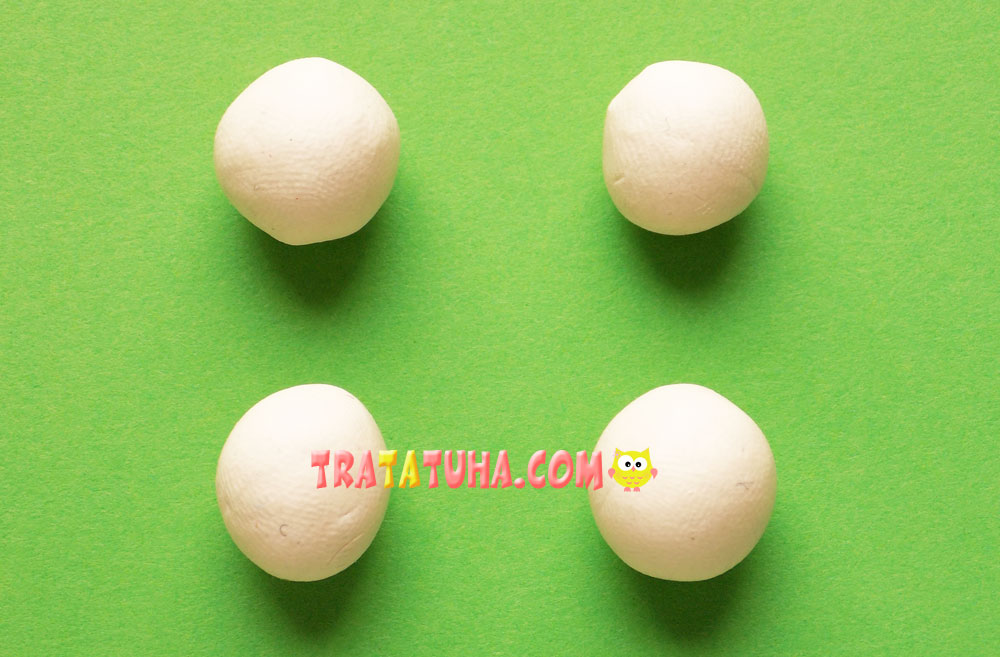
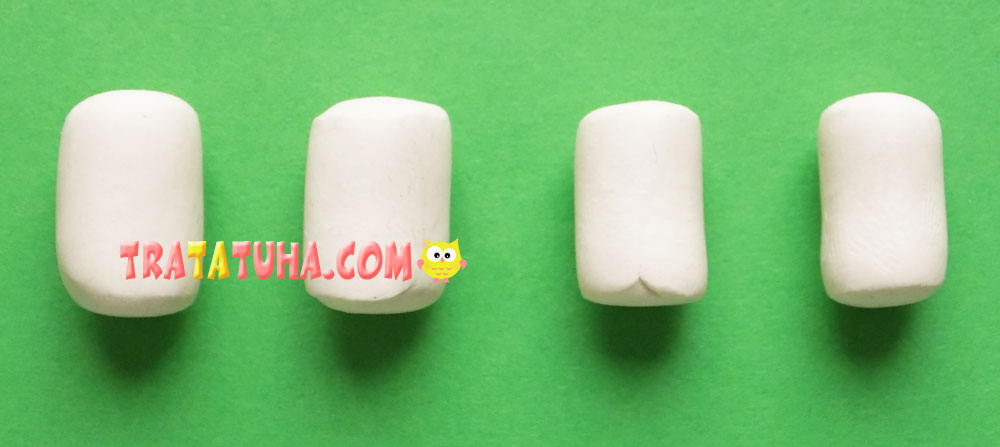
Small balls of clay of the same color are required to create the legs of our animal.
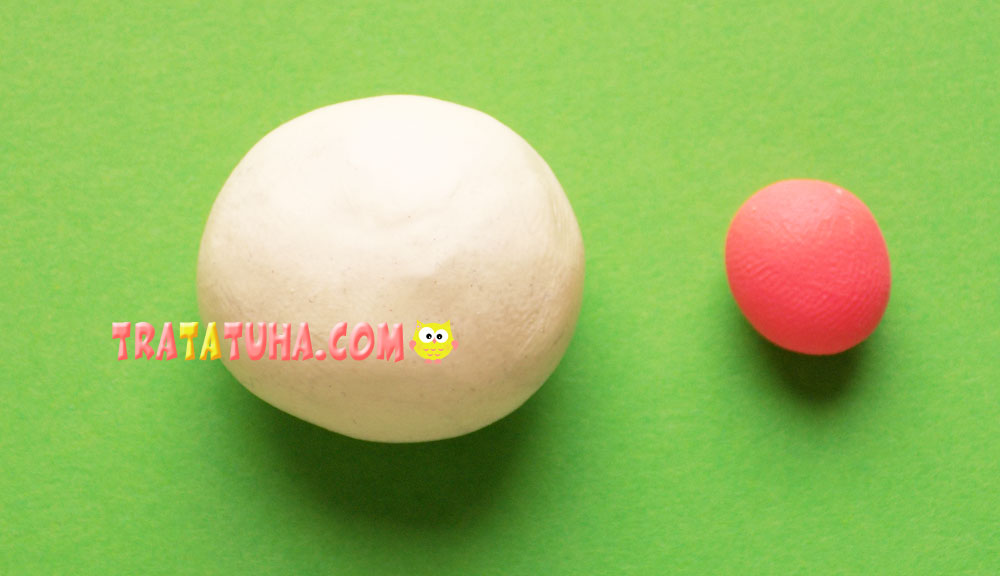
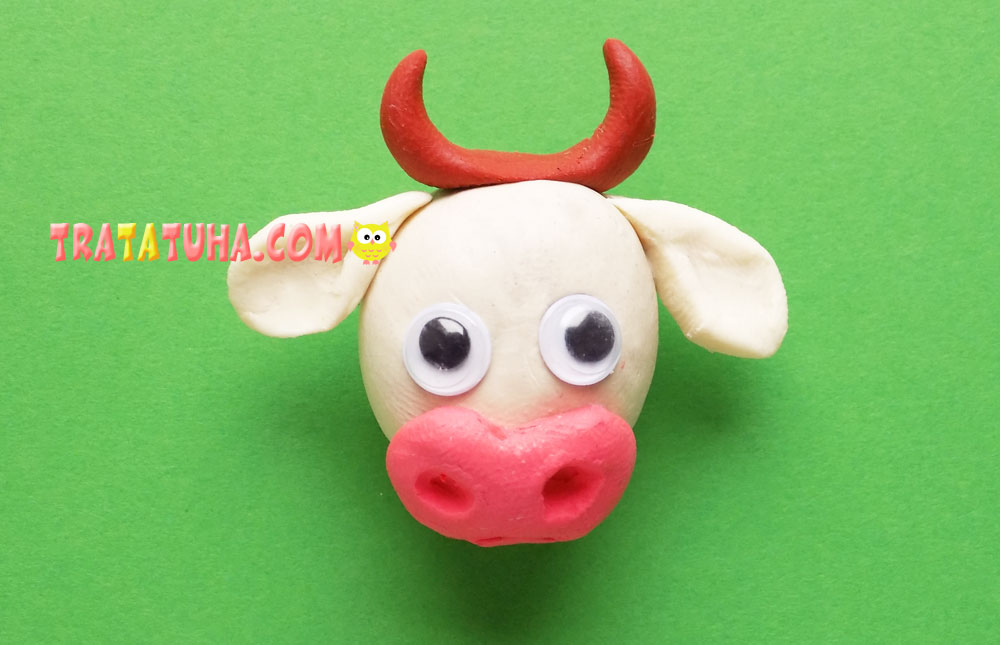
For the head, we will prepare 2 blanks in white and pink.
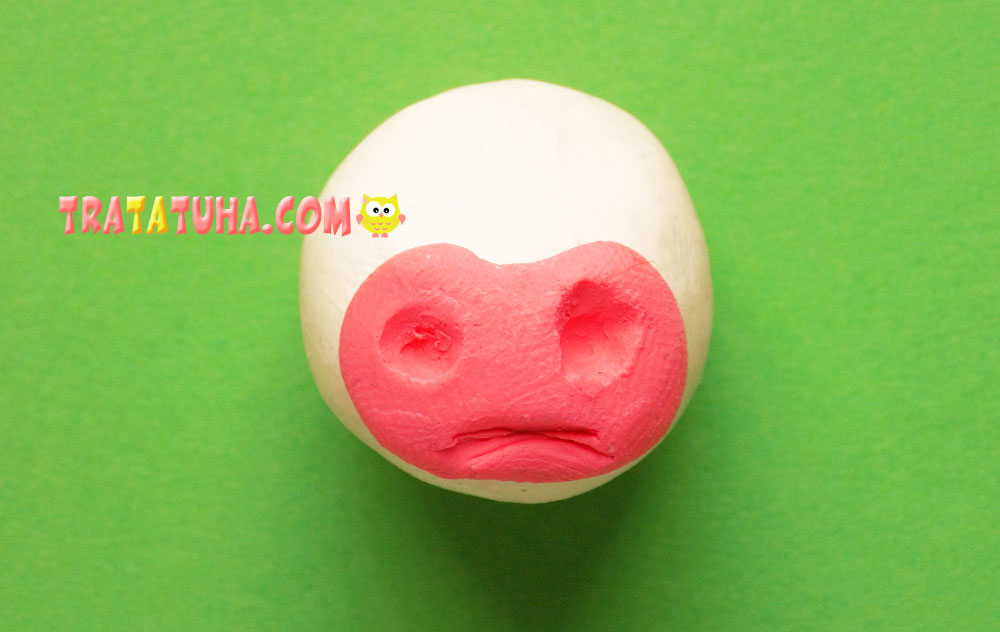
We begin to form the muzzle of the bull. To do this, we make the pink ball flat, attach it to the head, and on the muzzle with a match we denote the nostrils and mouth.
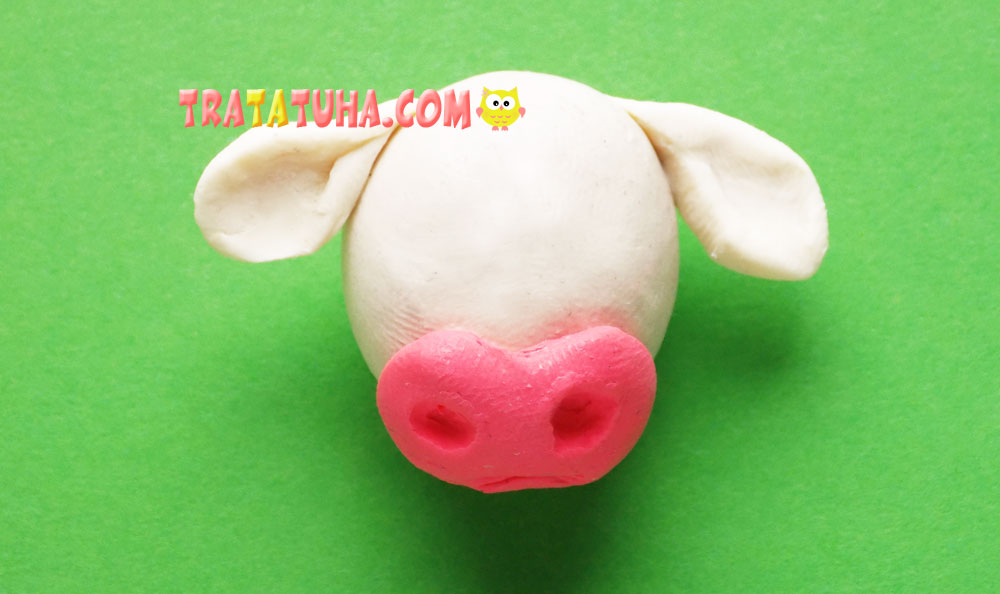
Add small white ears.
We make horns from a flagellum of brown clay, its ends should be pointed. We smoothly bend this flagellum and fix it on the bull’s head. Add decorative eyes. If there are none, then you can fashion them from small balls of black clay.
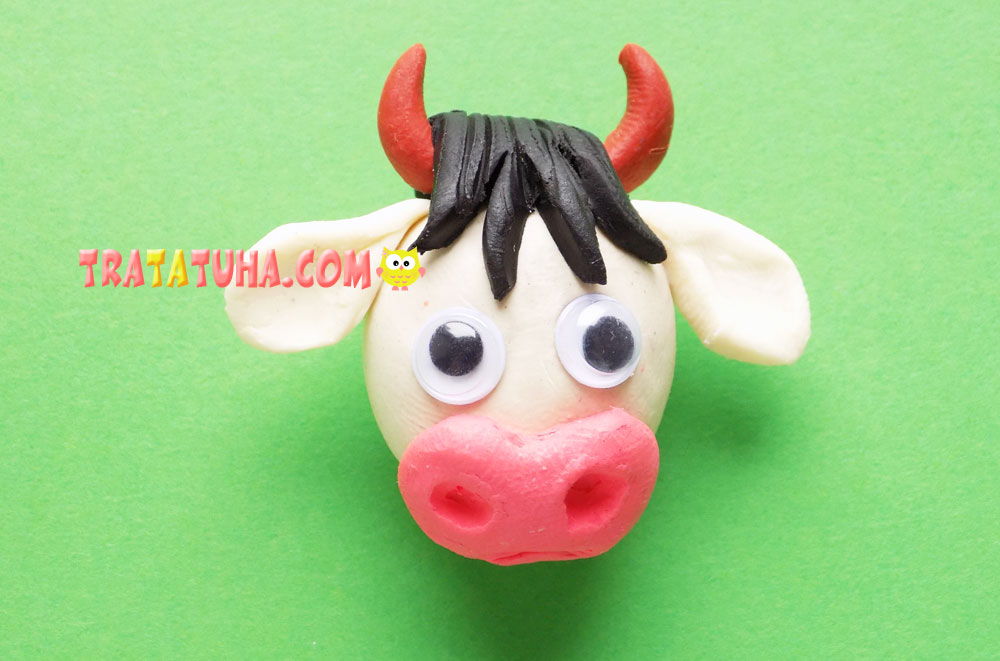
Between the horns we fix the bangs made with the help of a stack of black clay.
Roll out the previously prepared small balls of white clay into short “sausages”.
From below, add black hooves to the legs, and then attach them to the body.
We will connect the head with the body using an ordinary match, which we will place inside (if necessary, it can be shortened).
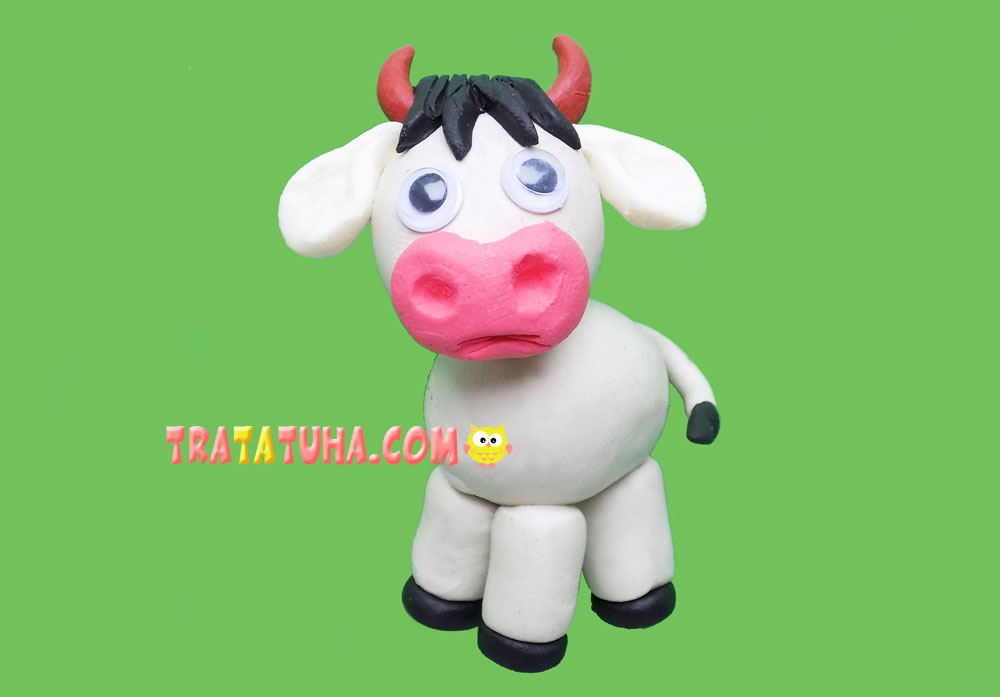
Add a ponytail made from a thin flagellum of white clay, with a black tassel at the end.
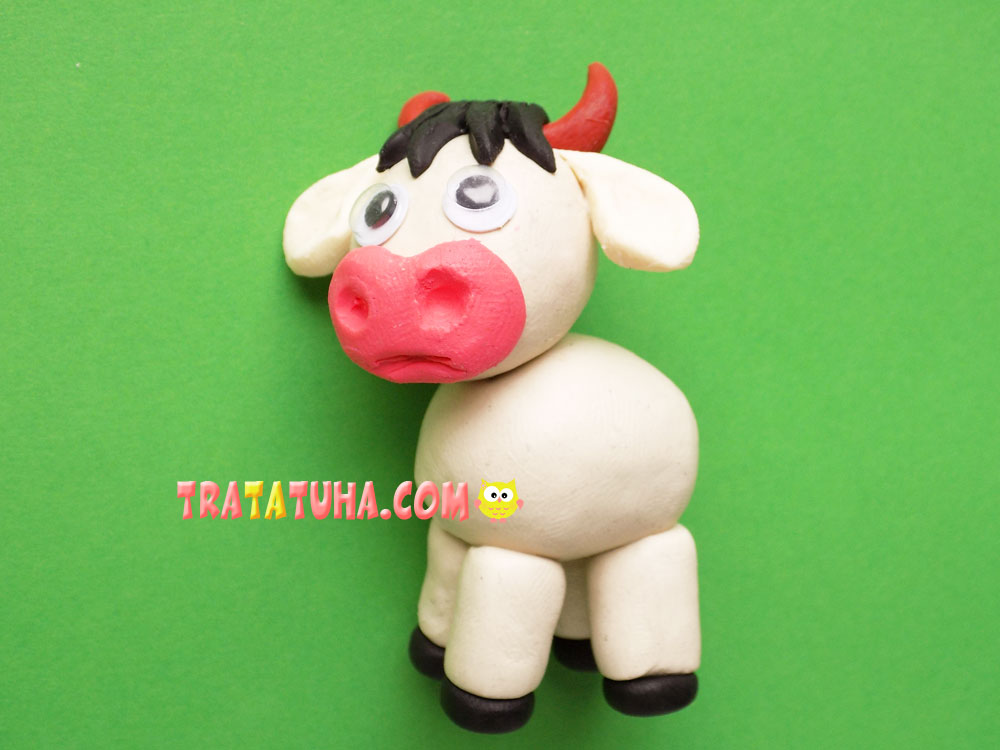
The clay bull is ready.
See more ideas about Clay Crafts.
Clay Animals – art and craft ideas for all ages.
Crafts for Kids – learn how to make craft at home! Super cute crafts for all age groups!
Related Post: