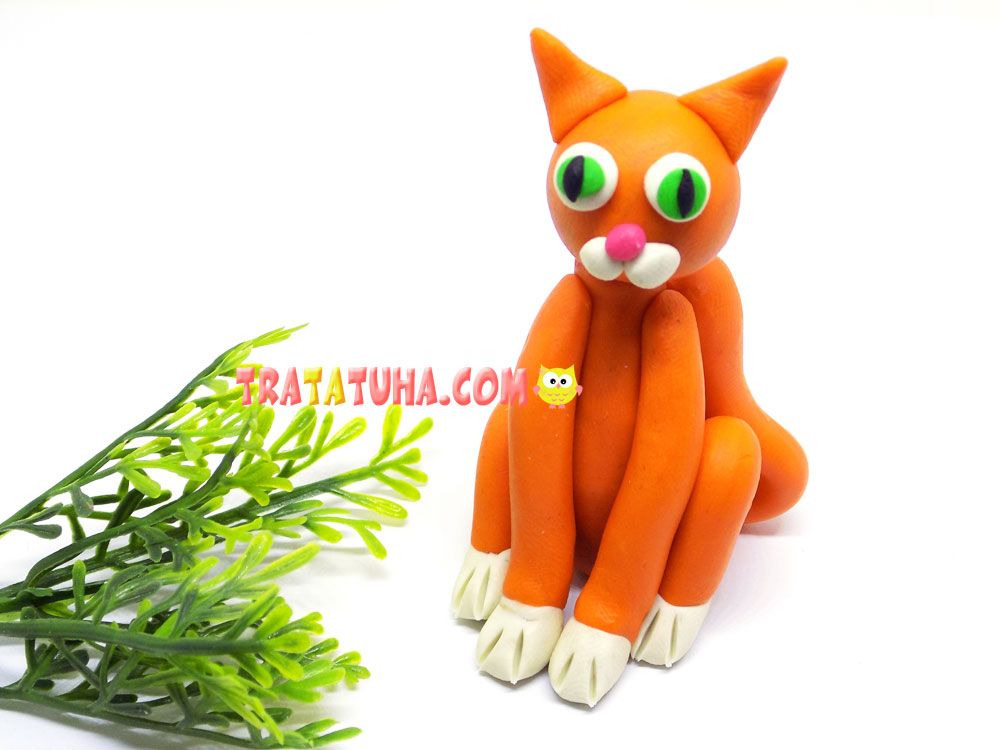
Modeling animals out of clay can be a fun activity. Our step-by-step tutorial is a red cat made of clay.
To modeling a cat, we will need:
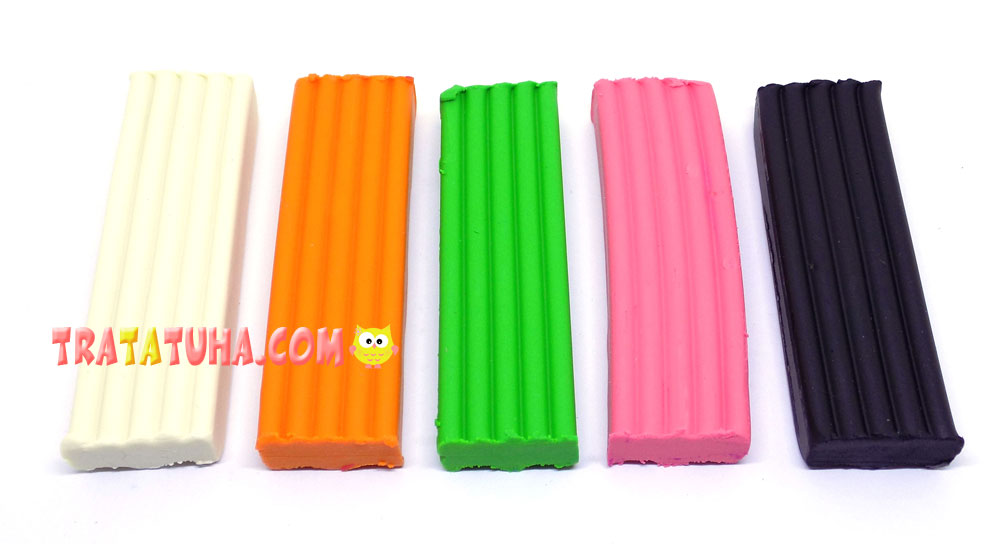
- clay orange, pink, green, black and white;
- stack;
- work mat.
Clay Cat Step by Step
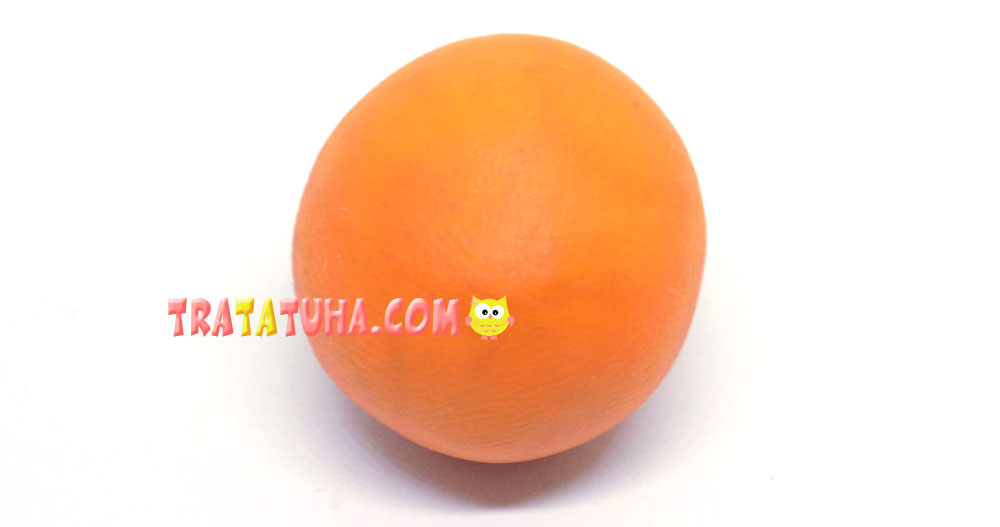
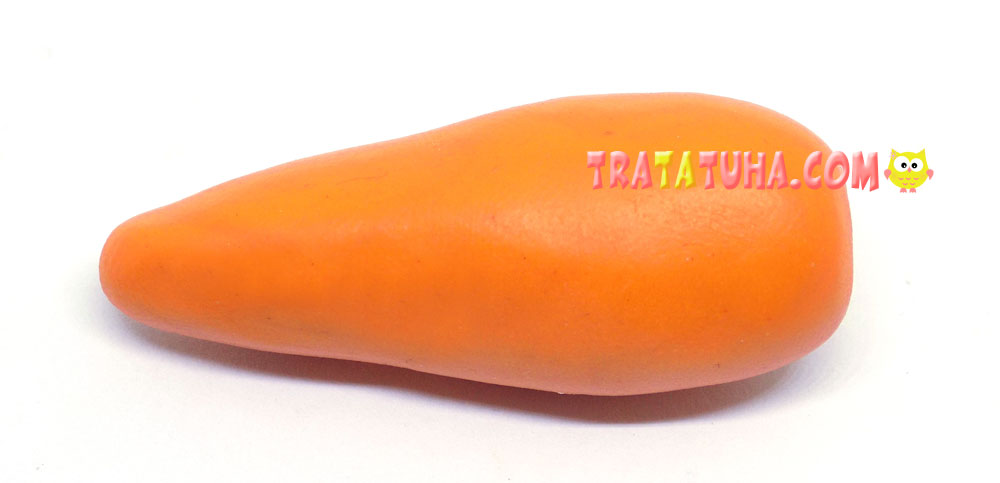
The main color in our craft will be orange, so we sculpt almost all the details from this clay. Let’s start by creating the body, it needs to form a ball.
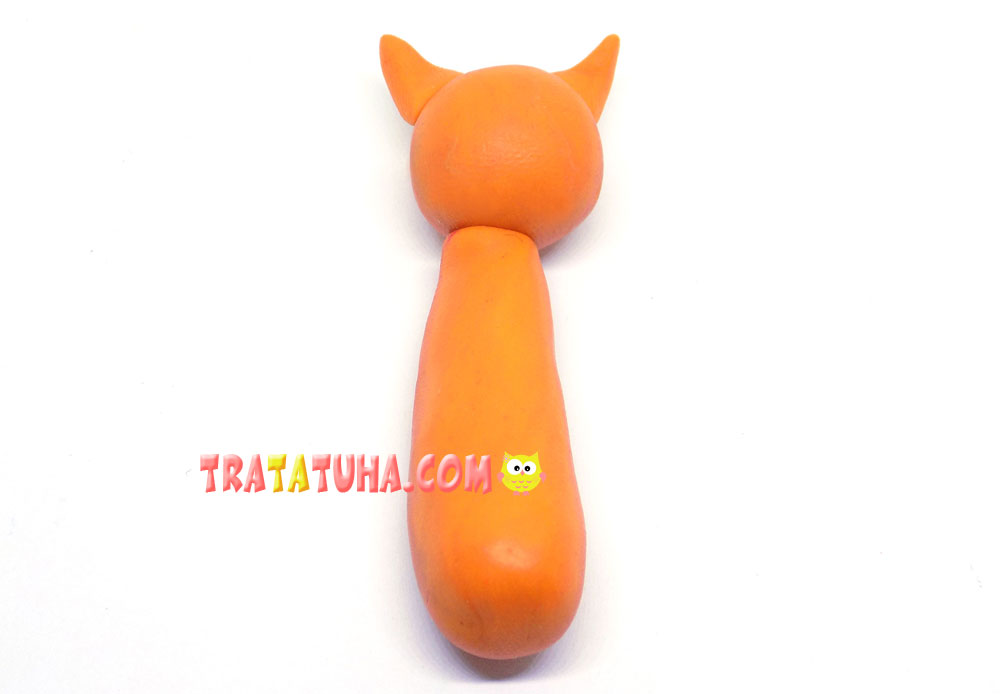
For the head you will need a smaller ball, and to create the ears of our cat, we are preparing a couple of small balls.

We begin to form the body of the cat, it will be elongated and have the following shape.
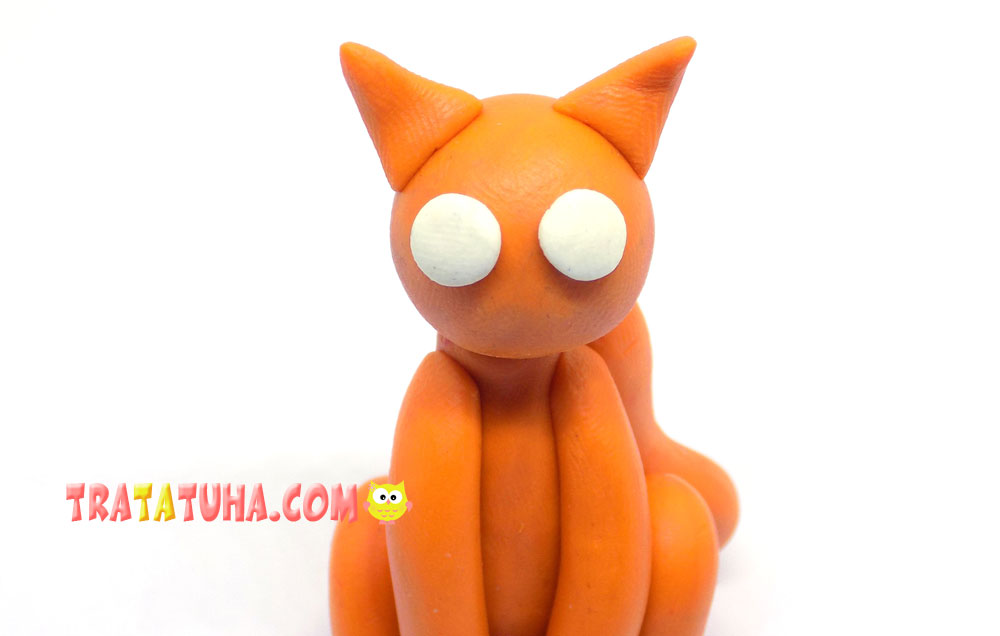
The cat’s head will remain round, and from small blanks we create triangles that will become ears, fix them on the head. Then we connect together the torso with the head.
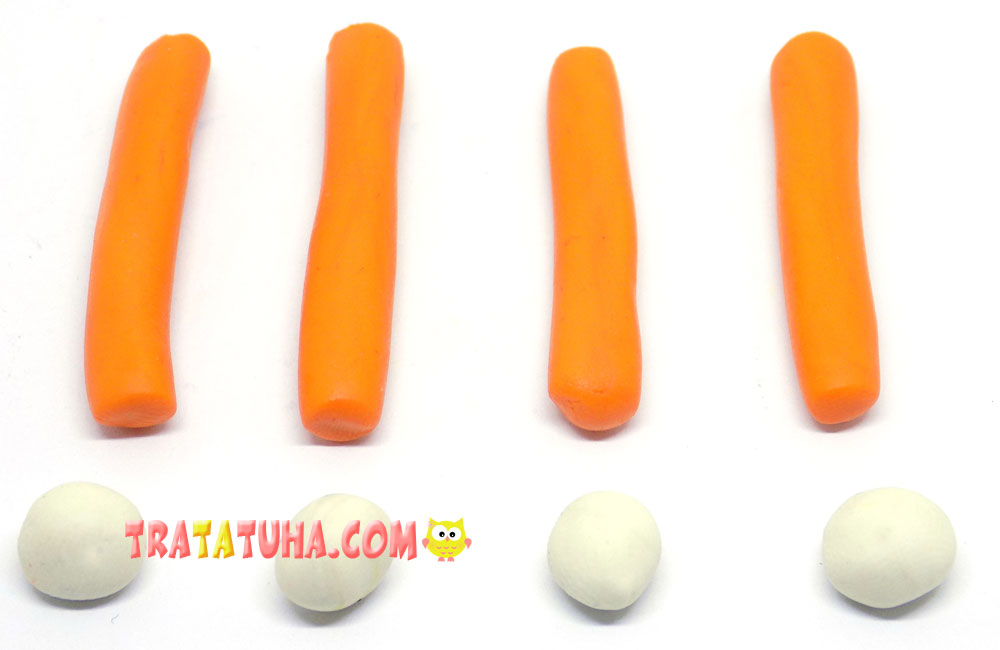
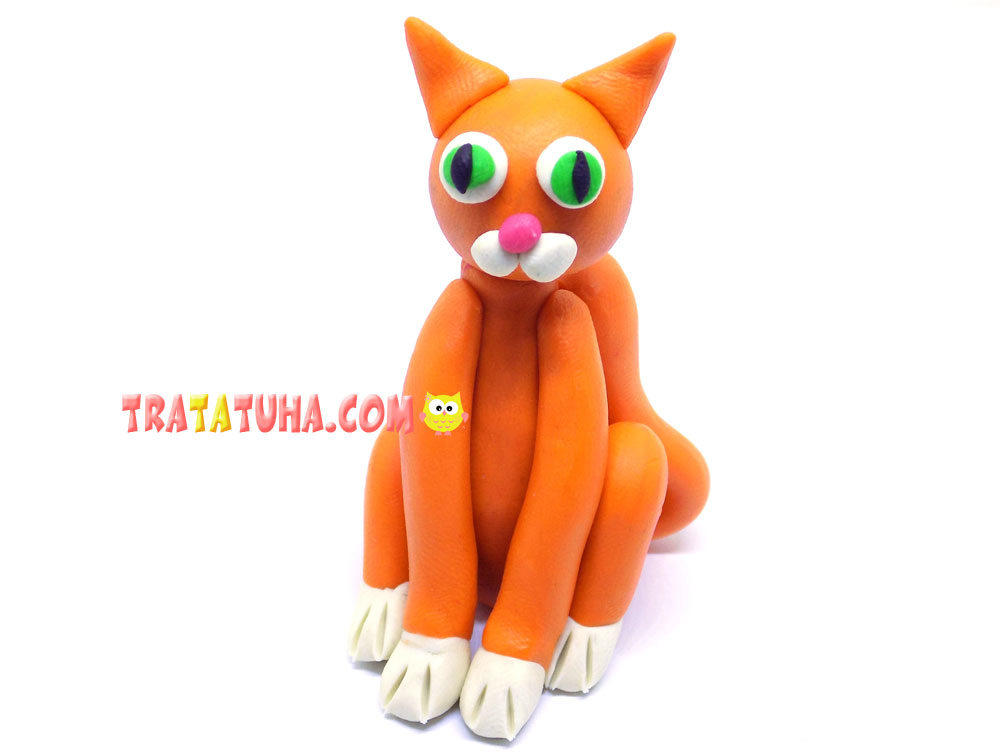
We make blanks for the paws of a cat. These will be 4 sausages rolled from orange clay. The tips of the cat’s paws will be white, so we are preparing 4 balls of white clay.
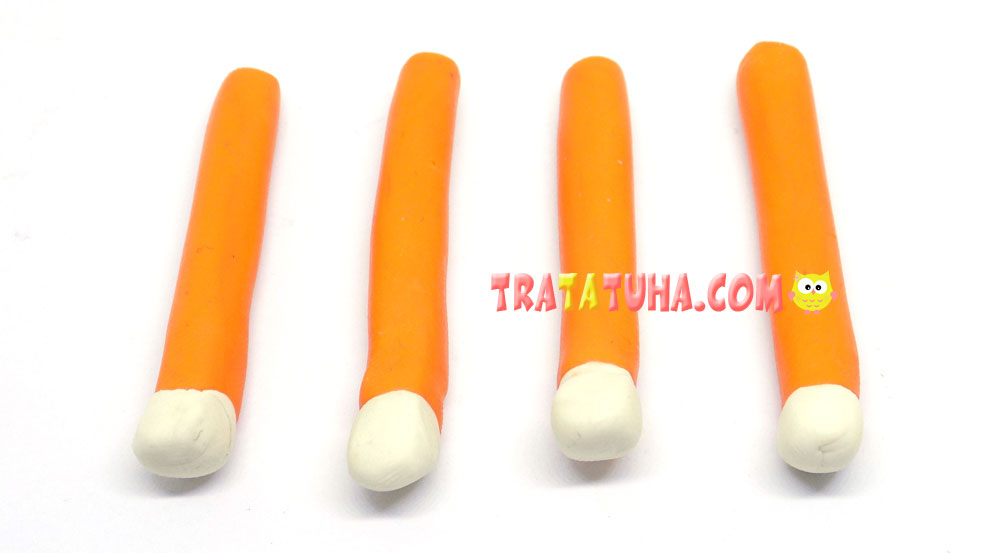
We connect together these balls with orange paw blanks.
We begin to attach paws to our cat. First add the front legs, they will be straight.
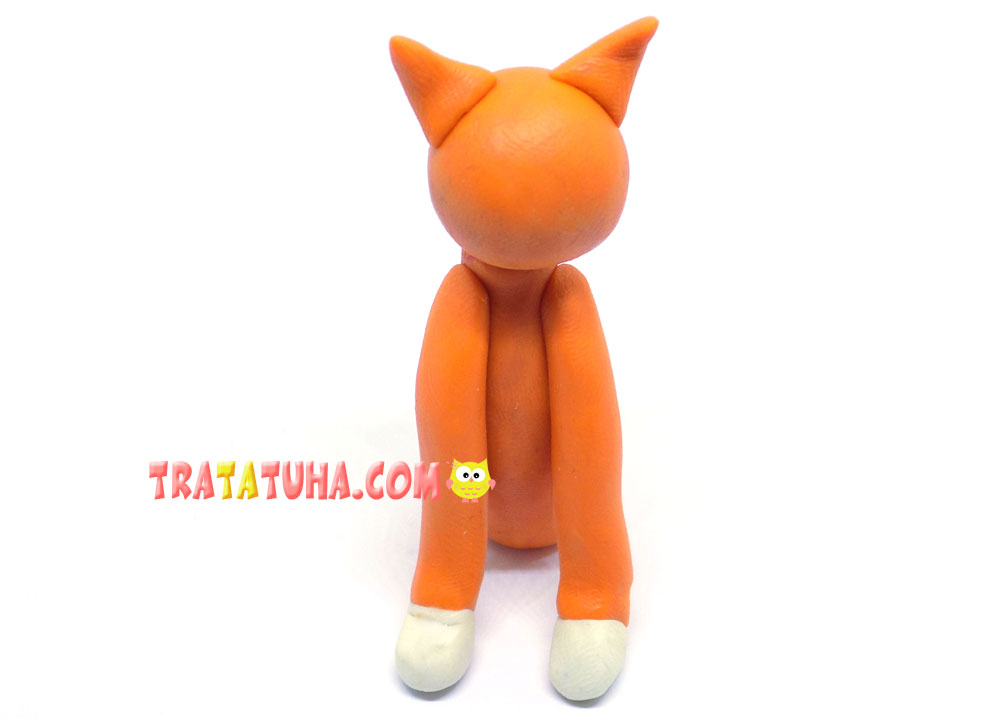
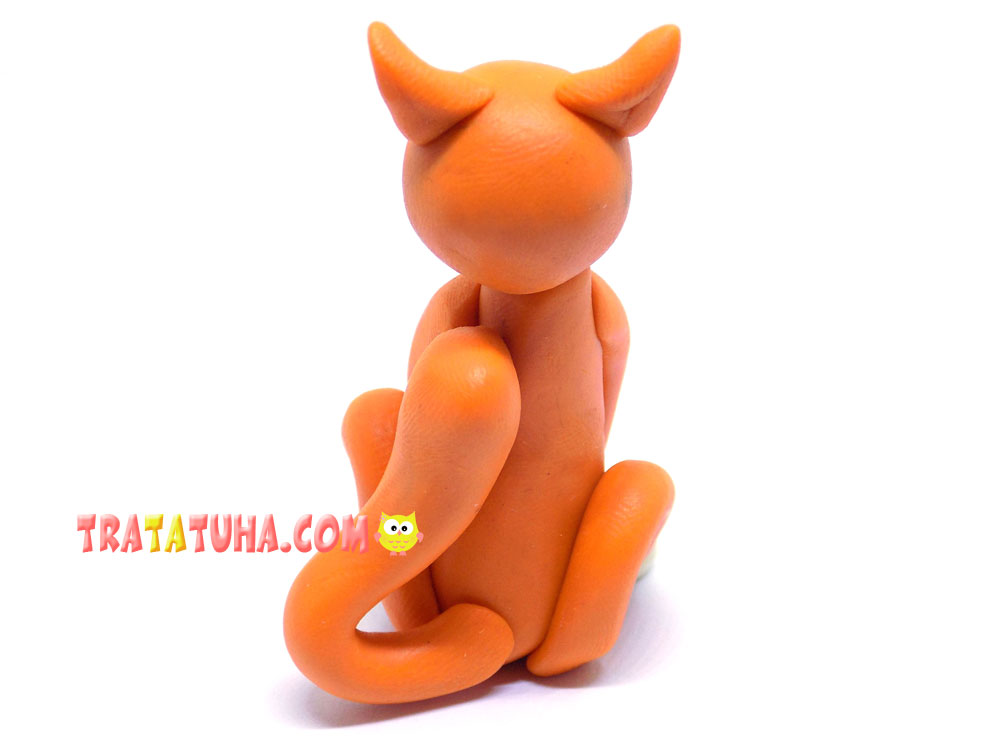
We will bend the hind legs a little, after which we will fix them.
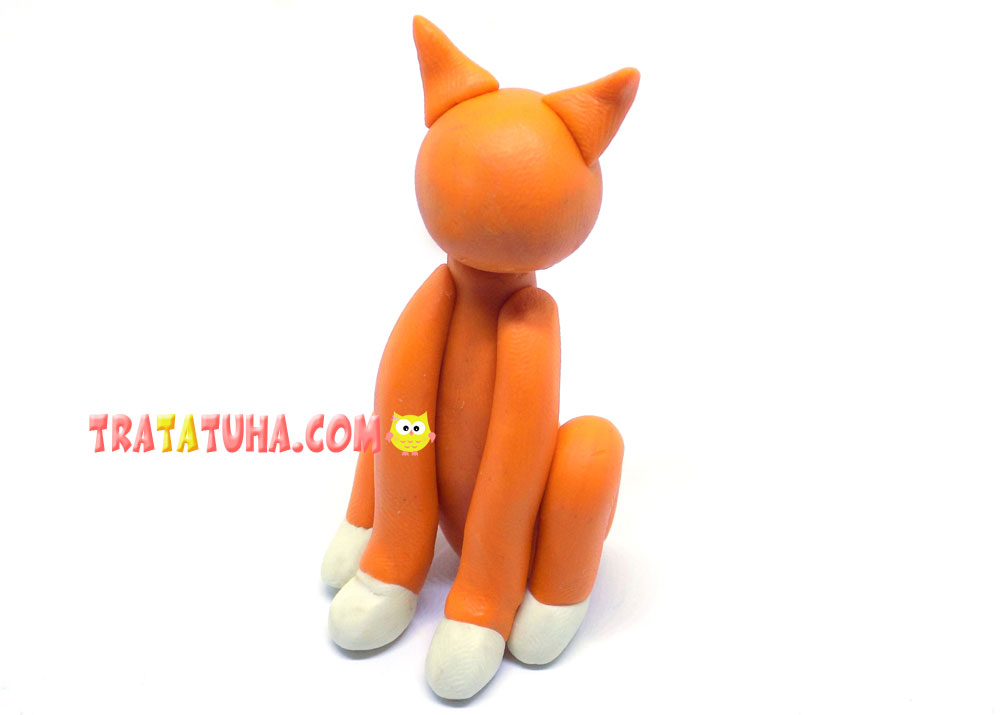
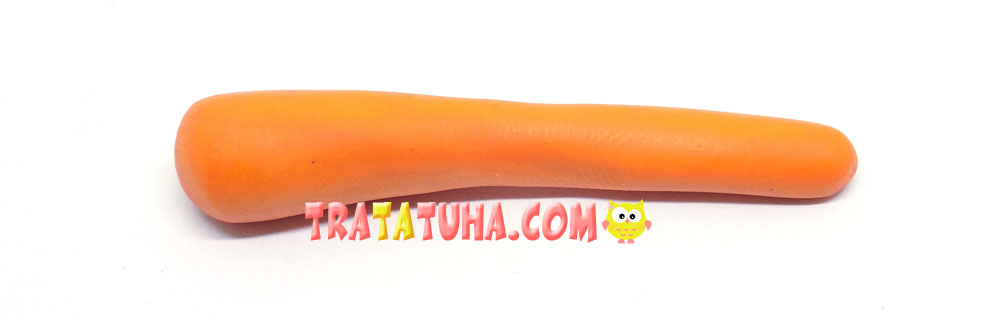
We make a tail. Let’s use orange clay again. We roll a sausage out of it, which will be a little thicker at one end.
We fix the tail at the back of the craft.
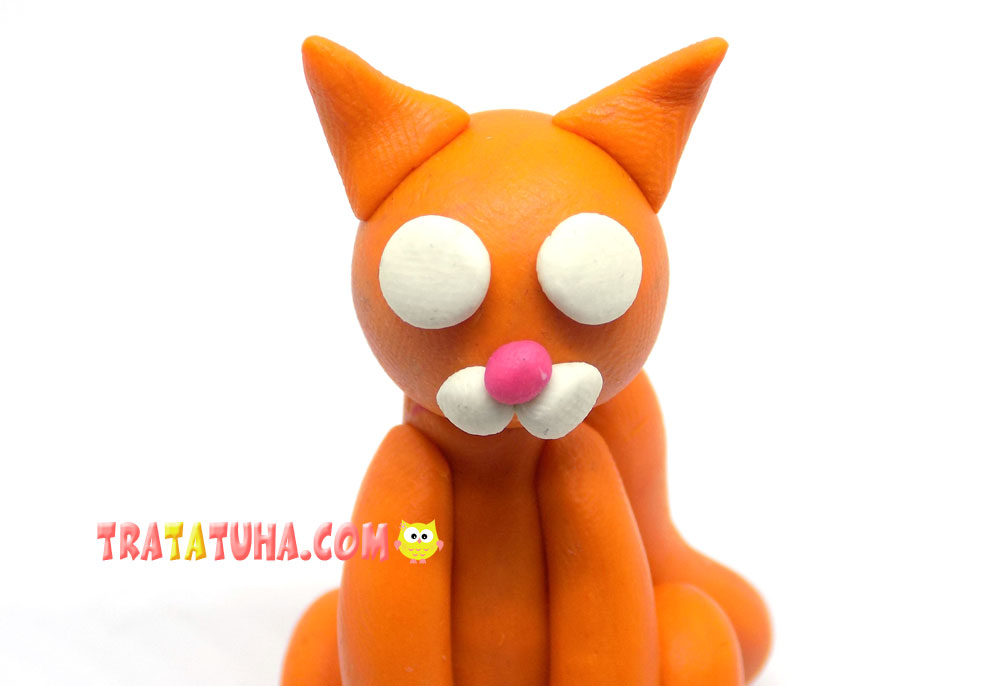
It remains to make the muzzle of our red cat. We outline the white base for the eyes.
We also add a couple of balls from white clay. The cat’s nose will be pink.
And we blind the eyes from pieces of green clay, the pupils will be vertical and made of black clay.

Clay cat is ready.
See more ideas about Clay Crafts.
Clay Animals – art and craft ideas for all ages.
Crafts for Kids – learn how to make craft at home! Super cute crafts for all age groups!
Related Post: