
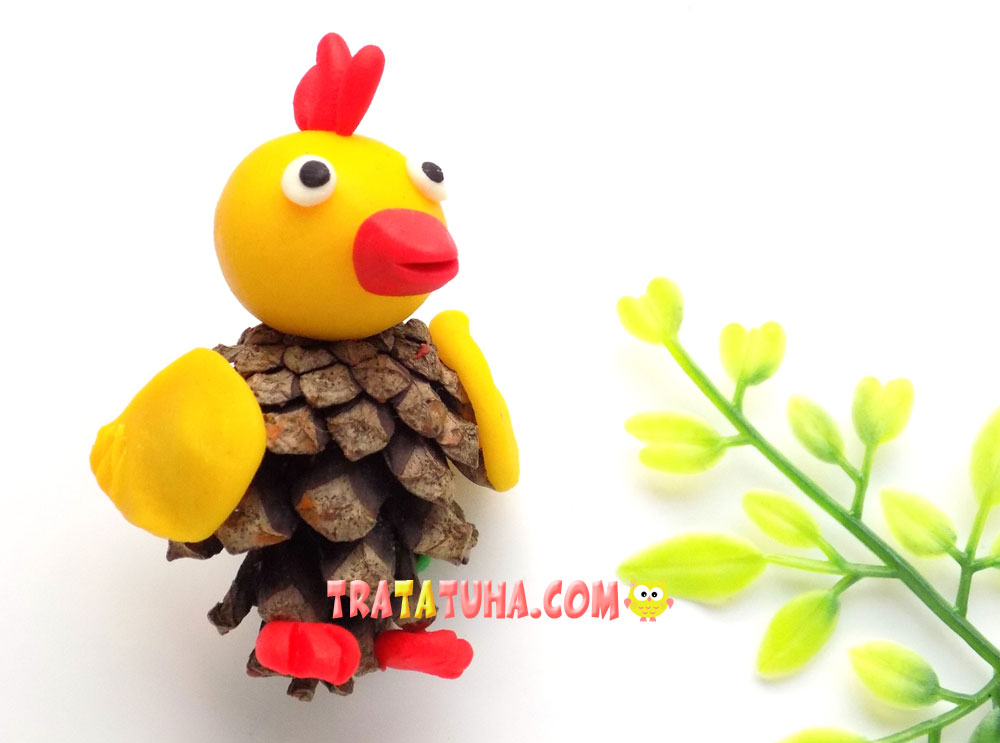
Funny and very simple clay duck for kids. All the steps for making this craft are presented in this tutorial.
To sculpt such a duck, we will prepare:
- a set of colored clay;
- plastic stack;
- a metal tool with a ball-shaped tip.
Clay Duck Step by Step
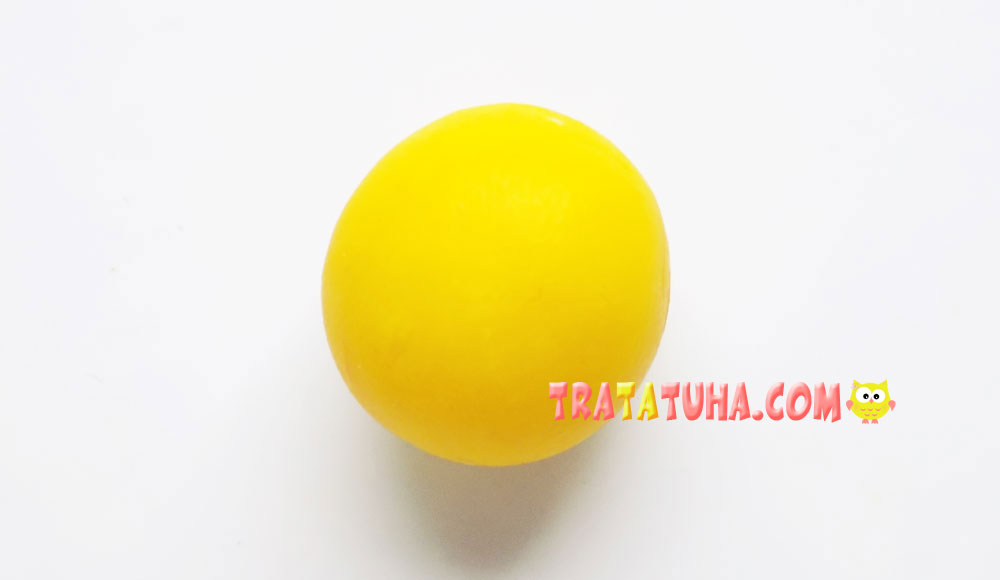
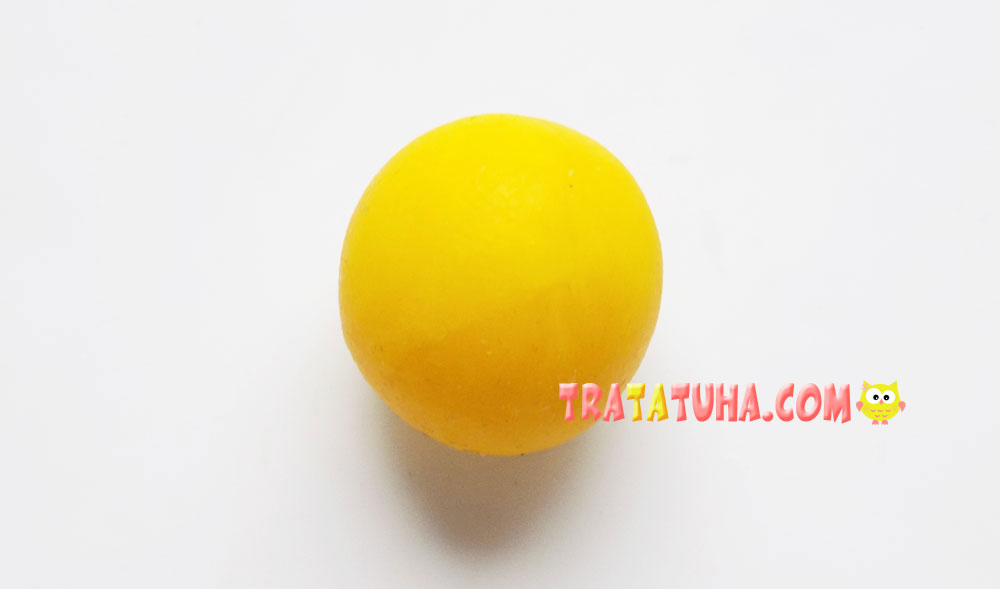
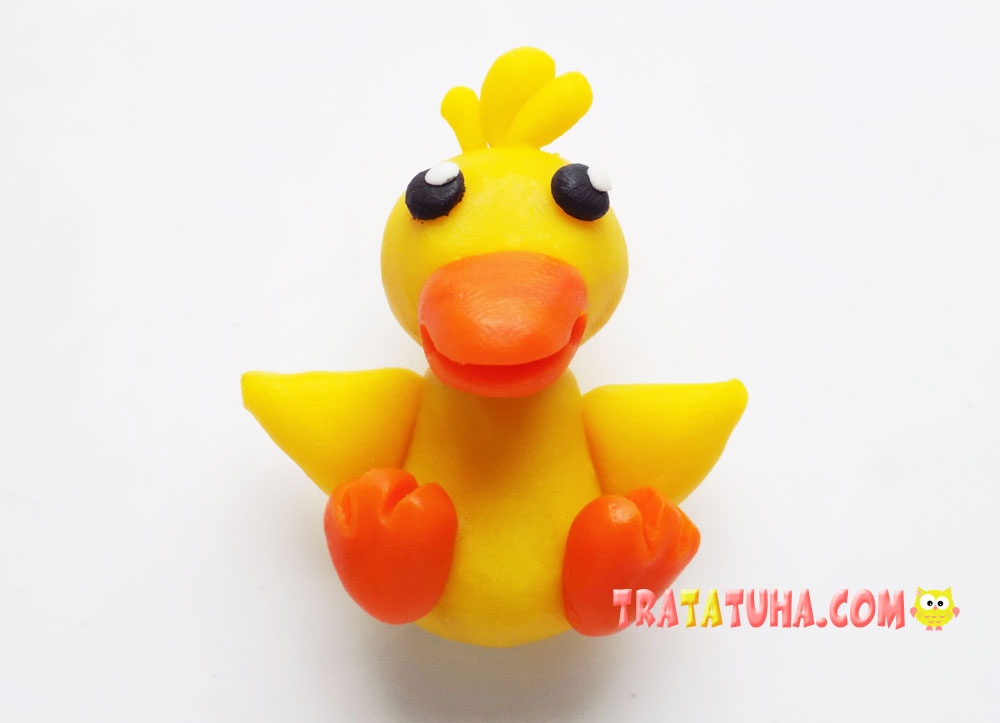
First, prepare a blank for the body of a duckling. To do this, roll a ball out of yellow clay.
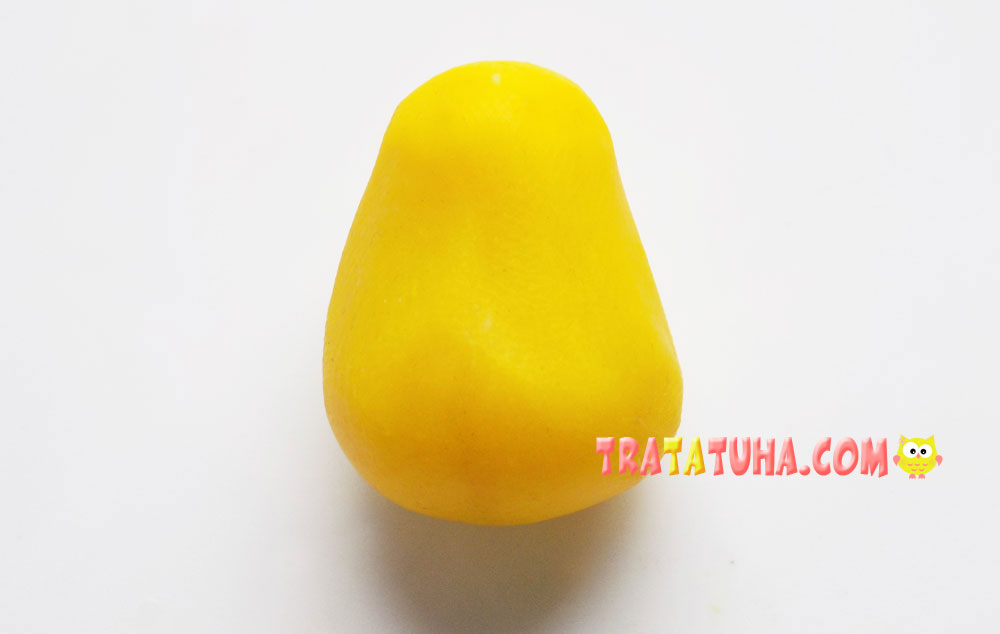
We sculpt from it the base in the shape of a cone.
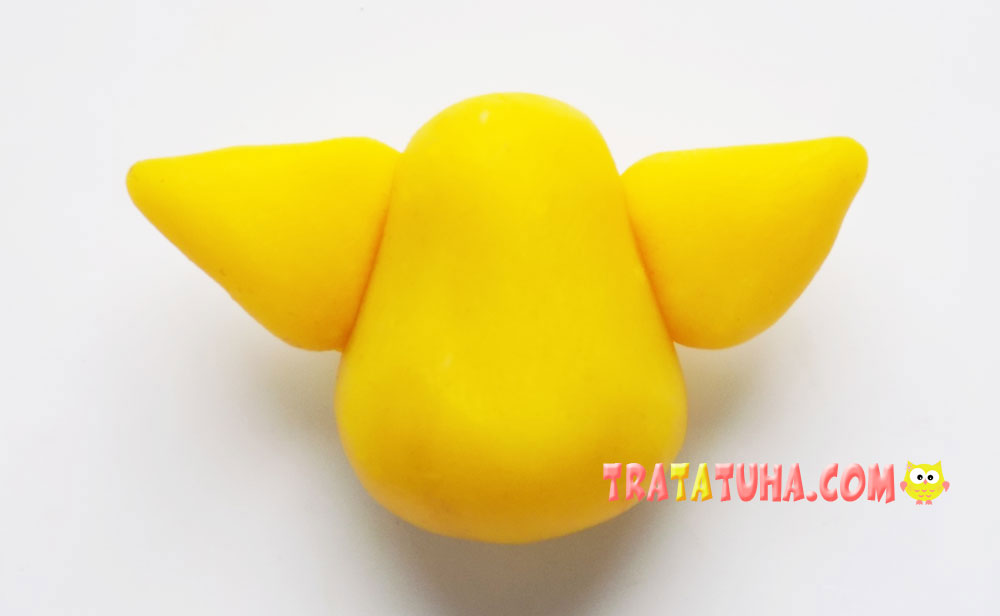
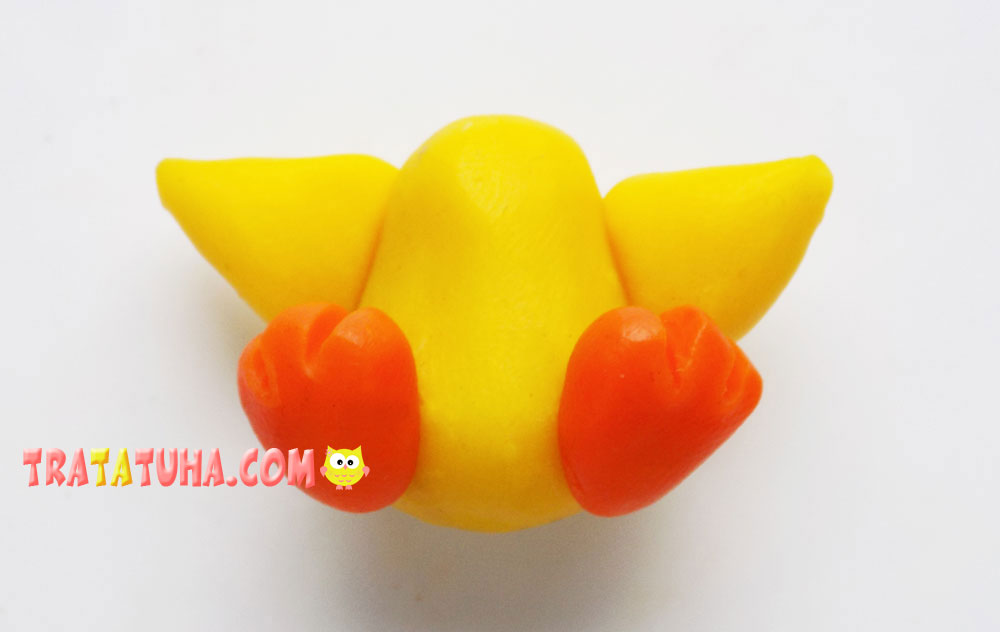
Next, roll up a couple more small balls of yellow clay. These will be blanks for duckling wings.

We form wings from the balls in the form of triangles and fix them on the sides of the body.
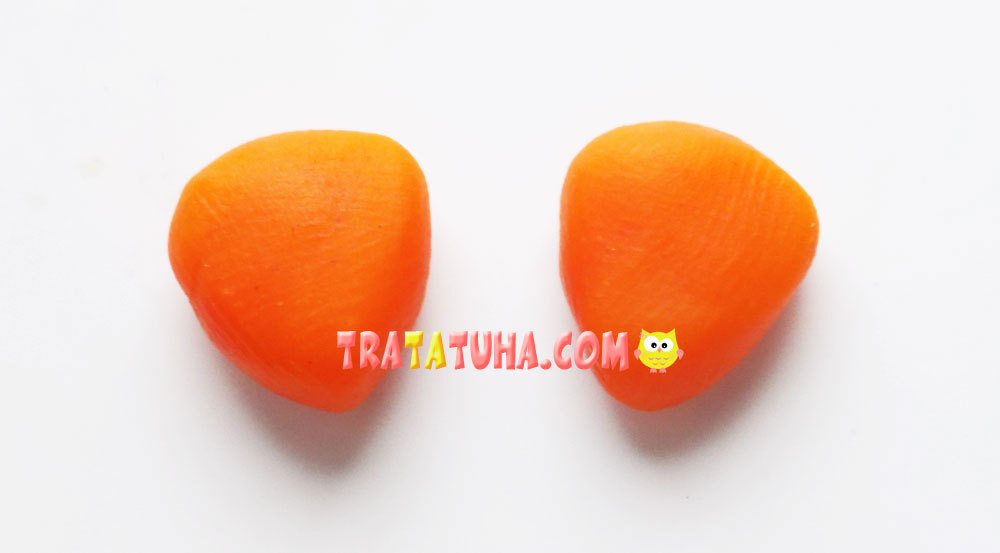
We will make the paws of the duckling from orange clay. At first it will be blanks in the form of balls.
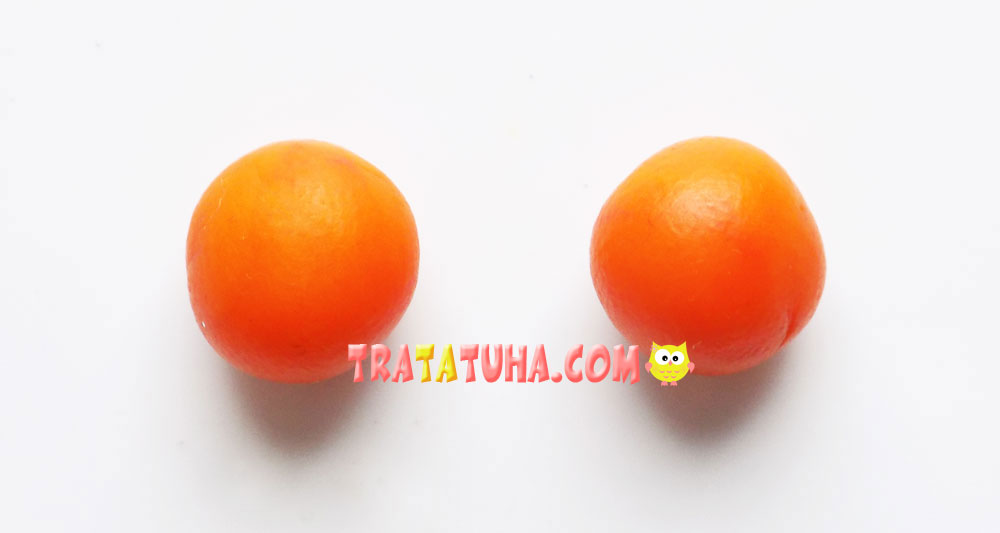
Then slightly flatten them and give the shape of triangles.
We make slots with a plastic stack, and after that we refine them with a metal tool.
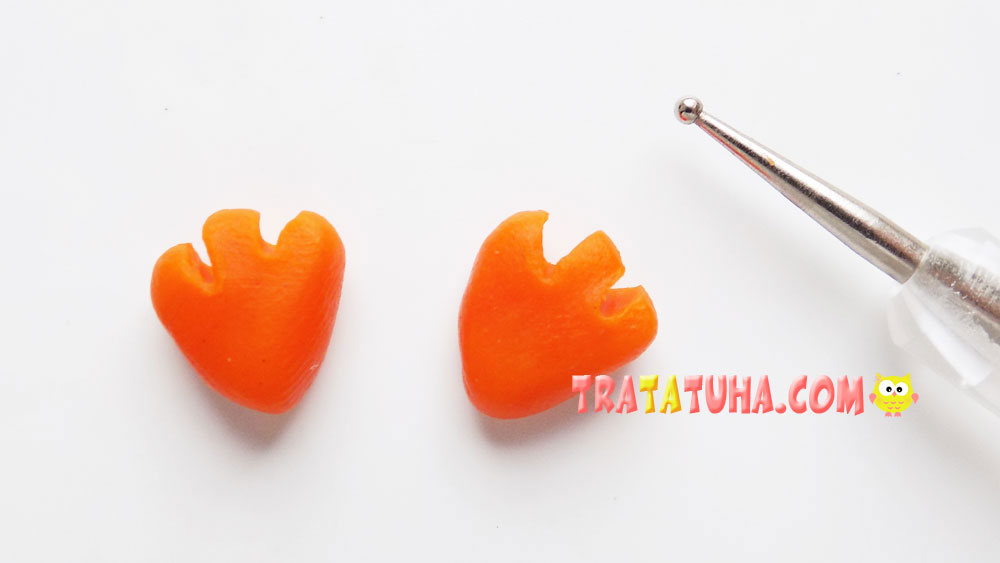
Fasten the paws at the bottom of the craft.
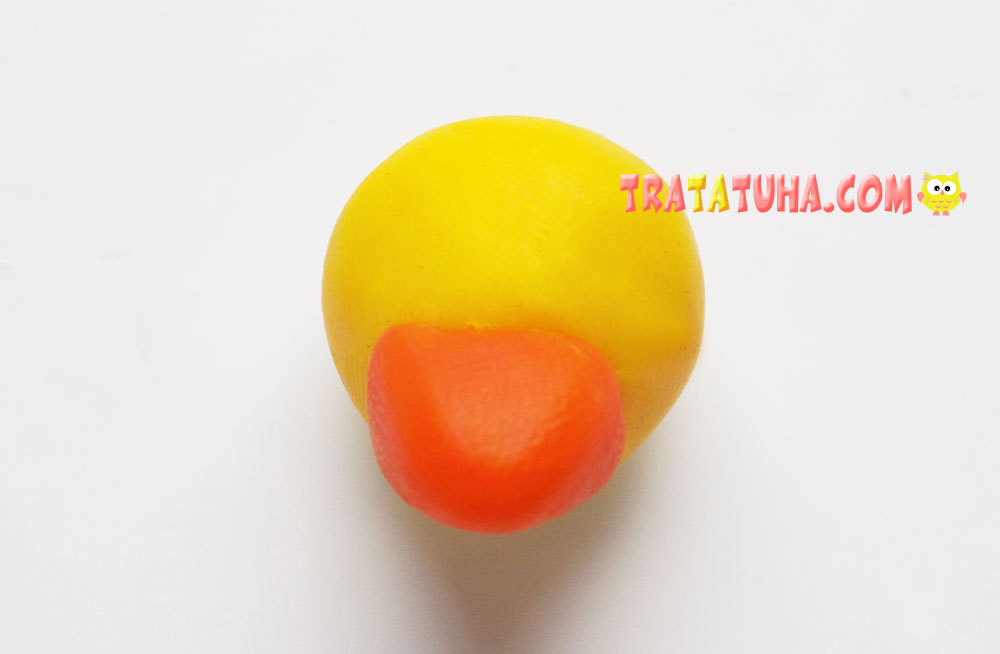
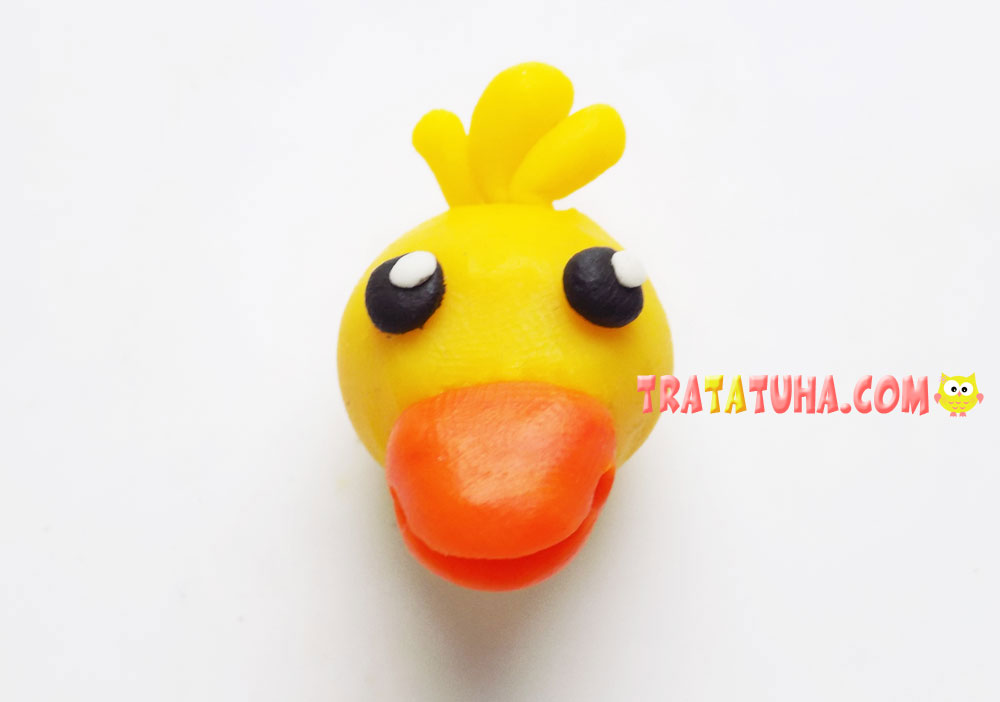
Let’s go back to the yellow clay. From it we roll another ball, it will be the basis of the duckling’s head.
Add a beak made of orange clay.
With a plastic stack on the beak, carefully make a slot.
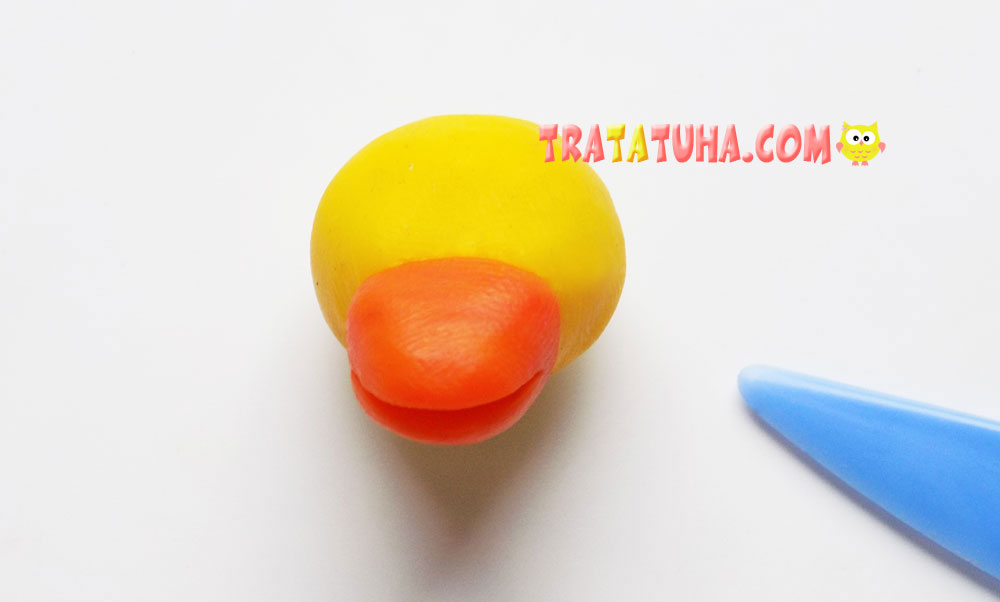
We pass along the edges with a metal tool, the tip of which has the shape of a small ball.

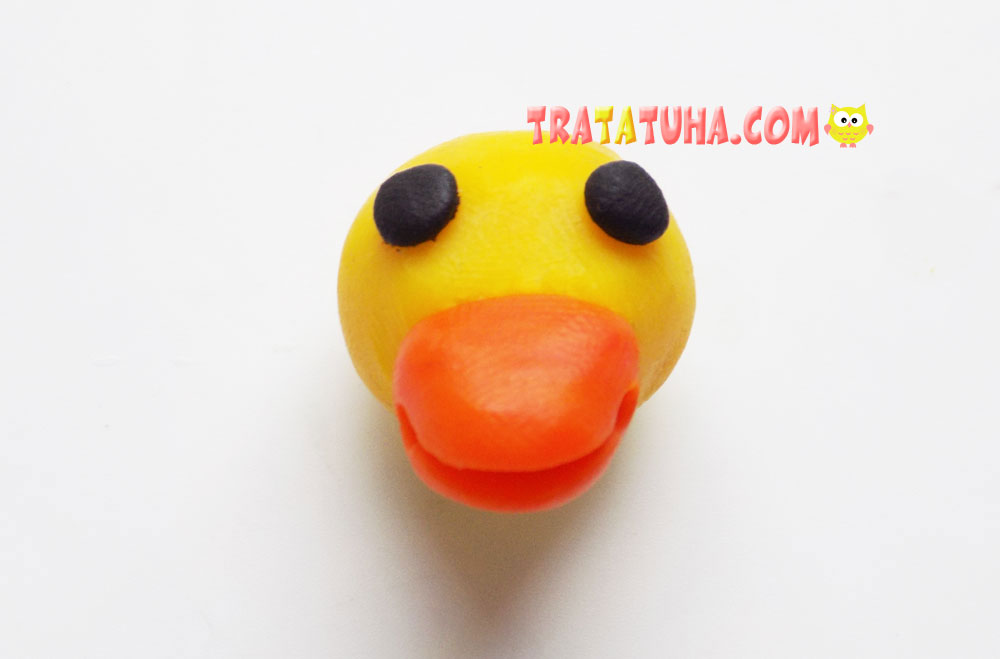
Add the base for the eyes, they will be balls of black clay.
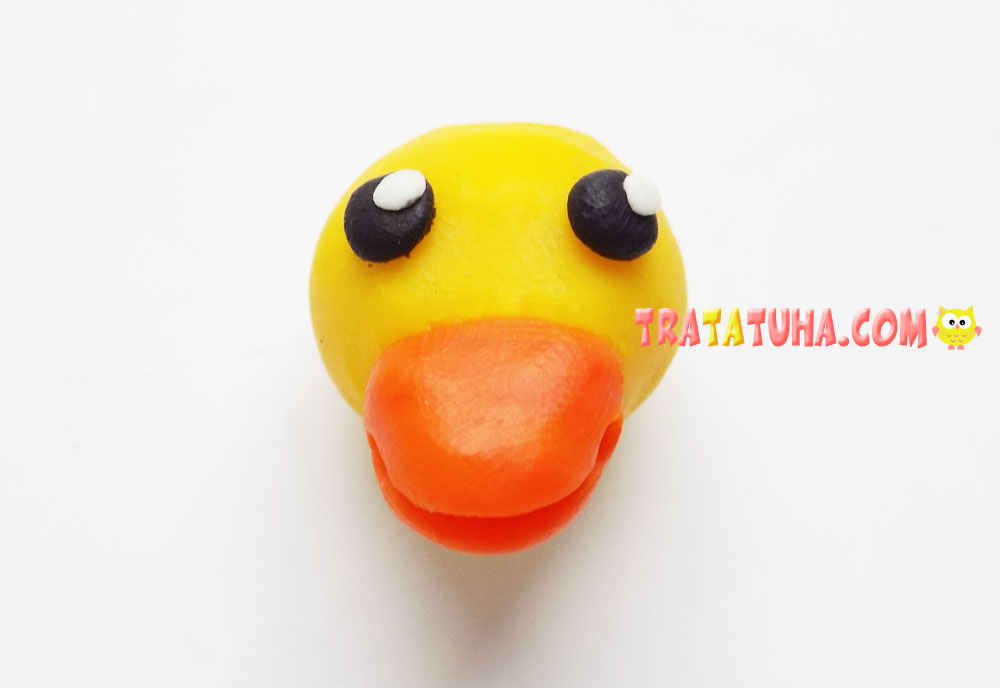
From above we attach blanks of white clay of a slightly smaller size.
We make a funny crest on the head. To do this, we roll 3 thin flagella from yellow clay and fix them.
It remains to connect the head with the body. This is how we got a clay duck.
See more ideas about Clay Crafts.
Crafts for Kids – learn how to make craft at home! Super cute crafts for all age groups!
Related Post:

Cool art work 😝👍👍