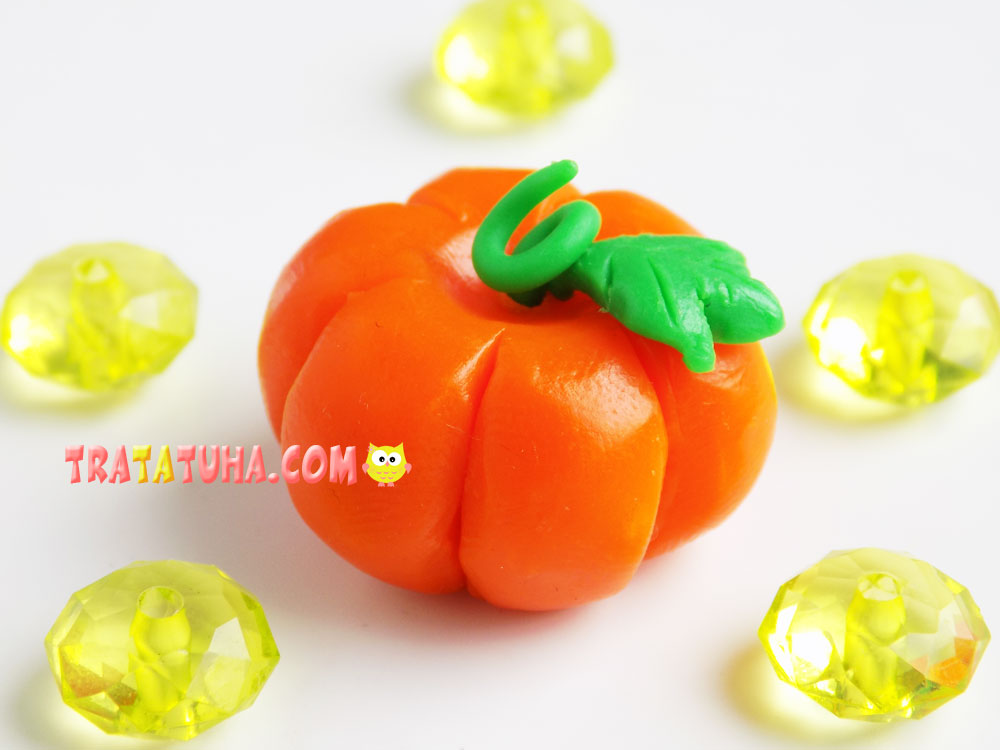
These bright vegetables can be called a tasty and healthy symbol of autumn. After all, it is at this time that pumpkins ripen. And today we have a step-by-step clay pumpkin.
To sculpt such crafts, take:
- orange and green clay;
- plastic stack.

Clay Pumpkin Step by Step
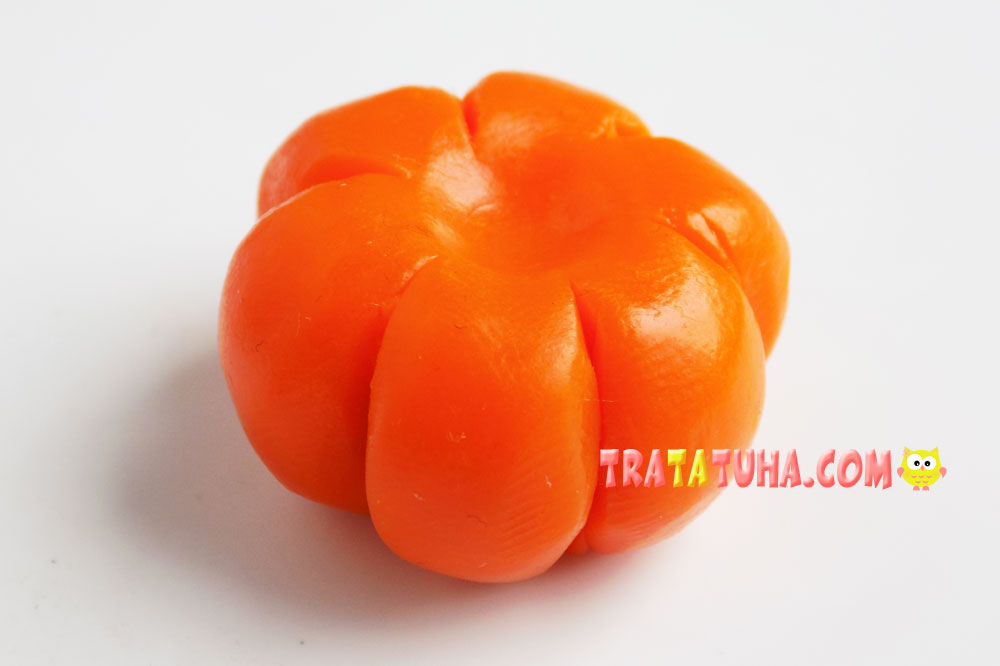
The basis for our craft will be a ball of orange clay. The kid will cope with this work if you show him how to roll the ball between the palms.

Then the resulting ball needs to be flattened a little.

In the next step, we will use a plastic stack. With the help of its rounded end, we make a small depression in the upper part of the craft.
After that, carefully cut the recesses on the sides of the workpiece.

The edges near these cuts need to be made smoother. To do this, again, you can use a plastic stack. Carefully round off the edges.
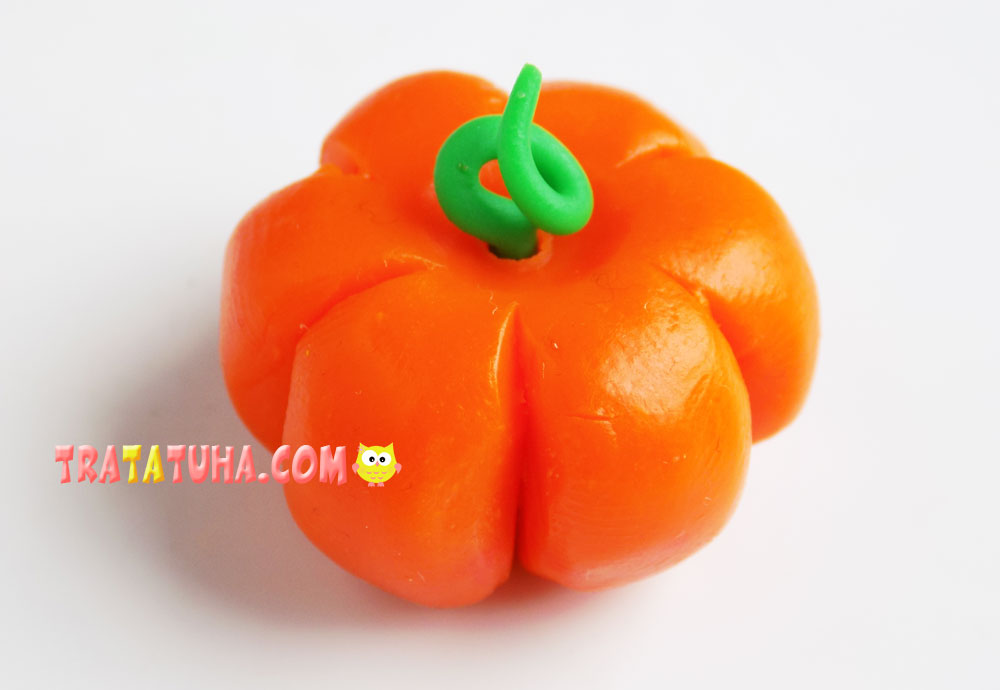
Now we need green clay. We roll a thin flagellum from it, twist it into a spiral and fix it on a pumpkin. For a better connection, you can first make a recess with a toothpick in an orange blank.
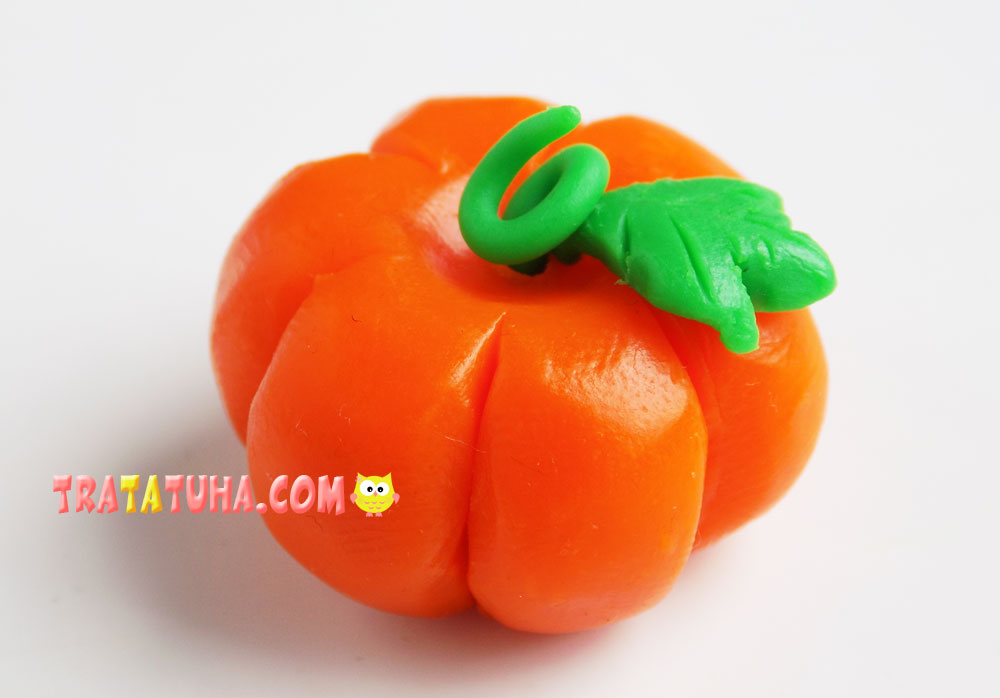
It remains to blind the leaf. Again we take green clay and sculpt a small leaf out of it, after which we decorate it with a stack. This is how we got a pumpkin made of clay. And if you add scary black eyes and a sinister smile to the vegetable, the pumpkin will be a good option for Halloween crafts.
See more ideas about Clay Crafts.
Crafts for Kids – learn how to make craft at home! Super cute crafts for all age groups!
Related Post: