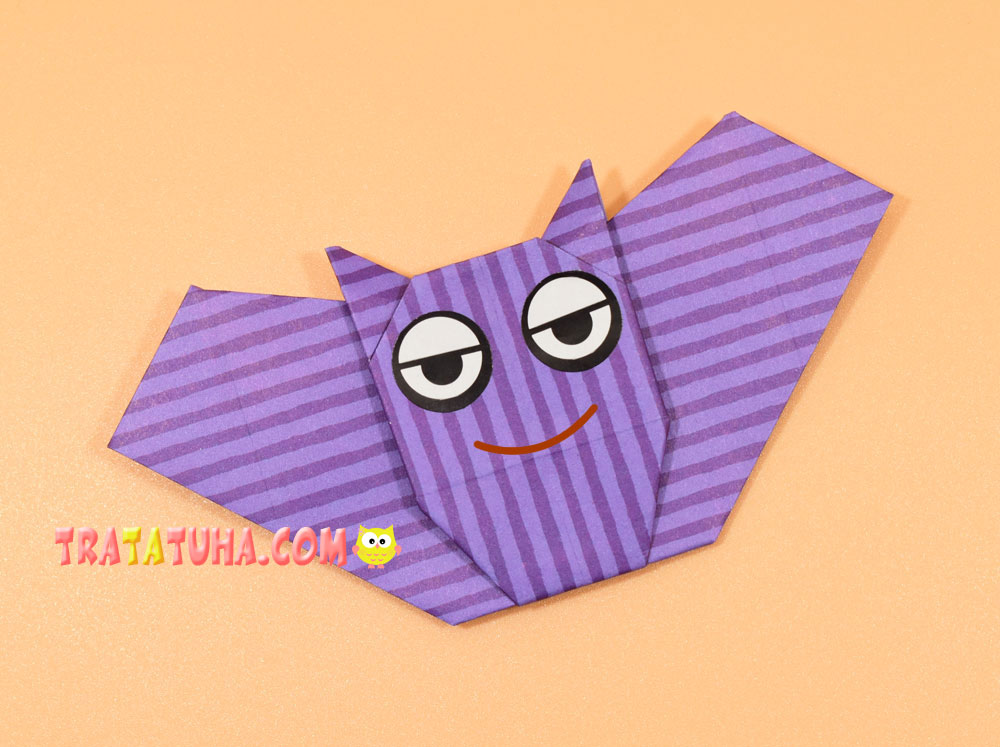
Easy origami bat for beginners and kids. A very simple way, including only 8 steps.
For those who are not looking for easy ways, the medium level of complexity option, which is presented in a step-by-step review, is an origami bat.
Materials:
- Black paper;
- White paper;
- Black felt-tip pen, glue.
Easy Origami Bat Step by Step
Prepare a piece of black square paper. Size at your own discretion, 13:13 cm paper was used in this review.
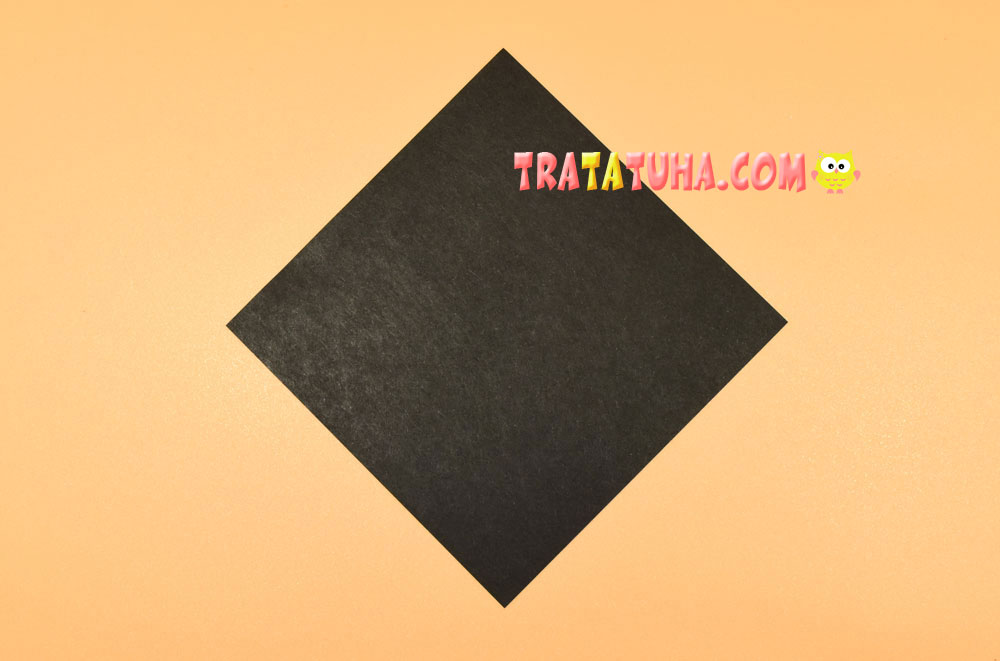
On the area of paper, you need to make two folds that intersect in the center.
To do this, fold the paper into a triangle, from corner to corner.

Then straighten the paper and fold it again, but now connect the two remaining opposite corners. The folds are ready.

Bring back the triangle shape.
Bend the top corner down so that the tip of the corner protrudes slightly beyond the edge of the bottom of the triangle.

Lower the right side down, starting from the middle of the paper.
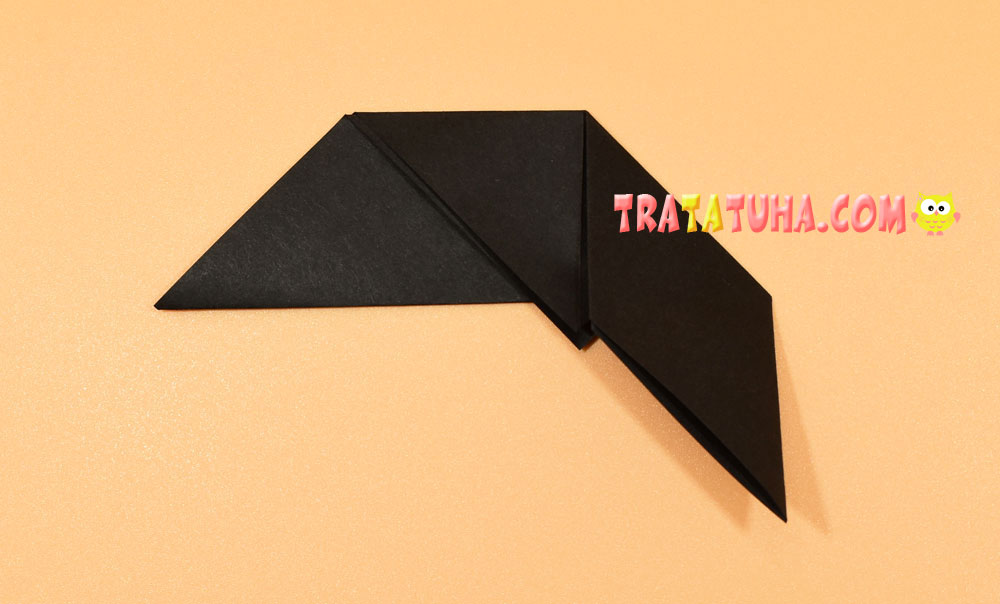
Fold the left one down as well.
Now fold the right side up, making a small crease.

On the left, repeat the same steps. Try to install the resulting wings symmetrically.

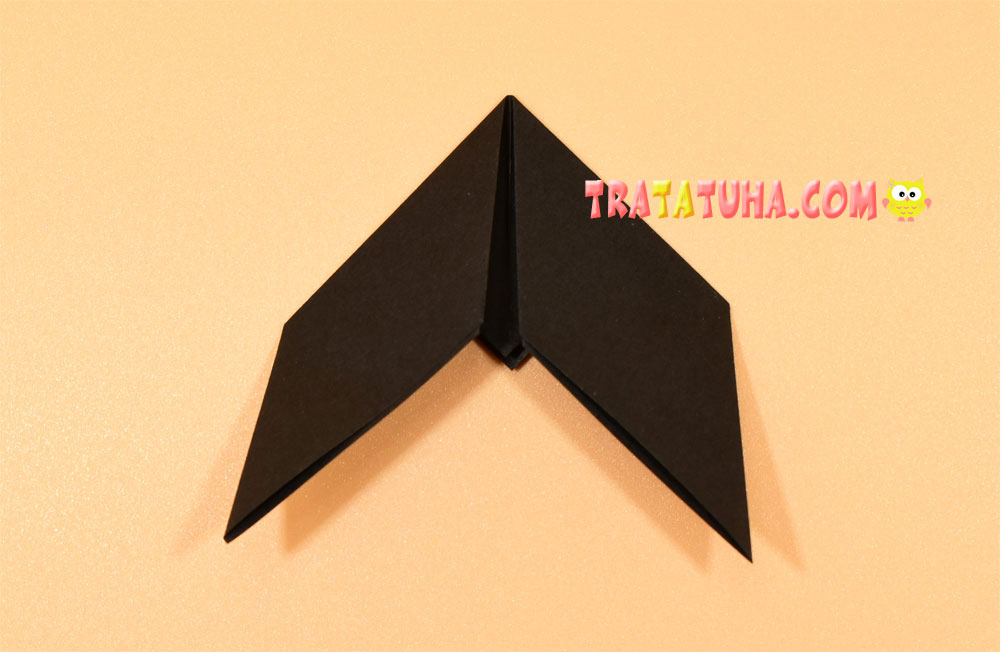
Flip over to the other side.

Bend the corner in the middle down, forming a head. Press firmly as the paper is thicker in this area. You can even fold it in half and press it.

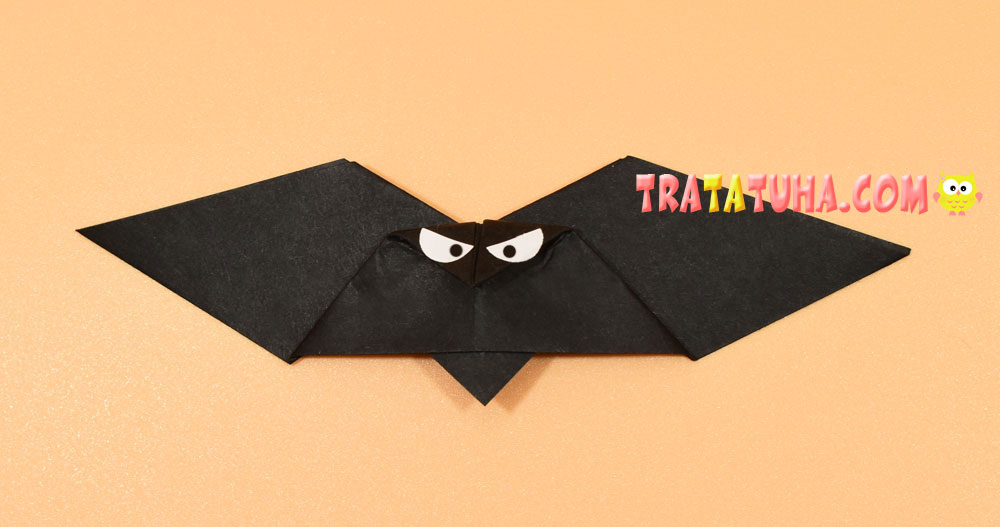
Cut out a small circle from white paper, cut it in half and glue the halves as eyes. Draw the pupils with a felt-tip pen.
All work completed. This origami bat is light, all actions are as simple and clear as possible.
Even more ideas in the review — Halloween crafts.
Related Post: