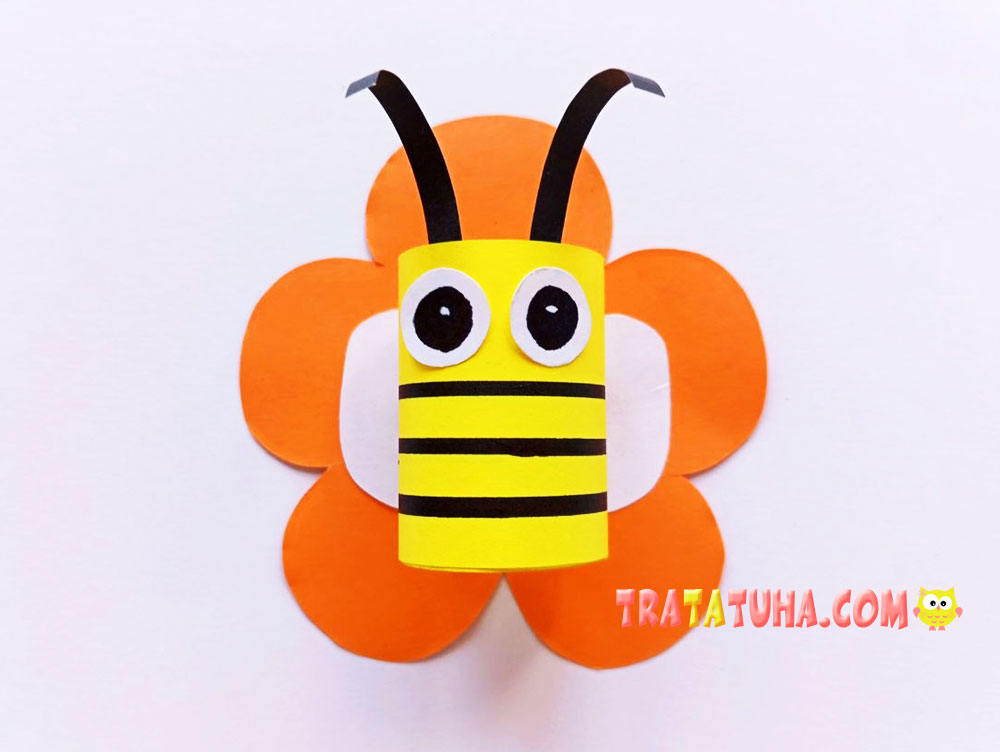
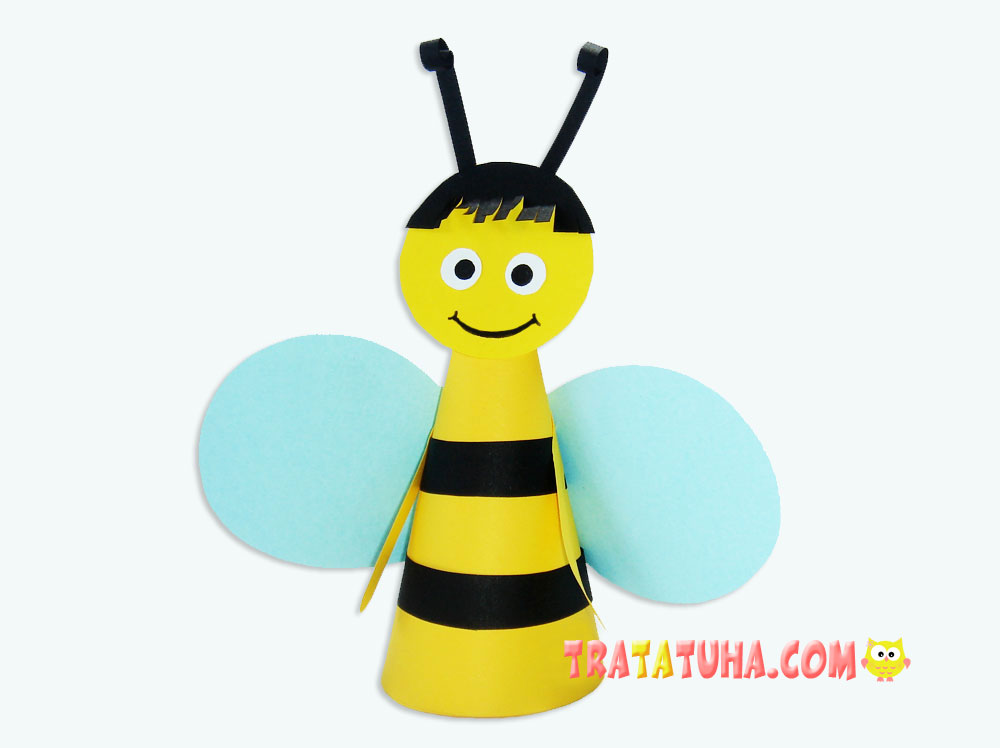
A bright and funny paper bee is a very simple craft made from a cone and small details in the form of wings, a head and antennae. This is a great spring craft that kids will love.
Materials used:
- Yellow cardboard (you can take paper for the body);
- Black paper;
- Double-sided paper in blue for the wings (white is also suitable);
- Compasses, scissors, black felt-tip pen, glue stick.
Paper bee step by step
We Make a Body
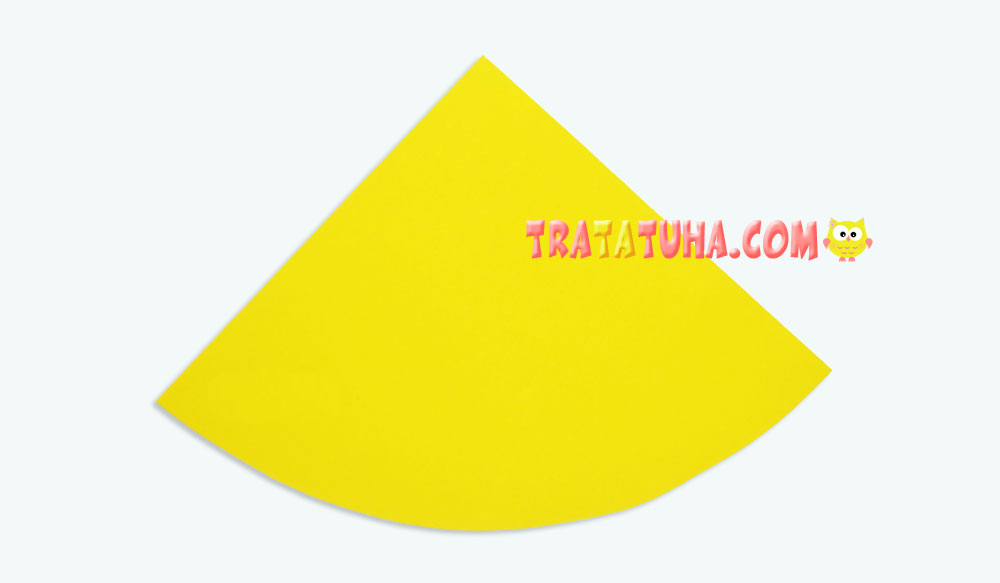
The bee’s body is a paper cone. To make it, draw a circle with a compass, divide it into 4 parts and take one of the parts. As an economical option, so as not to cut out a whole circle, if only one child makes the craft, you can simply circle any corner of colored paper with a compass.
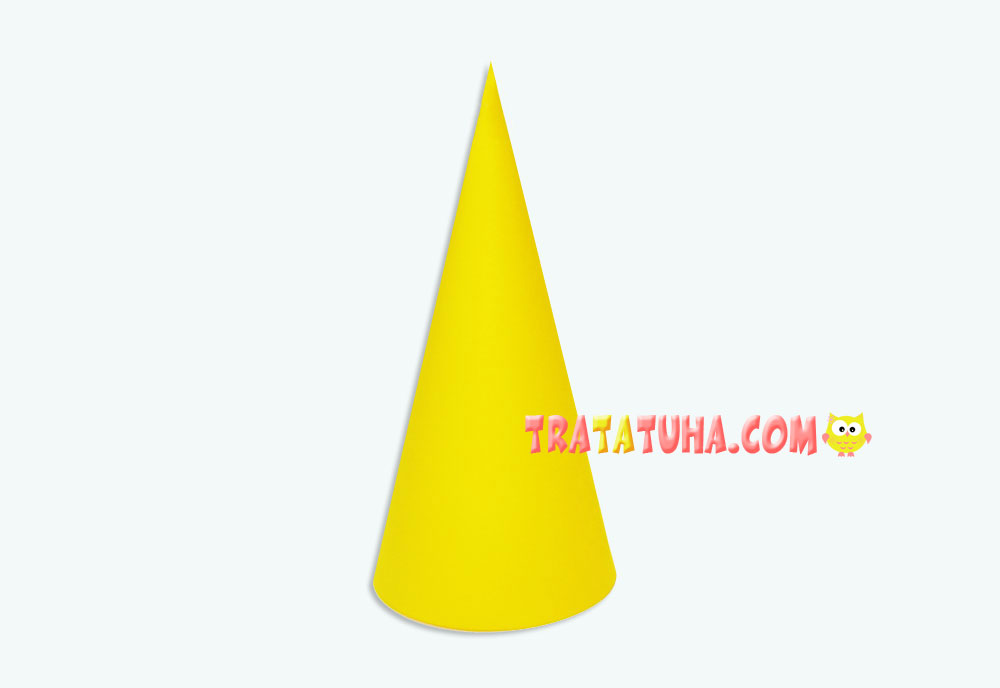
Wrap the segment and make a cone out of it, fix the edge with glue.
Complementing the Bee Details
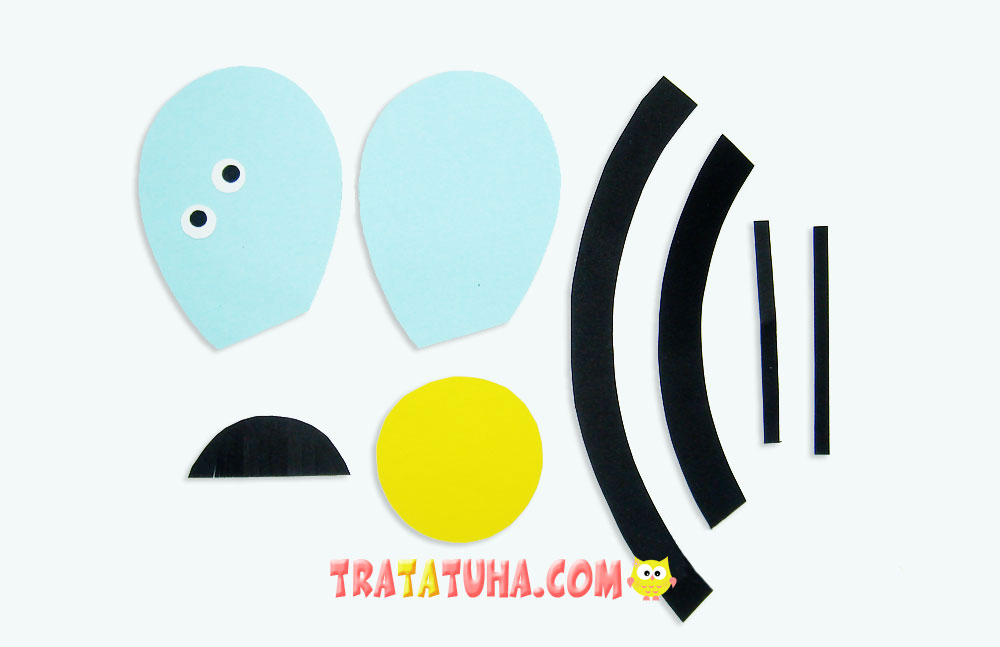
Prepare the following paper parts for the bee. Although there are many, they are very simple.
- From blue or white paper, cut out semicircular or even round wings;
- You will also need the head of a bee, which must be cut out of yellow cardboard. This is a simple circle of suitable size for a cone;
- The bee is defined by black stripes on its body, cut out two semicircular stripes. It is possible and straight, but they may not fit well to the cone;
- The bee also needs antennae, so cut off two thin black strips;
- Make eyes out of white paper. Draw the pupils with a felt-tip pen;
- Optional details – paws and bangs.
Final Stage of Creating a Paper Bee
Glue two black stripes to the cone, a head with pre-glued eyes, bangs, mustaches and a painted smile. Finish the craft with wings glued to the back of the cone body and paws.
Many other Insects Crafts for kids.
Crafts for Kids – learn how to make craft at home! Super cute crafts for all age groups!
Related Post: