It is very easy to craft Christmas houses from paper using the templates. Thanks to a vibrant coloration and themed decor, such houses look bright and positive and can create the right mood before the Christmas holidays.
Your children will be delighted with both the process and the result of their work.
Necessary materials:
- Colored cardboard;
- A glue stick;
- Scissors;
- Graphite pencil;
- Figure hole-punch;
- Any Christmas decor (beads, paillettes, stickers)
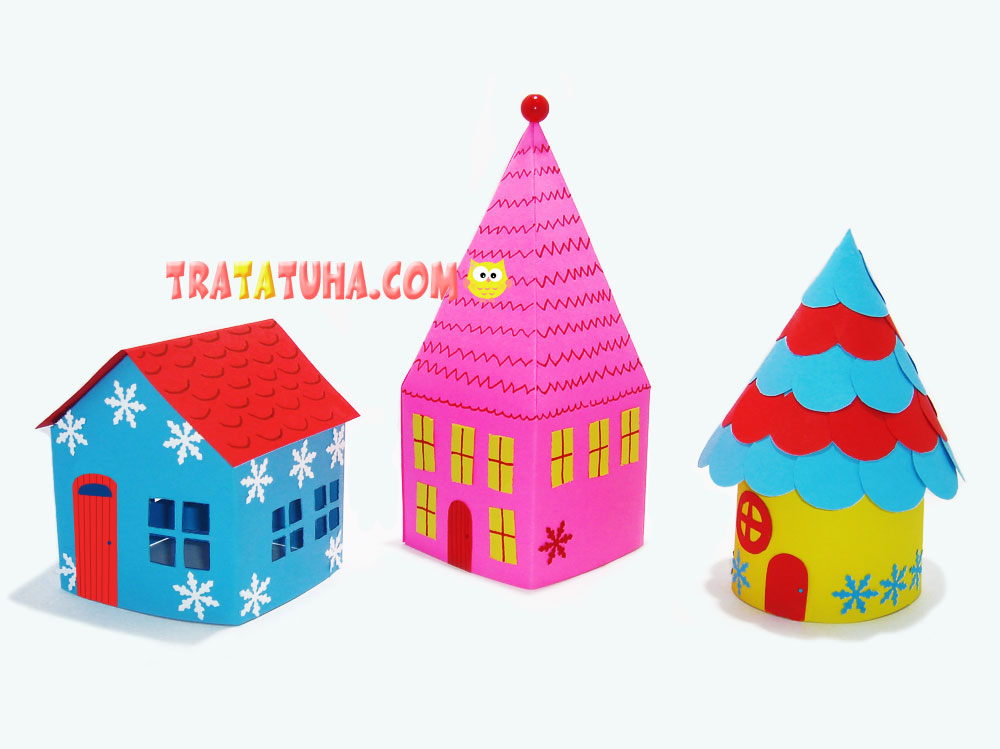
Amazing do-it-yourself Christmas houses made from paper
1. Winter paper house
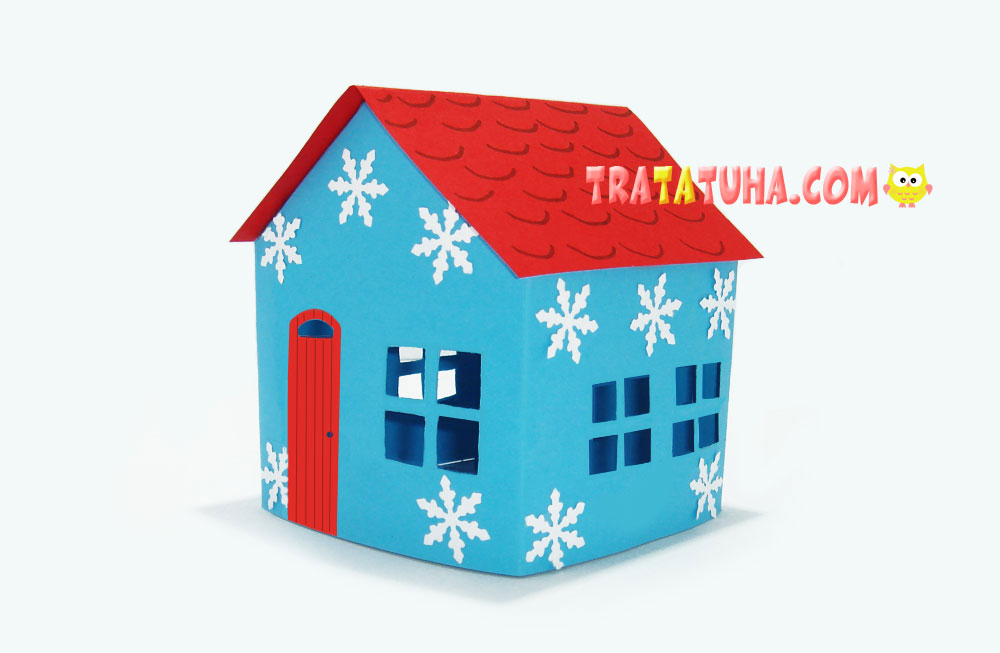
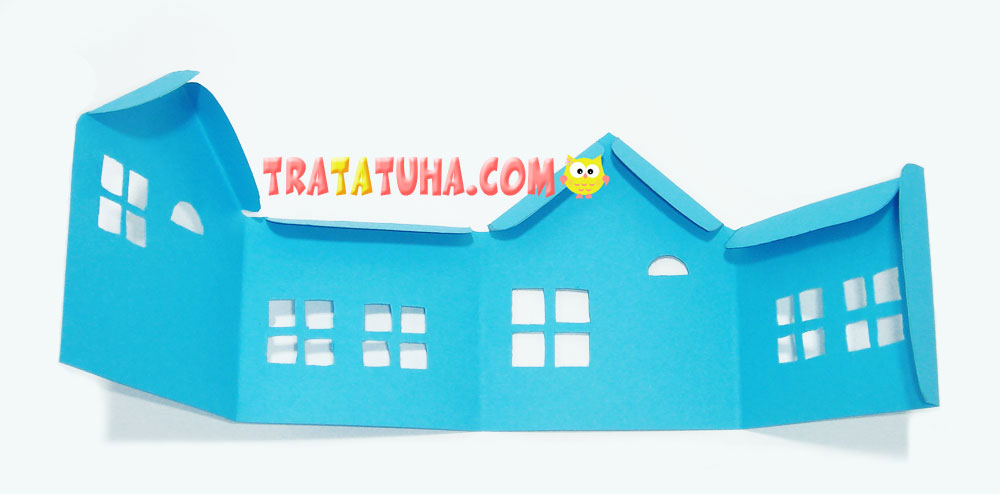
It is an easy-to-make classic house which, nevertheless, looks pretty lovely. Use the provided template to craft such a house. In the photo below, you can see the template of the house itself and its roof.
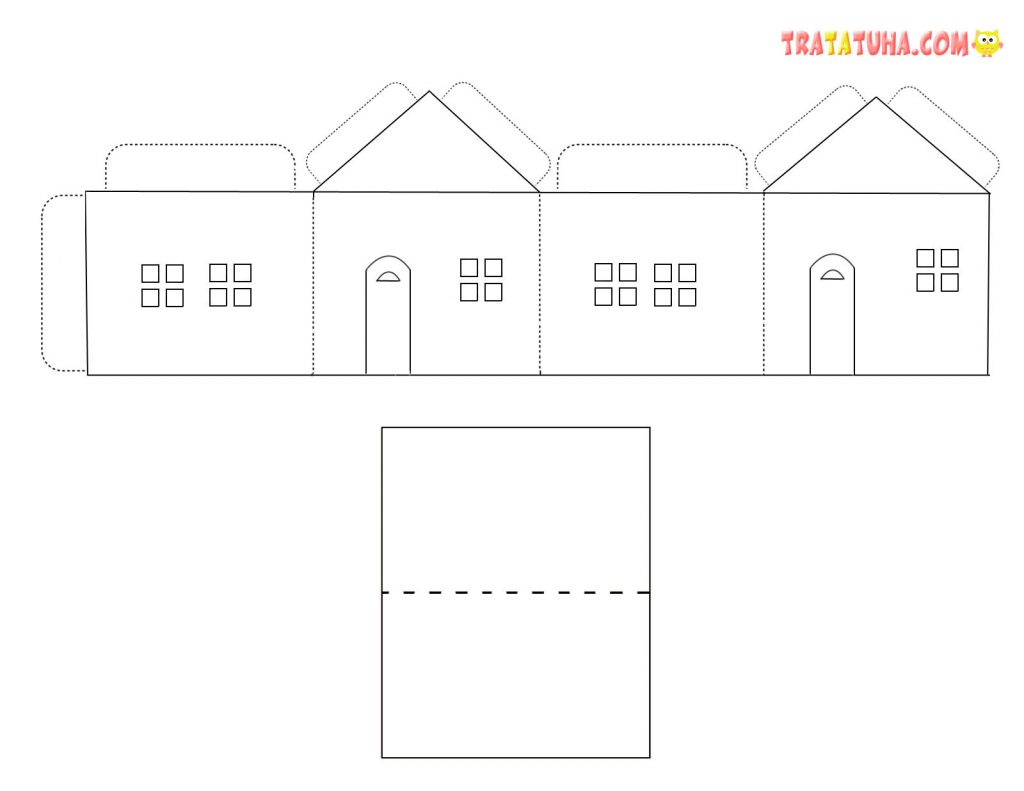
Print up this template and scissor out the workpiece from colored cardboard. Make accurately window cutouts. This step is, perhaps, the most difficult, especially if the house is of a small size. Tiny windows are better to be cut with cuticle scissors.

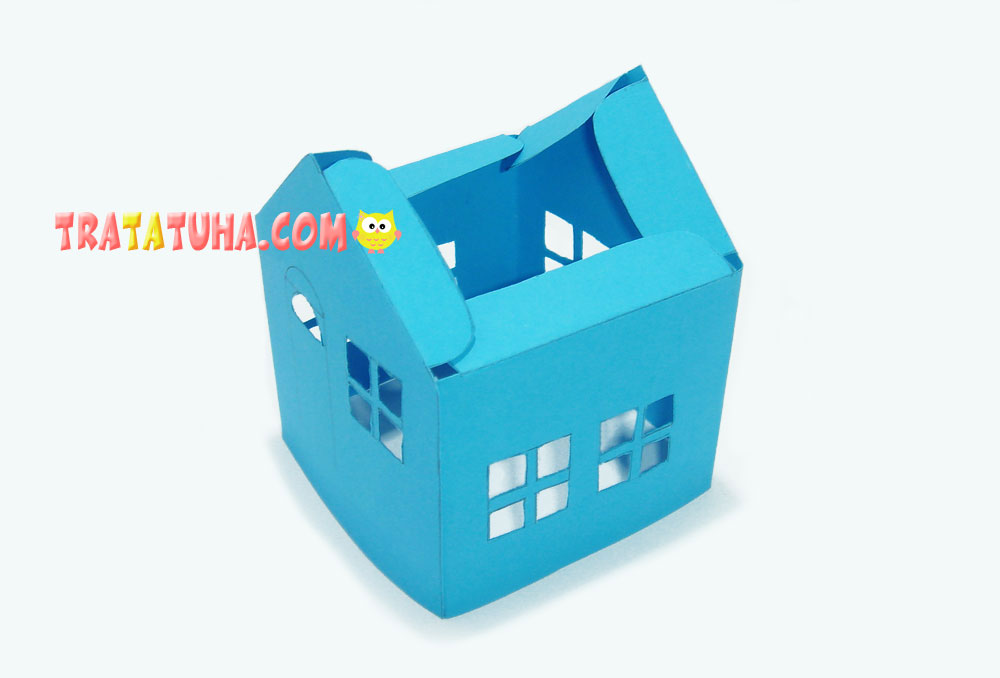
Make the necessary folds: from the side to glue the house and from the top where the roof will be attached. You will also need to make cross folds after each square part of the house.
Apply some glue on the sidepiece and glue the house.
Scissor out a rectangle from colored cardboard and fold it double – it will be a roof.
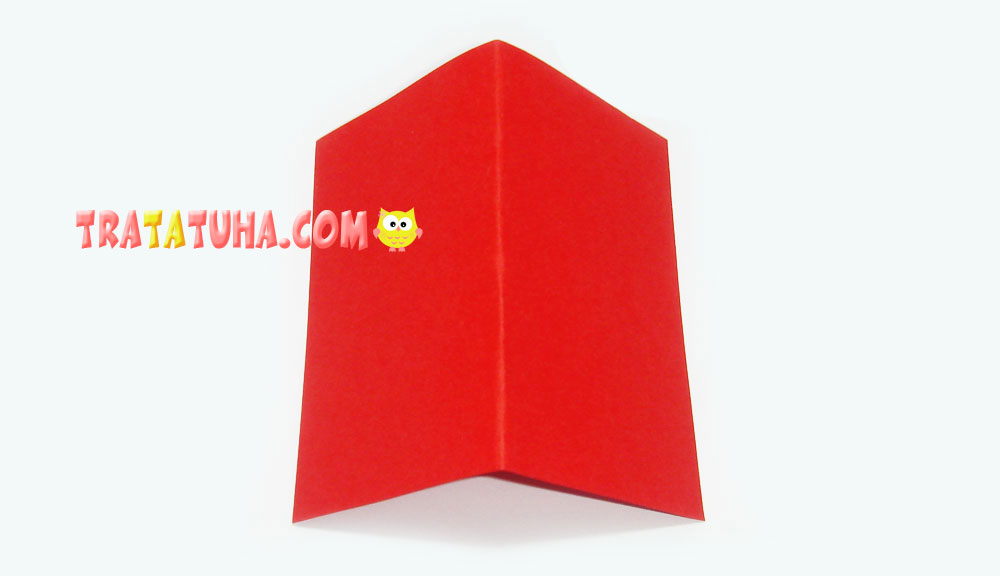
Glue the roof in the area designated for this at the top of the house.
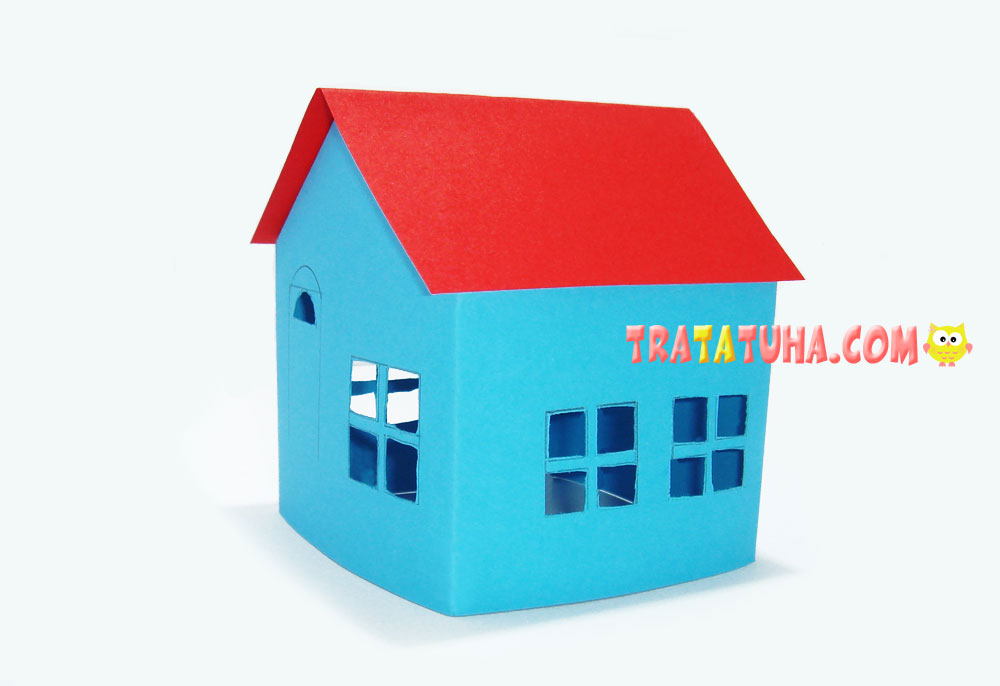
The winter paper house is almost ready, the only thing left is to cut the doors out of cardboard, draw tiles on the roof and paste on any Christmas decor. I like snowflakes because they look interesting and suitable. I made them using a figured hole-punch. If you have a bigger house, you can cut all kinds of beautiful snowflakes whose templates are abundantly provided on the internet.
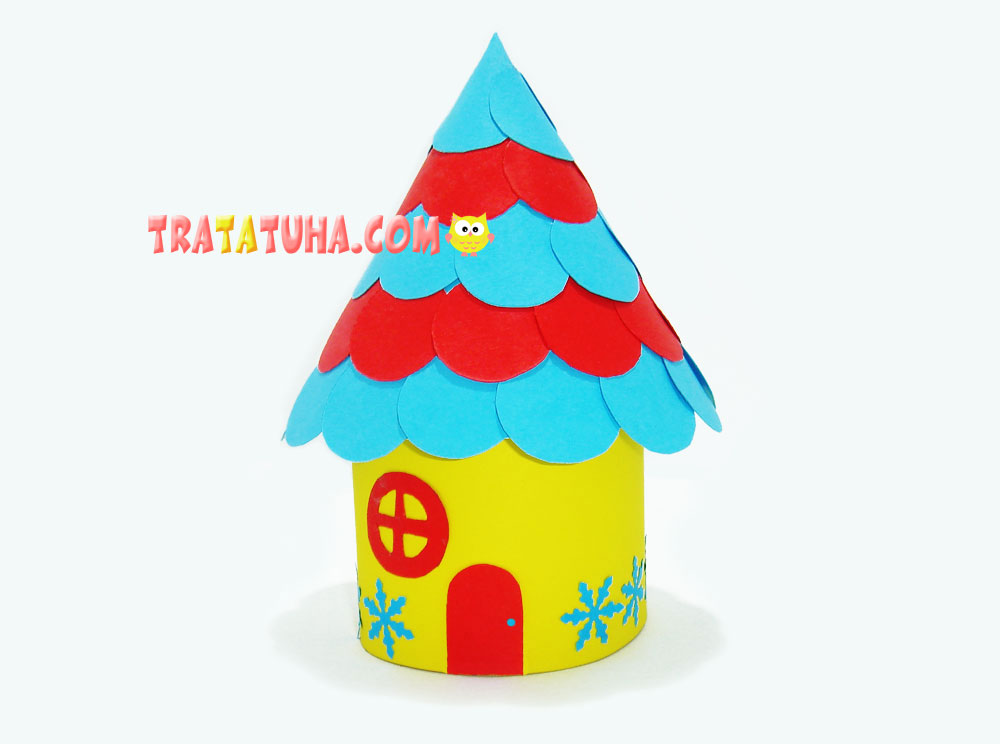
2. Christmas paper house
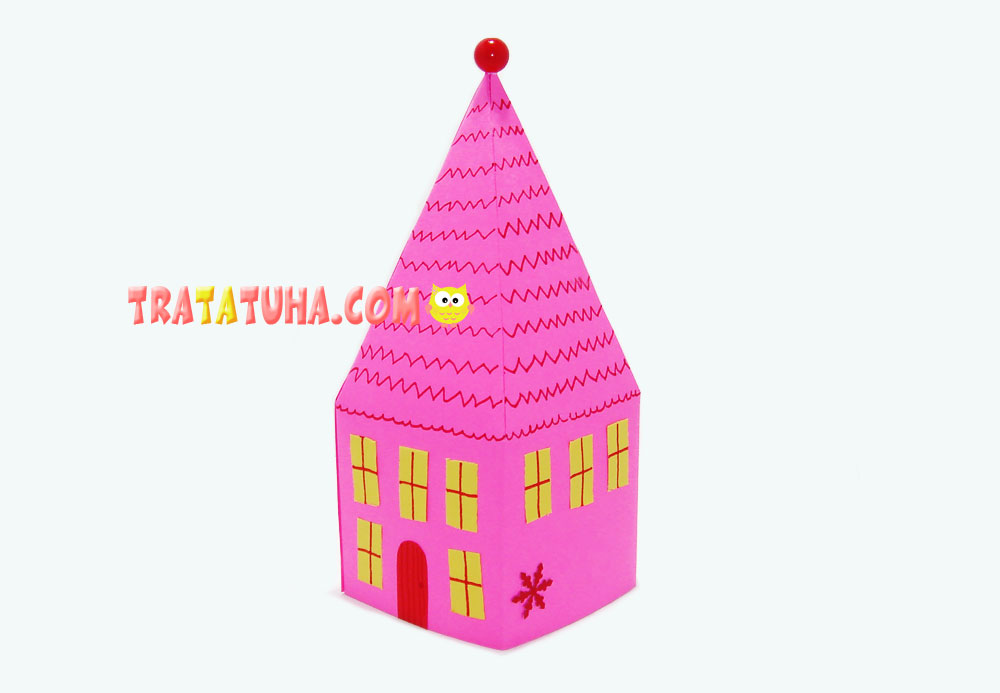
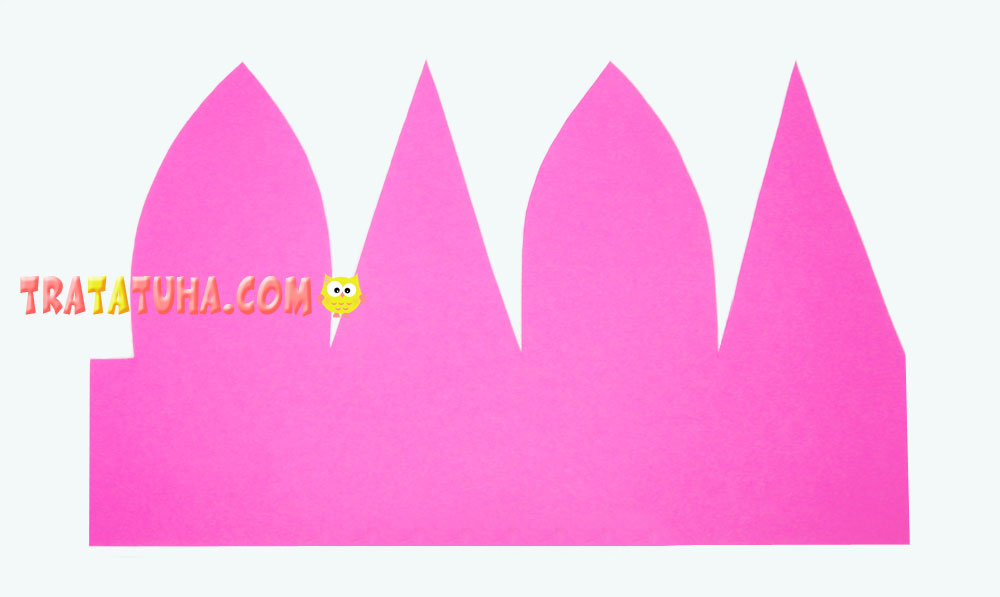
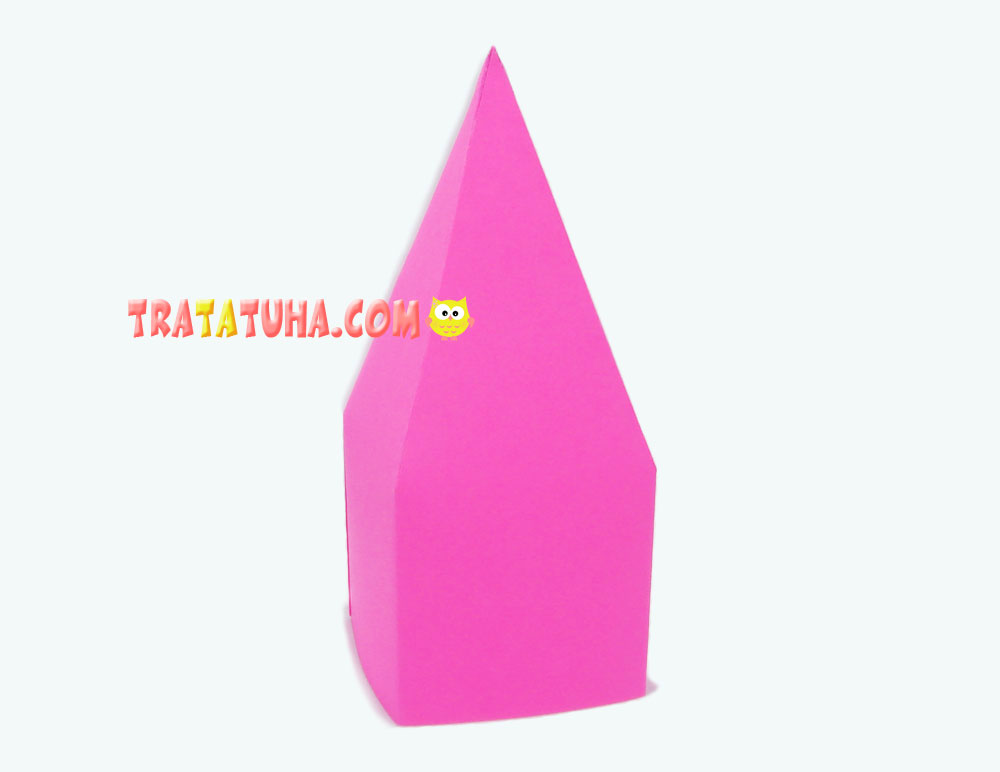
Despite a seeming complexity of the roof, this variant of a paper Christmas house is the simplest. The house is also very easy and quick to craft. Print the house template and scissor out the workpiece from colored cardboard.
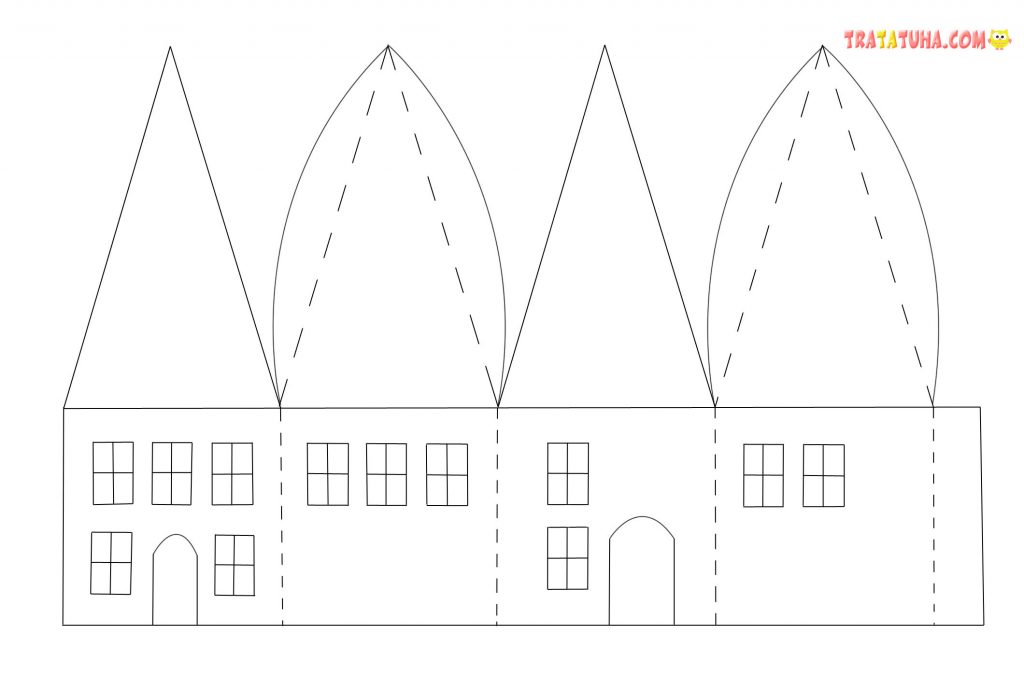
The fold lines are marked as dotted lines on the template photo.
Bend them to one side. That is, you need to make folds after each square, at the side, and in the roof area. On the roof, you need to make bends thoroughly and accurately to get even triangles when bending. For this, you can use a ruler, a protractor or a plastic card.
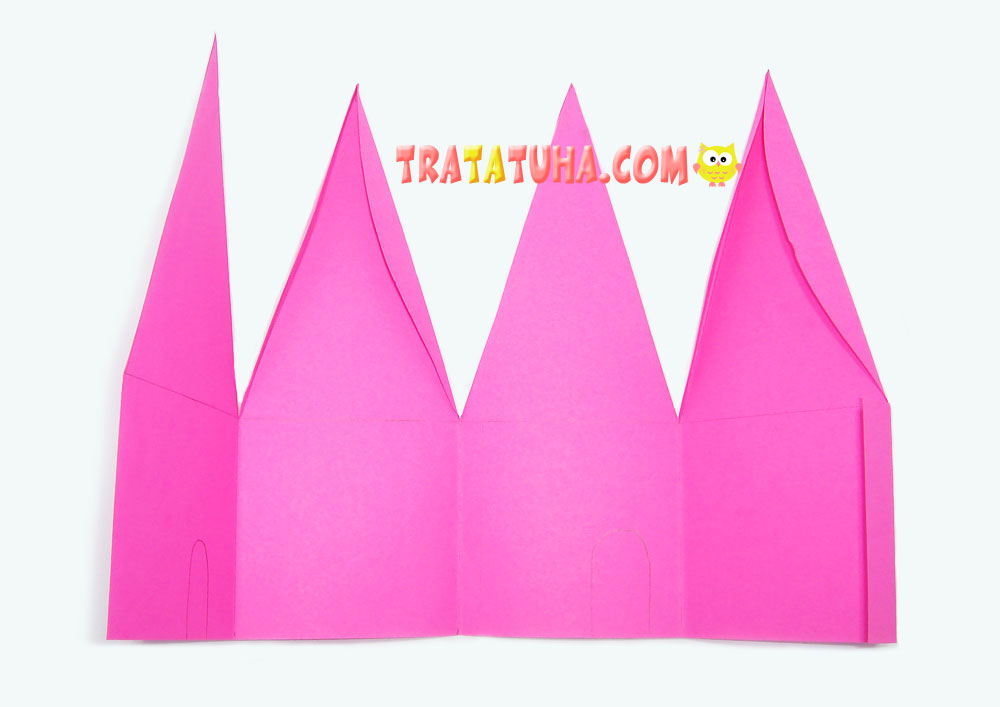
Glue the side part of the house.

Then, glue a long pointed roof.
The remaining steps are very easy because you do not have to cut the windows out. Scissor out rectangles out of yellow-colored paper, draw crossed lines on them and glue the resulting windows. Scissor out the doors and paint the roof. Embellish the little house with any decor – snowflakes, beads or paillettes.
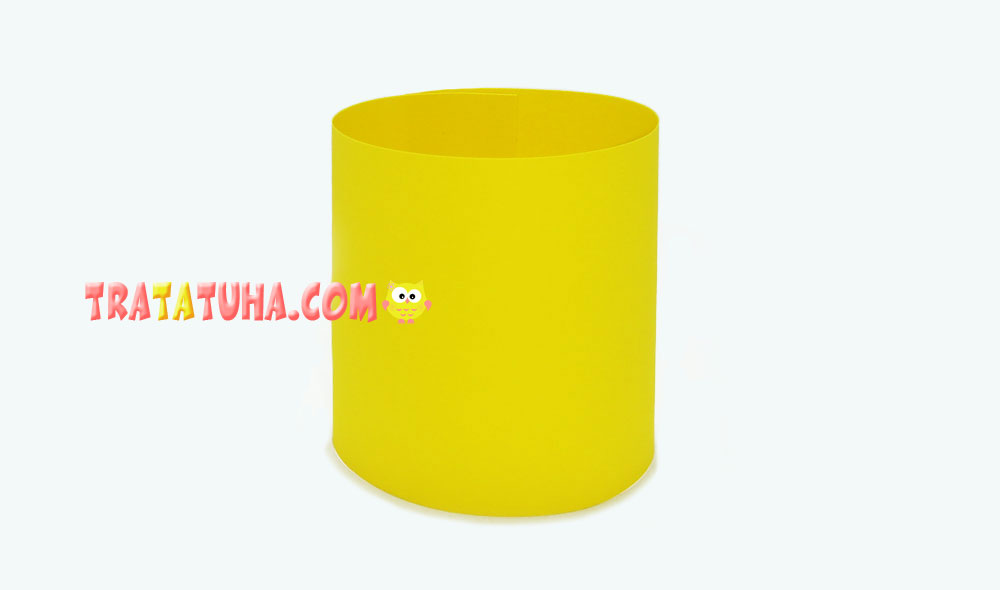
3. Little fairy-tale paper house
You even do not need a template for this house – so easy it is to do! Cut a stripe of colored cardboard and glue its ends to make a tube. The width and height play no meaningful role, so it is up to you to decide the house’s dimensions.
Cut a circle of colored cardboard so that it is 2-3 cm wider than the tube’s circumference; then cut it in half.

Shape the workpiece into a cone and glue it – this will be the roof of the house.

Now, the roof needs tiling. You will need circles made of colored cardboard. The size of circles is not critical, but you should remember that working with smaller circles will slightly prolong the process.

Glue circles on the roof starting from the bottom.
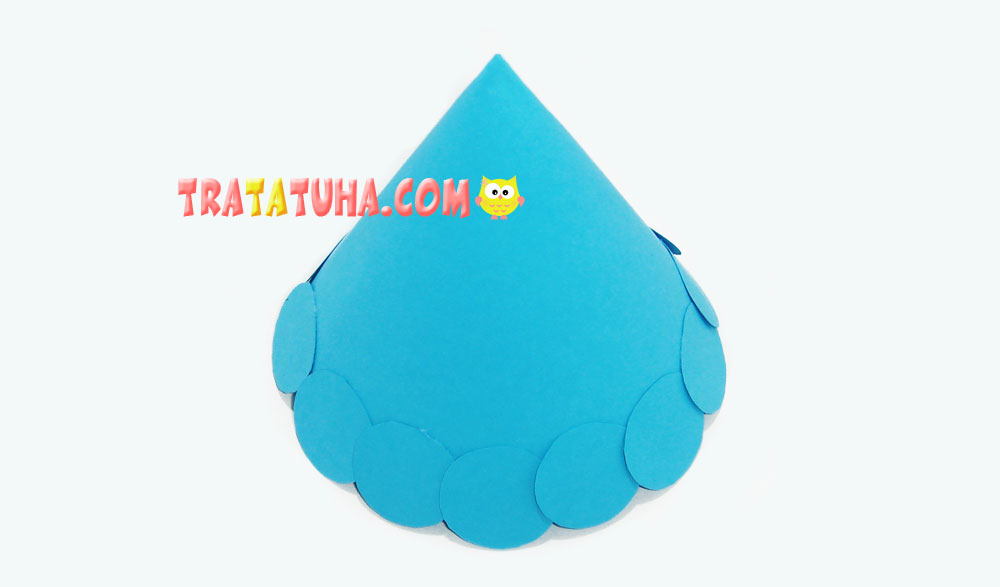
The roof can be monochrome, striped (as mine) or even motley if to alternate the circles’ colors in each layer.
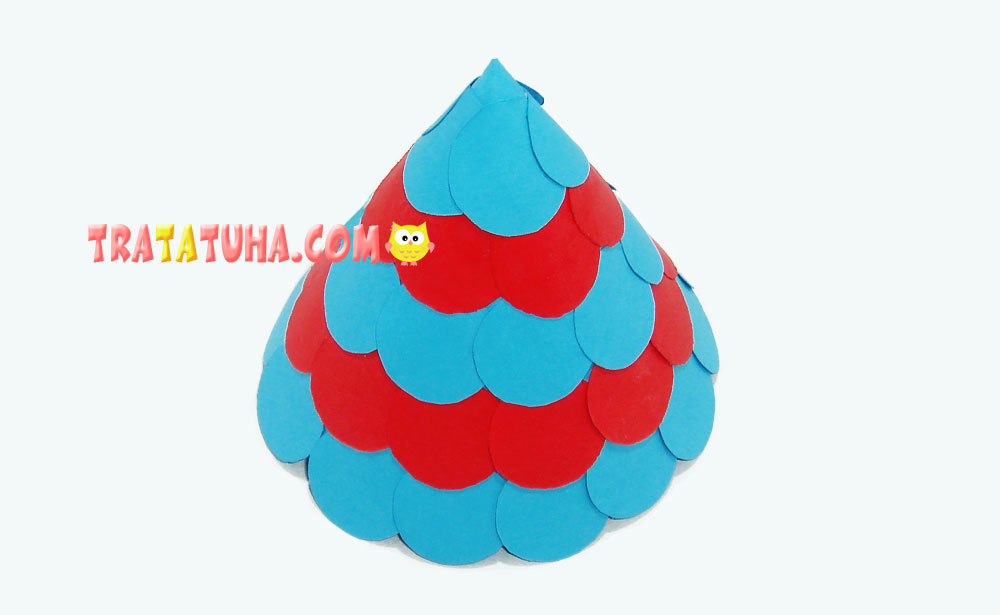
Apply some glue (it is better to use white craft glue for this) on the rounded edge of the tube and glue the roof. Scissor out a circular window and doors from colored paper and glue them, too. Adorn the resulting paper fairy-tale house with suitable decor. The craft is ready!
These are my dreamy paper houses – they all are bright, childish, and pretty worthy to be used as Christmas decor!
Crafts for Kids – learn how to make craft at home! Super cute crafts for all age groups!