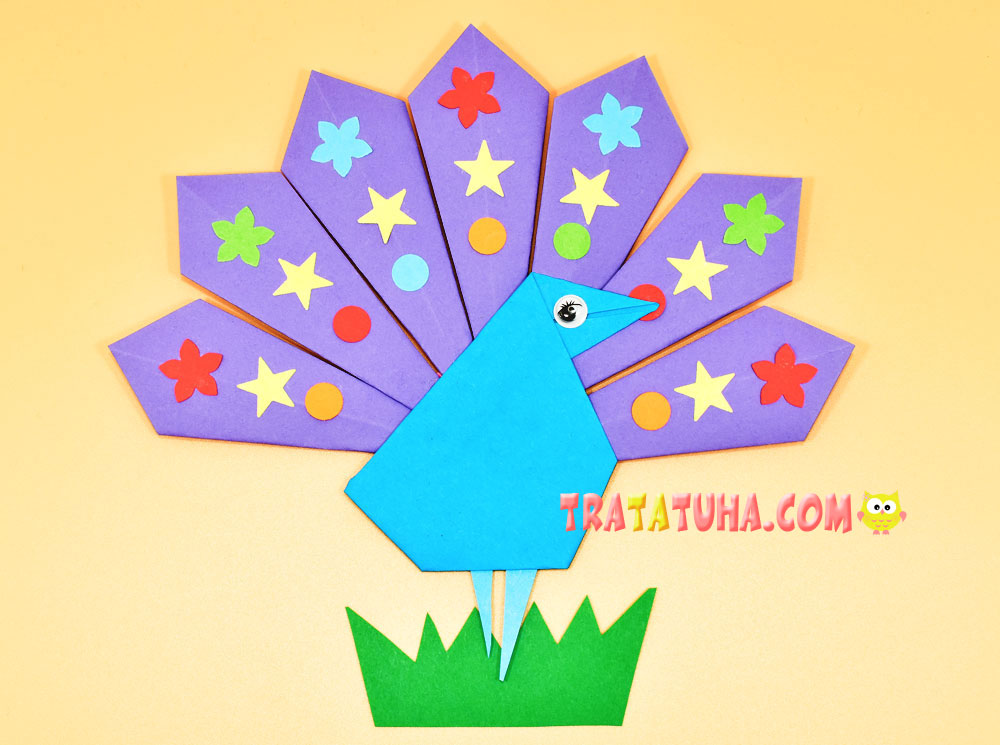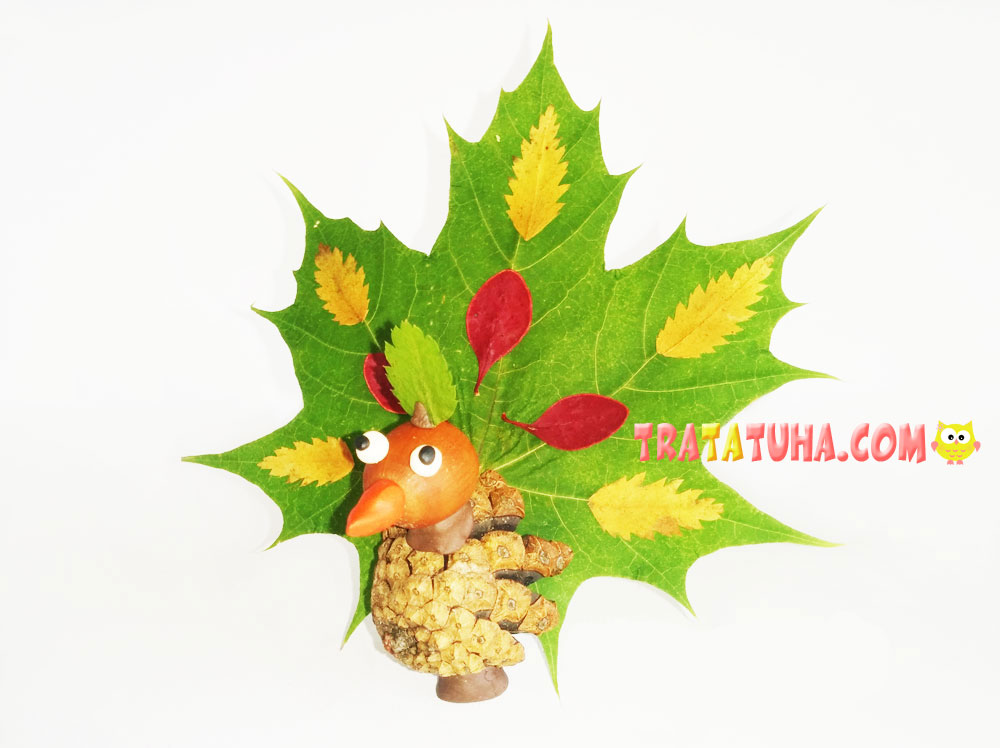
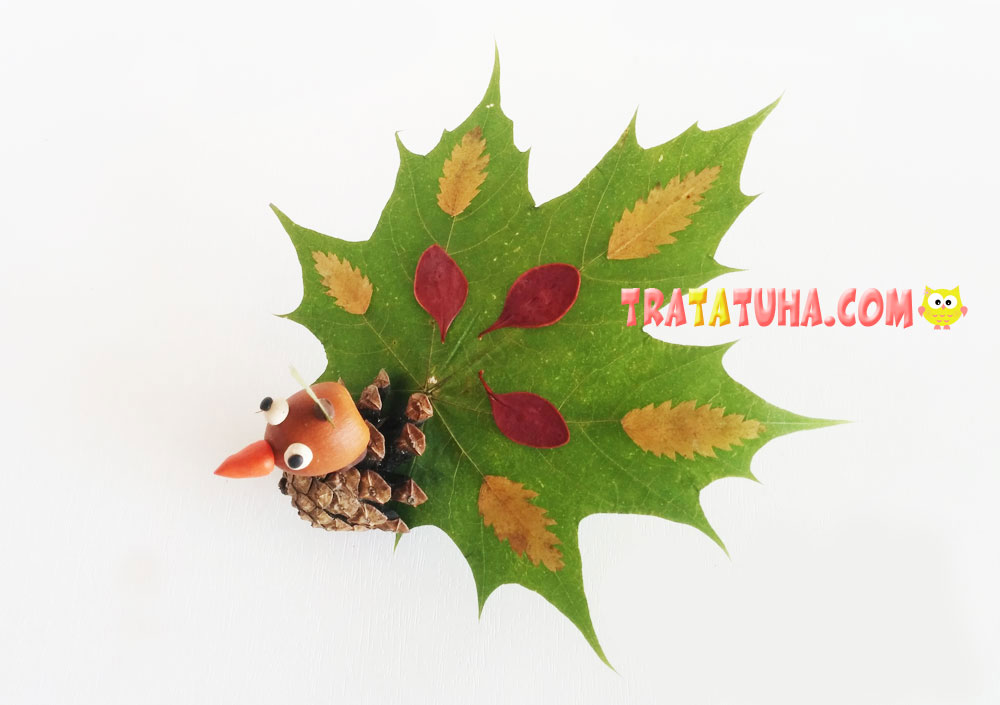
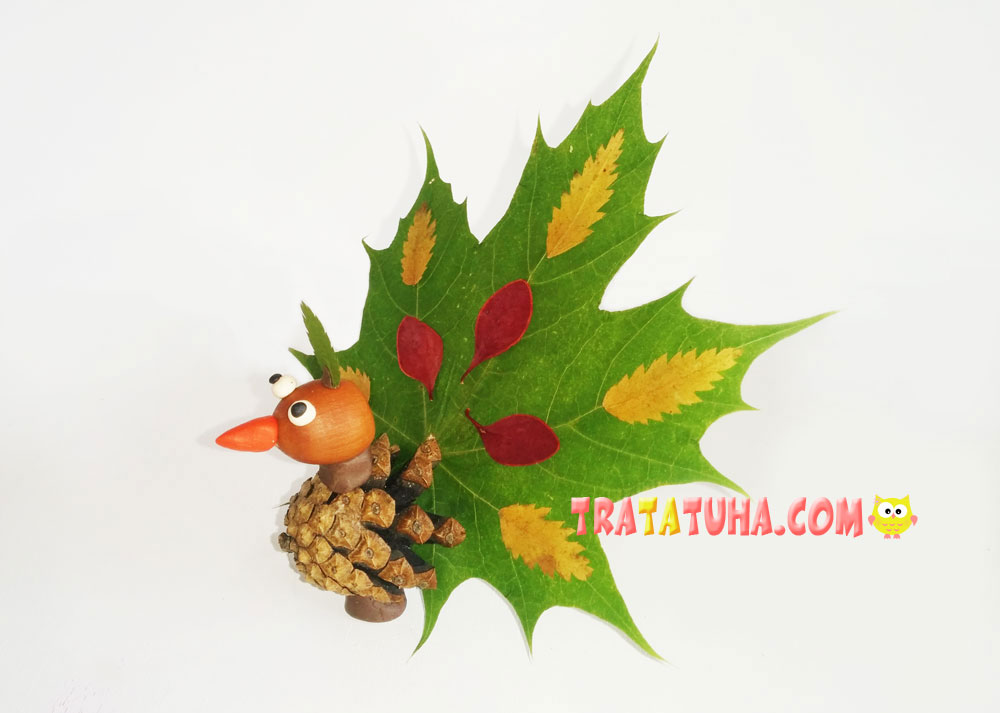
Bright pinecone peacock. In addition to the cone, the craft consists of leaves and an acorn. The work is easy and creative, because the tail can be of very different colors, that is, it is made of various leaves, and, possibly, berries.
What materials will be needed for crafts?
- Opened pine cone;
- Medium sized acorn;
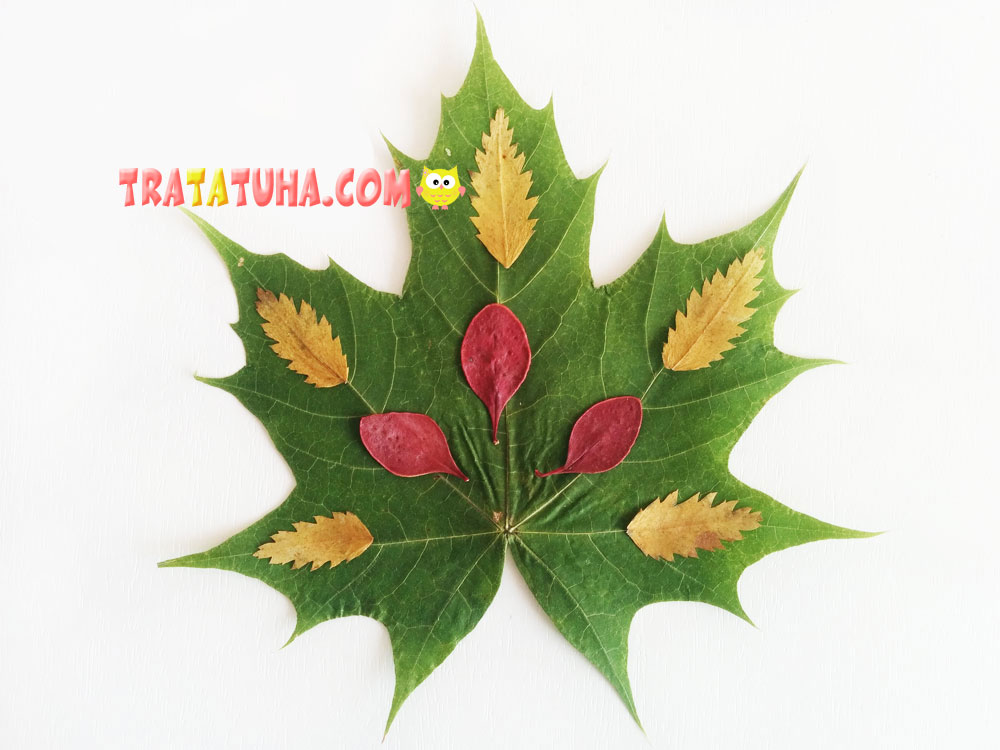
- Large dried maple leaf of any color;
- Small multi-colored leaves;
- Clay.
Pinecone Peacock Step by Step
As you can see, the craft consists entirely of natural material. The only exception is clay, but it is also used to a minimum.
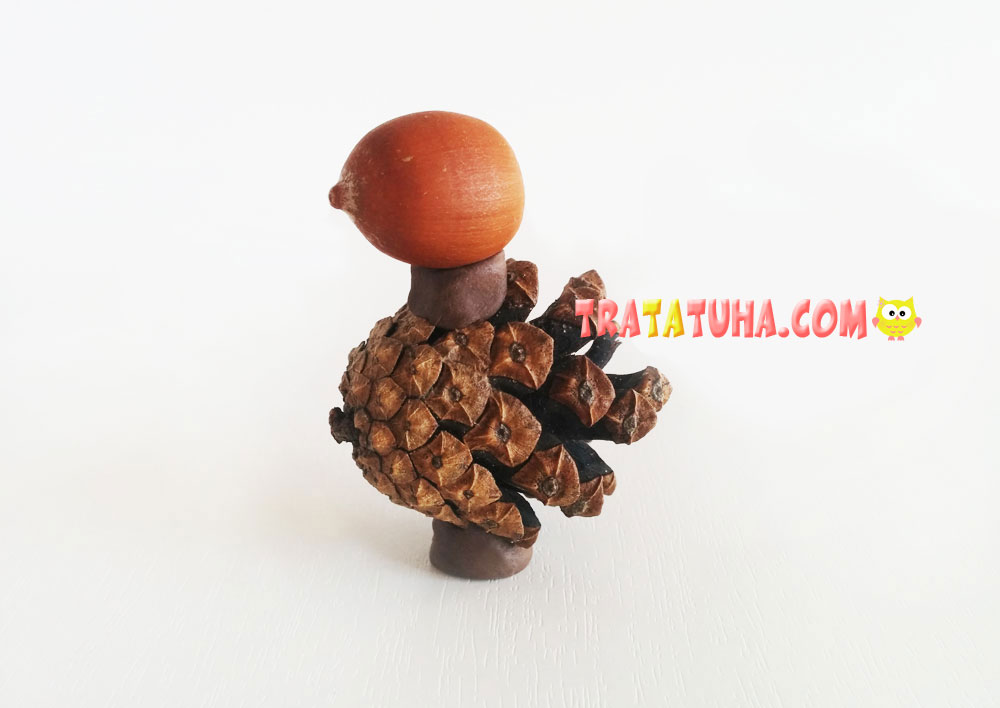
First, glue the acorn to the side of the cone and a stand, thanks to which the peacock will hold an upright position. They are best made from not very bright clay, for example, brown.
Next, make a beautiful peacock tail. Here you can show all your imagination and make, in fact, a collage of leaves, using small pieces of clay for gluing, or PVA glue. On a large maple leaf, you can stick smaller leaves of various colors, even rowan berries attached to the edges of the maple leaf would be a good idea.
From orange clay, make a small cone-beak, and from white and black – eyes. Glue these details to the bird, attach a chic tail to the pine cone, and a small leaf on the head, which will be used as a tuft.
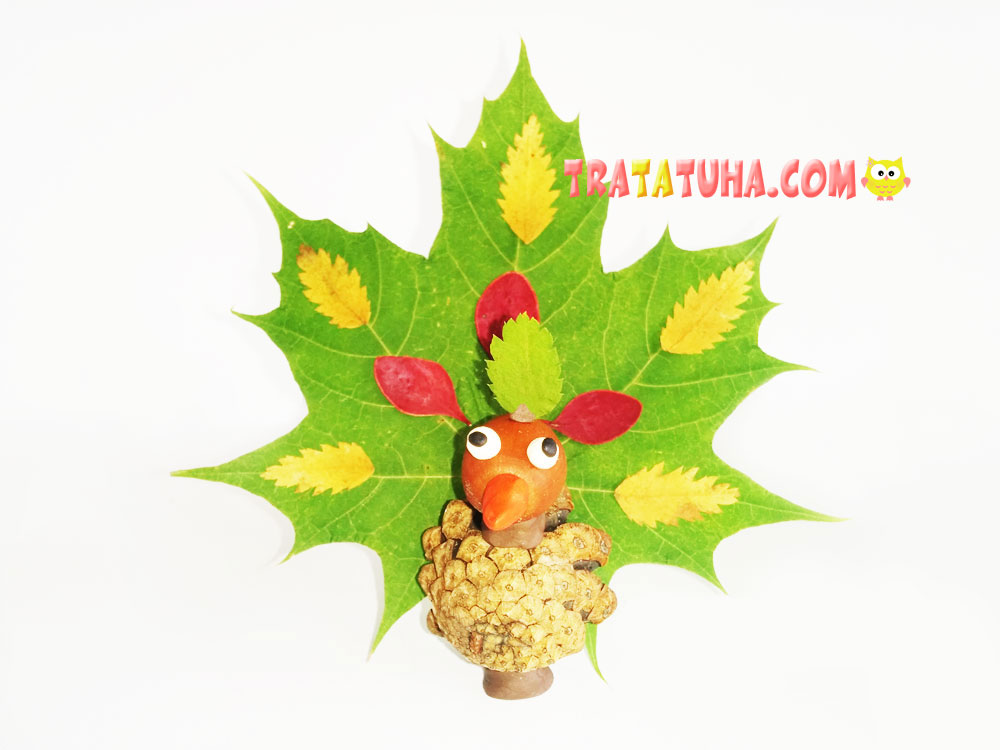
All the pine cone peacock is ready. We made such a bird in kindergarten, the leaf successfully lasted unchanged for about two days. If longer preservation is required, you can try to laminate the sheet with tape. Just glue it completely, cut off the edges. Or with the help of an iron and a special film for lamination.
See more ideas about Pinecones Crafts.
Crafts for Kids – learn how to make craft at home! Super cute crafts for all age groups!
Related Post: