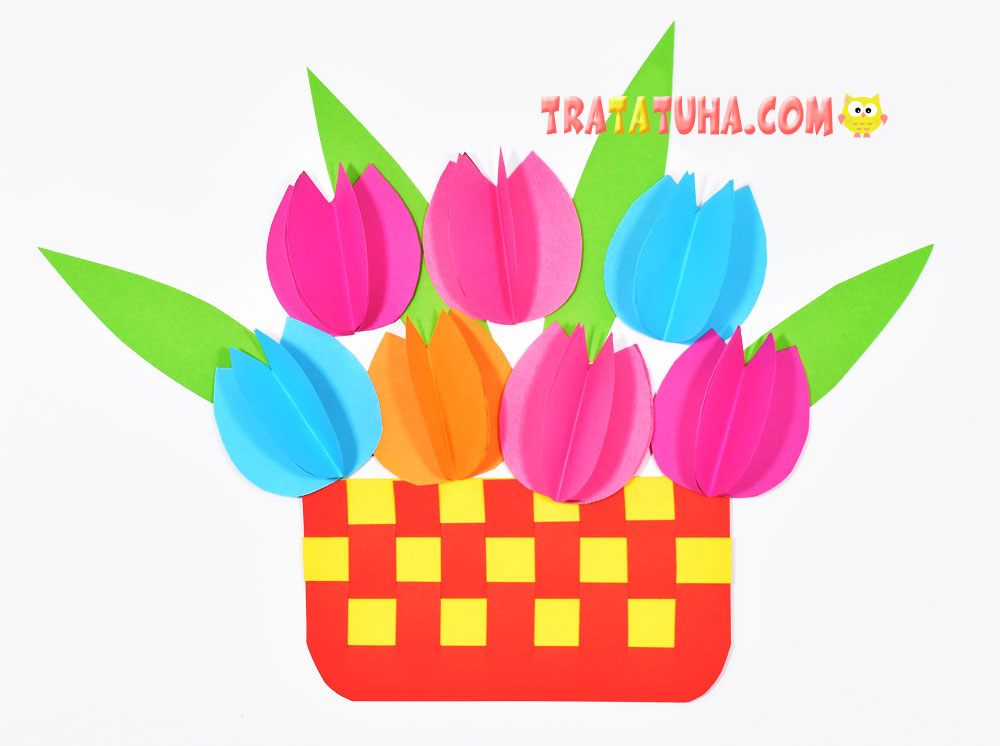
DIY wicker basket of tulips paper craft. Bright volumetric craft for children step by step.
You will need the following materials:
- Colored paper and cardboard;
- Scissors, ruler, glue, simple pencil.
Basket of Tulips Paper Craft Step by Step
Making a Wicker Basket
Braiding is quite common in children’s art. Children are introduced to the basics of this technique as early as preschool age.
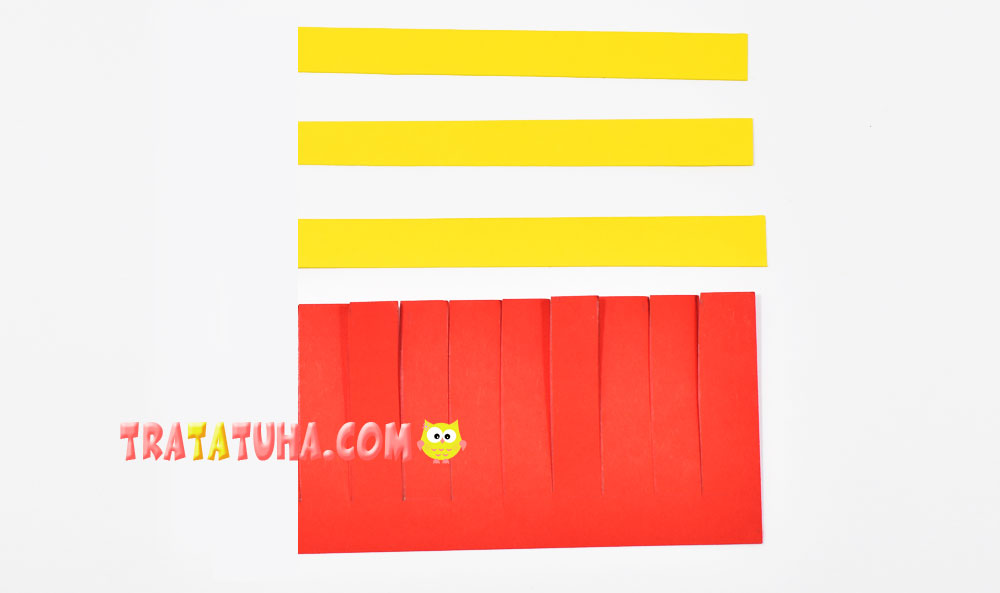
Cut a rectangle of any desired size from cardboard. Use a pencil and ruler to delineate the cut lines. For example, the lower horizontal stripe can be equal to 1 cm. Based on this, the vertical stripes can also be centimeter long.
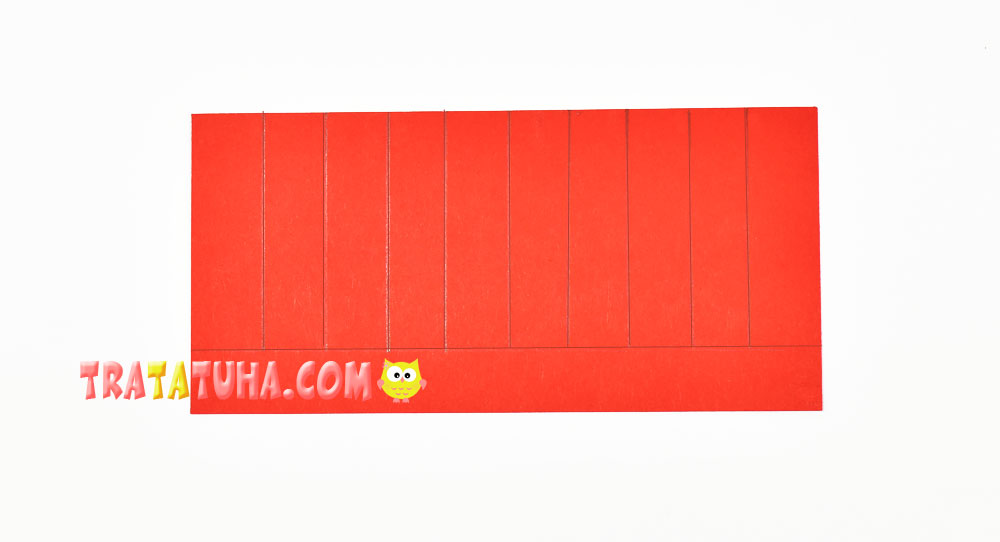
Cut along vertical lines. Prepare 3 strips of cardboard, the width of which is 1 cm and the length is equal to the length of the rectangle.
Place the first strip between the cut strips on the rectangle.
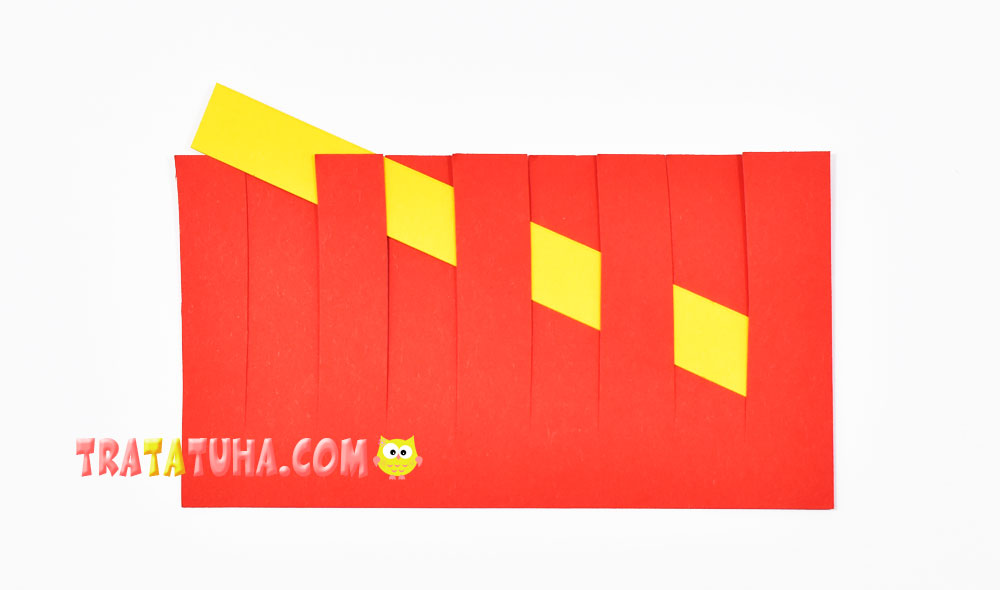
Add the other two as well. Align, secure with glue and cut off any excess if there is any on the sides or top.

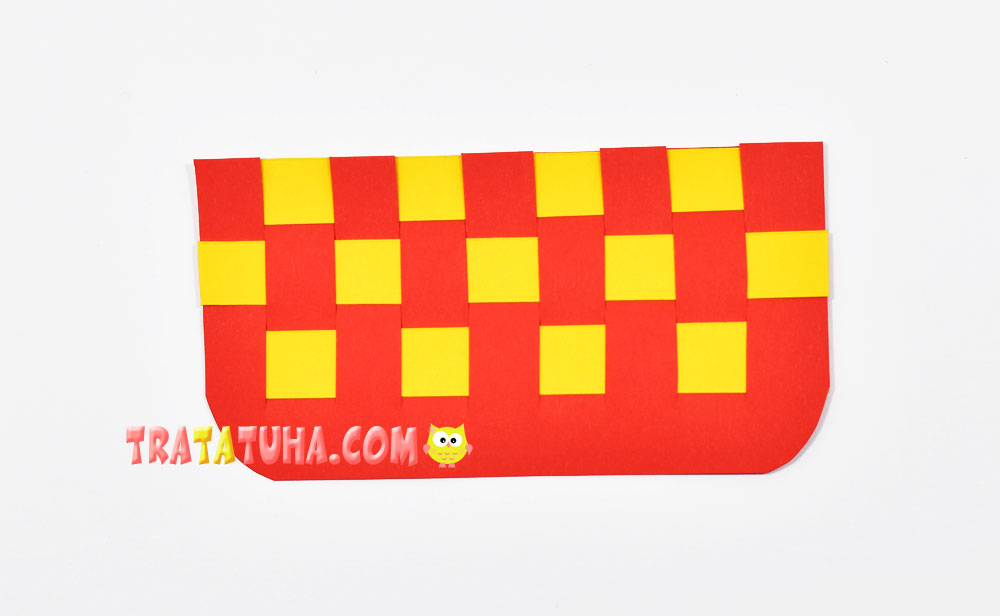
You will get a wicker basket like this; if desired, the lower corners can be rounded.
Creating 3d Tulips
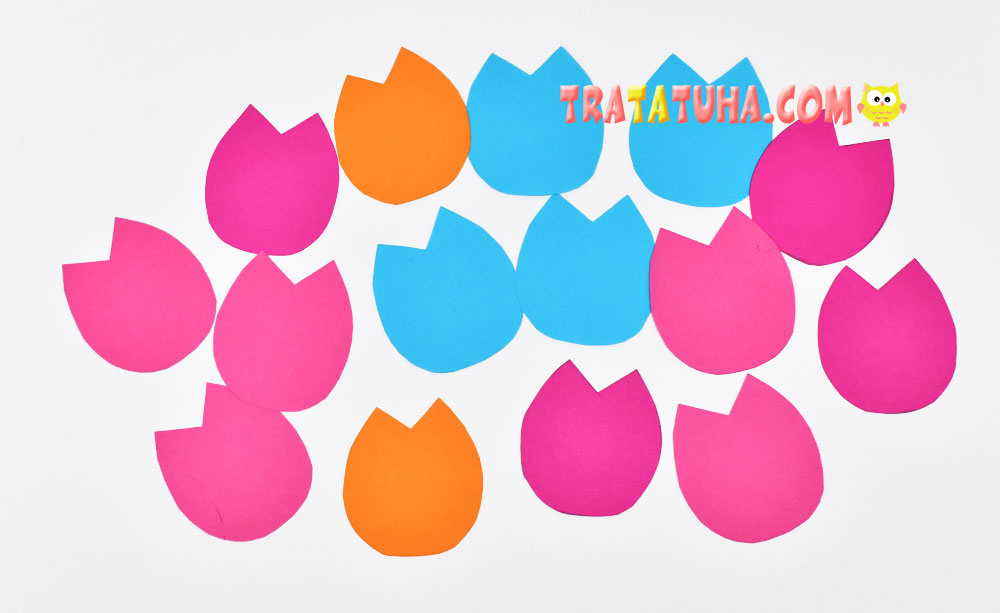
Cut out simple tulips from colored paper. Smaller children can place them in the basket and finish the craft.
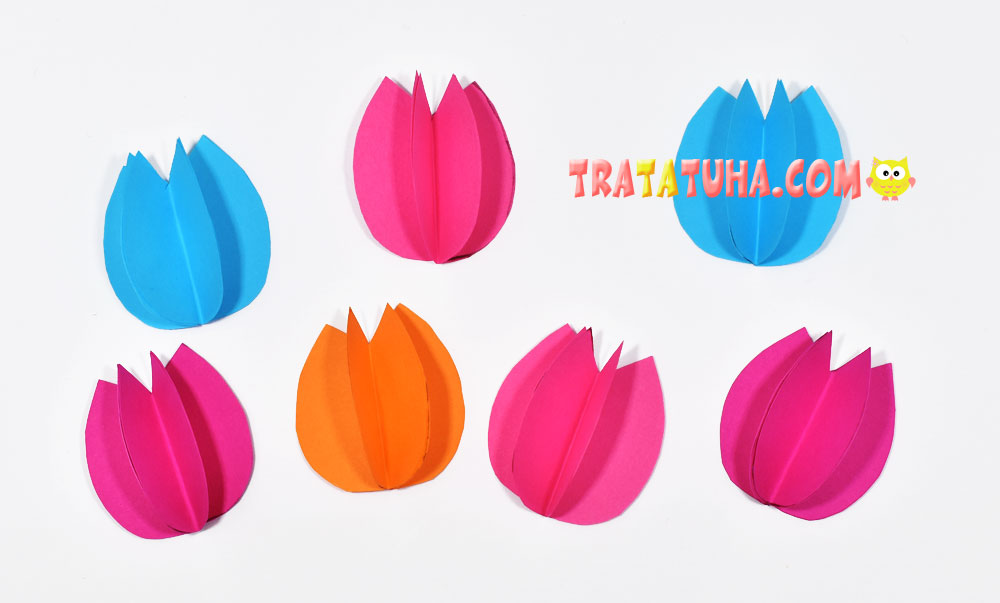
To make the tulips voluminous, fold the cut tulips in half.
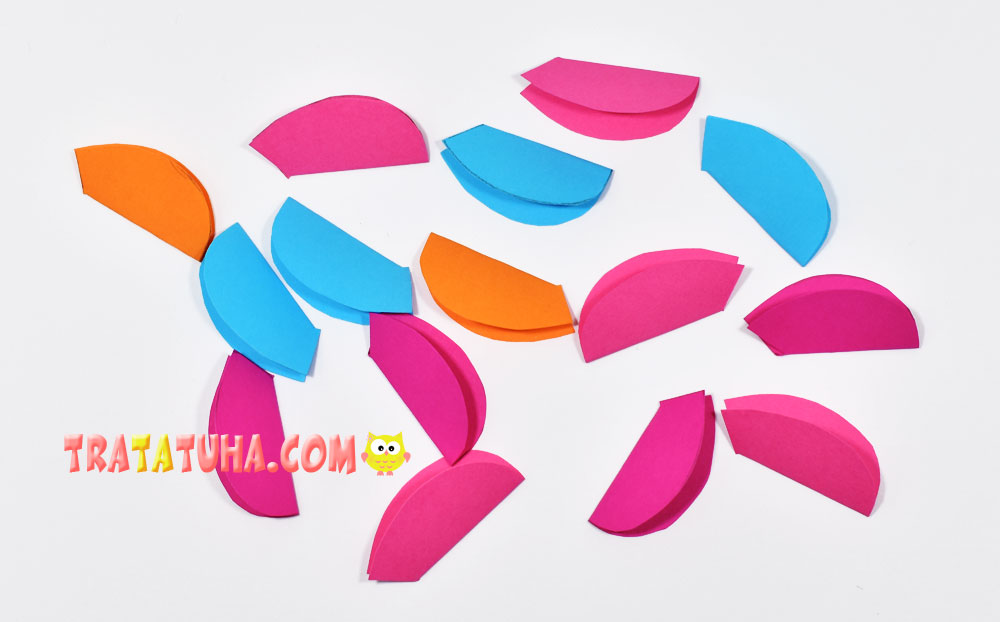
And then glue the sides together. In this version, the tulip consists of 3 parts; in the end, 21 simple tulips were prepared.
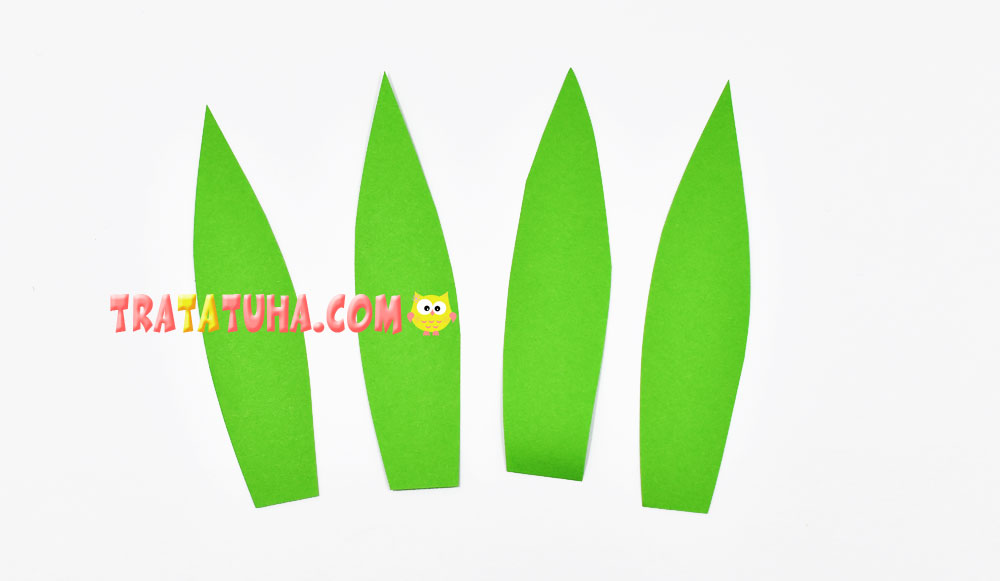
Cut out long leaves from green paper.
After all the parts of the composition are ready, it’s time to assemble it into one whole. To do this, prepare a base cardboard of any desired color, glue a basket on the bottom, and add flowers and leaves on top.
That’s it, the wicker basket with tulips is ready.
Related Post: