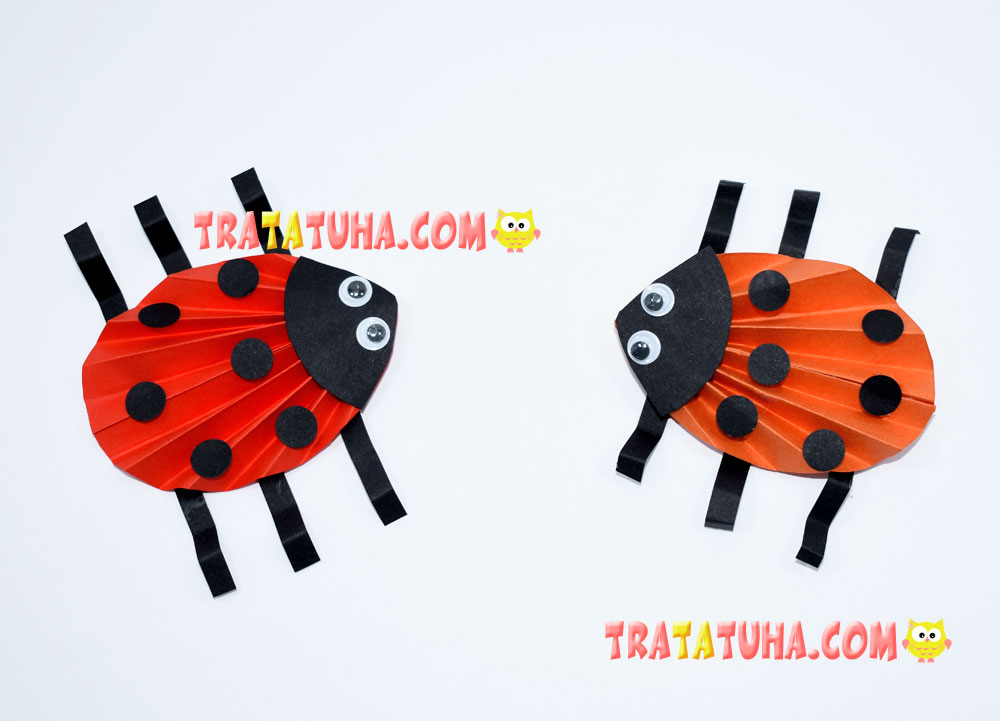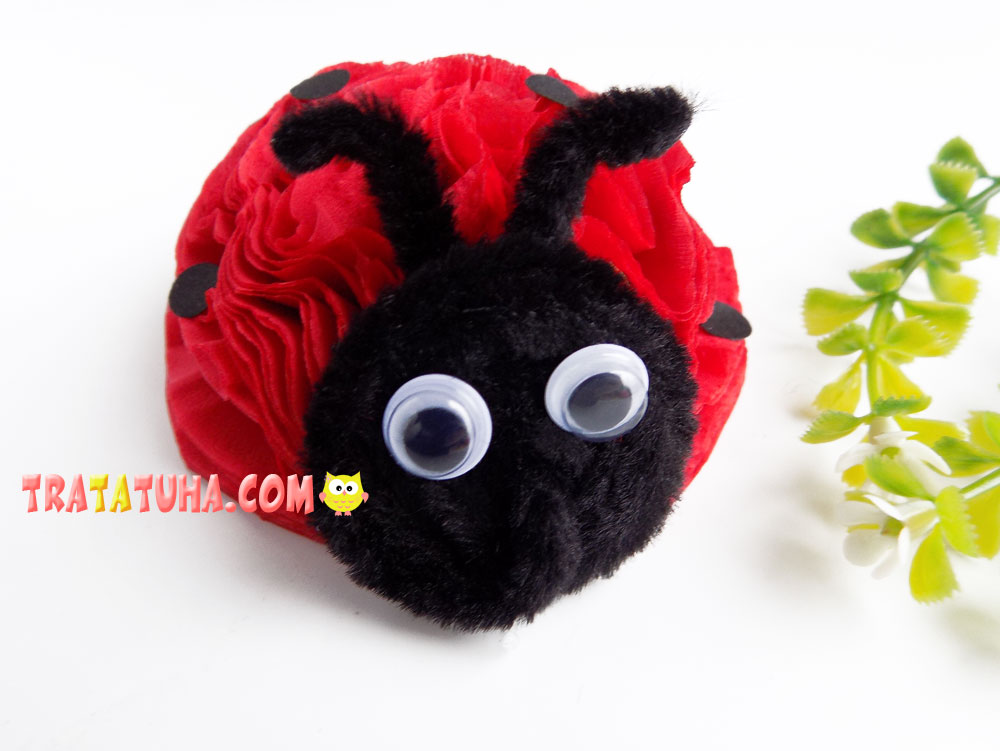
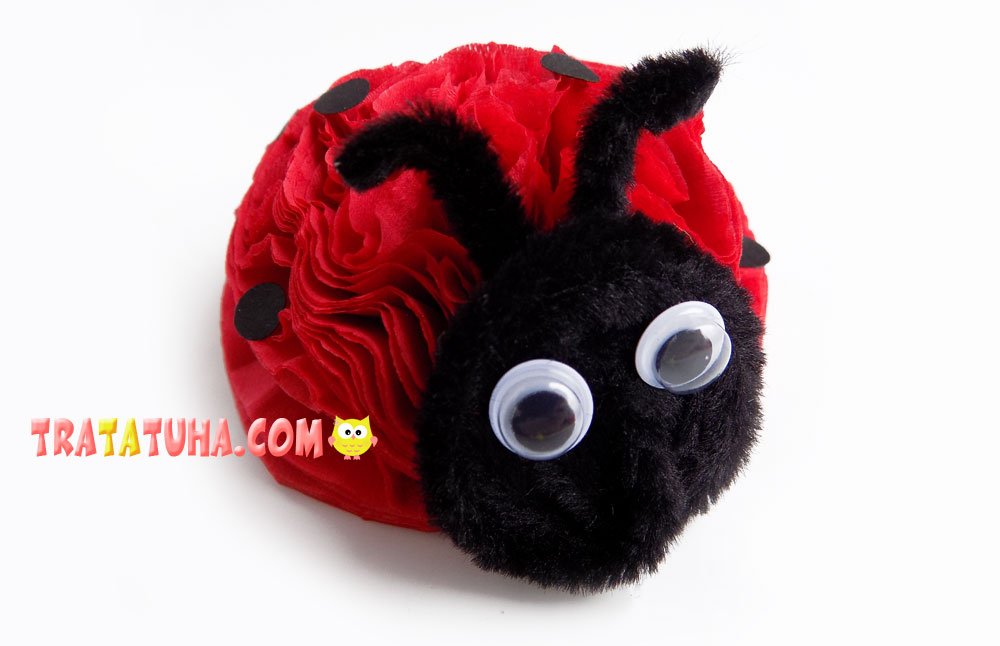
Bright tissue paper ladybug and pipe cleaner. Step-by-step photo review, creative work with kids from improvised materials.
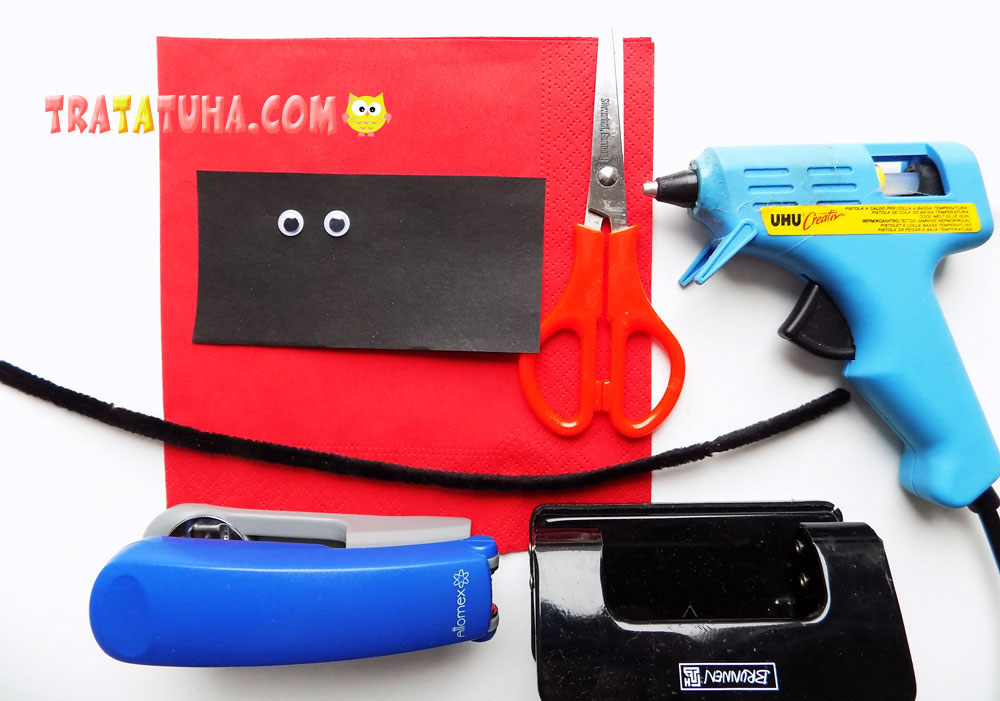
To create such a craft, take:
- red tissue paper;
- stapler;
- black pipe cleaner;
- scissors;
- hole puncher;
- glue gun;
- a small piece of black paper;
- decorative eyes.
Tissue Paper Ladybug Step by Step
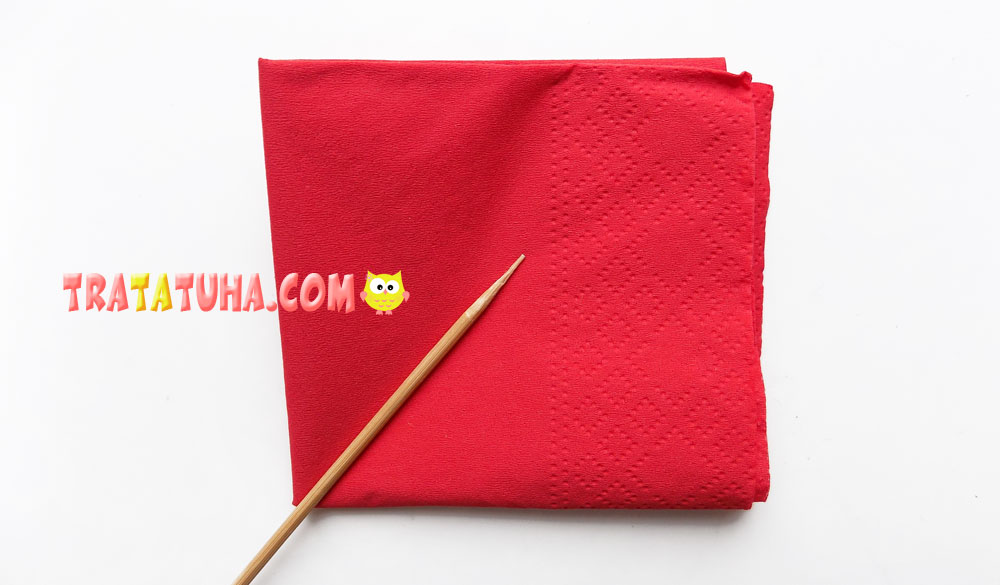
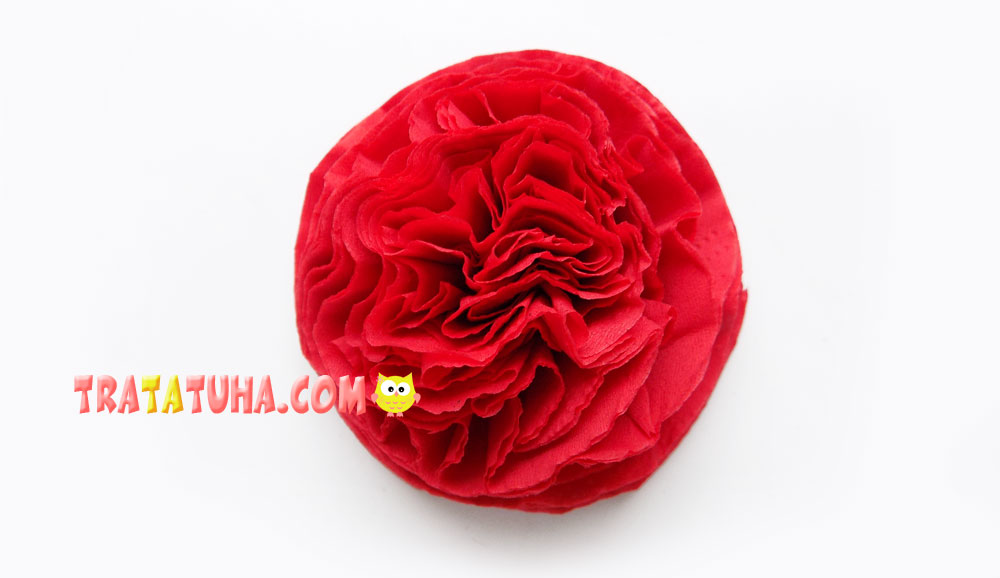
First, let’s make the body of a ladybug. To do this, fold the red tissue paper several times to make a small square.
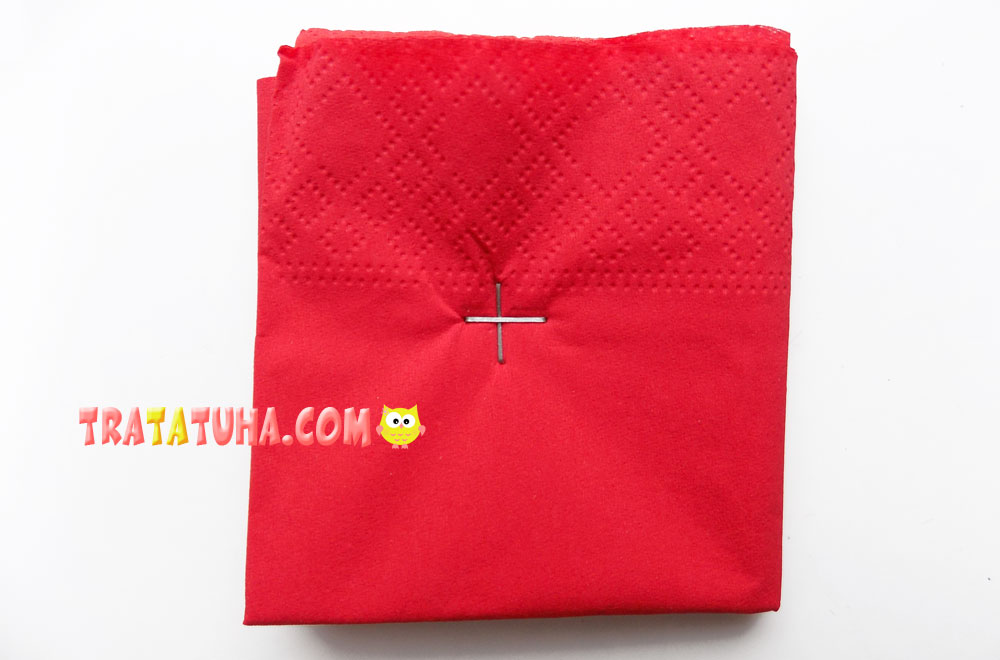
We fix all the layers in the center with a stapler.
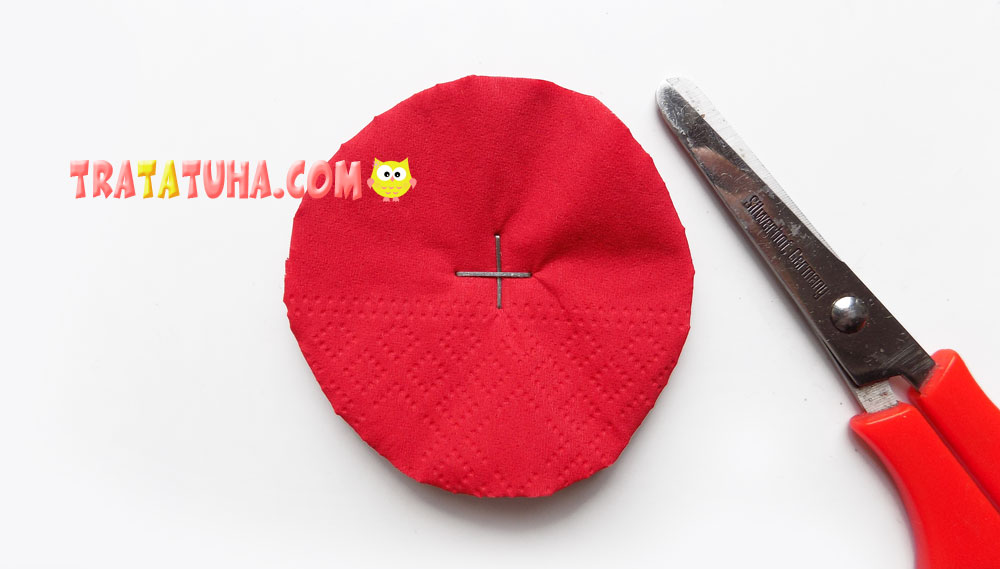
Now we round the corners with scissors, we should get a circle.
Next, we will alternately lift all layers of the tissue paper, starting from the top.
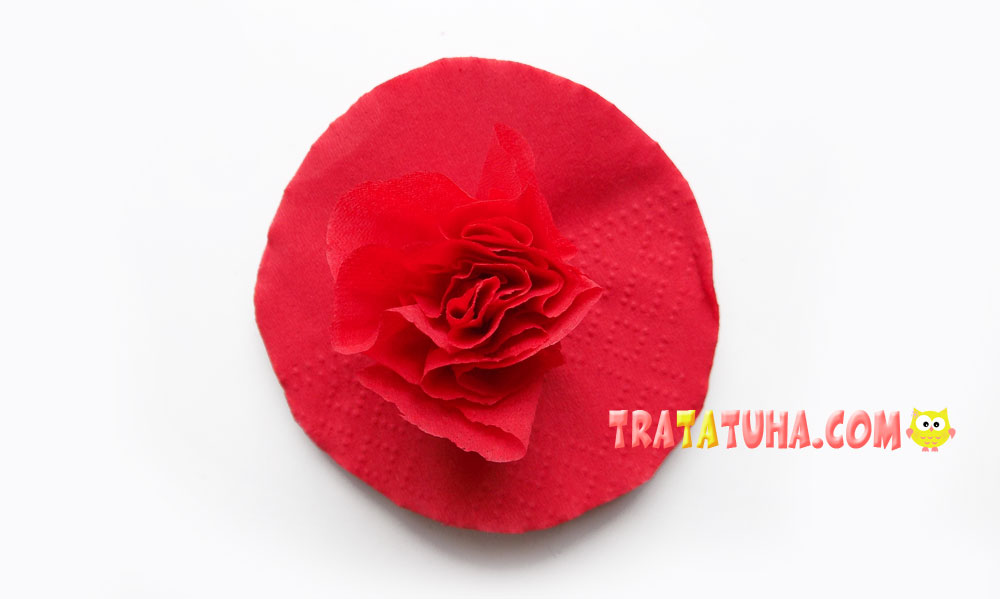
So we will form the body of the ladybug.
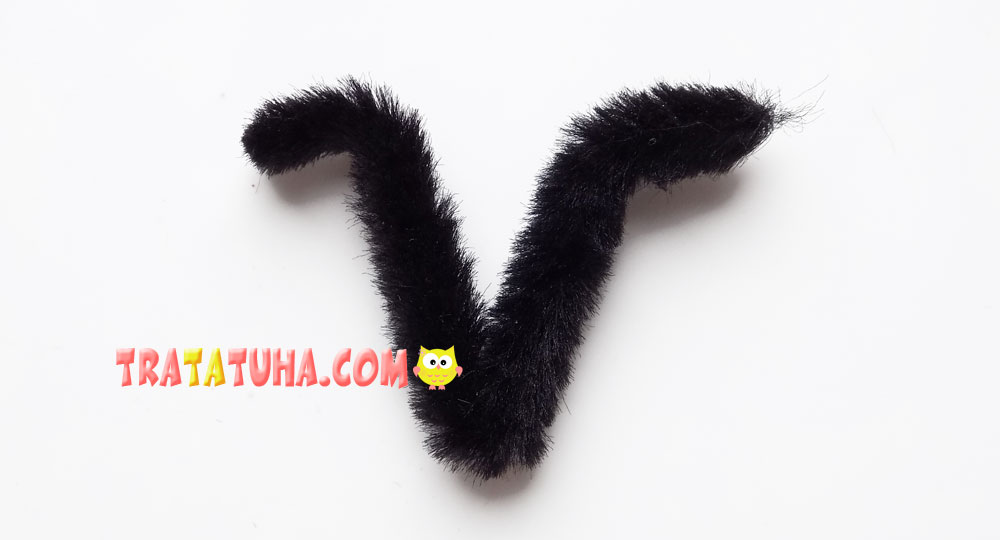
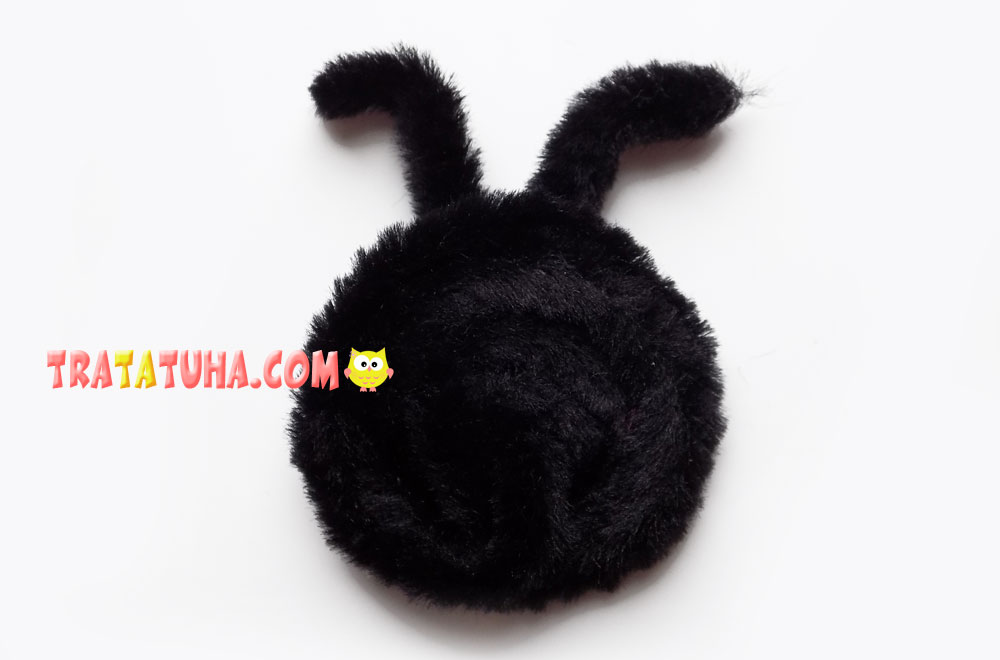
Let’s make the head. To do this, you first need to cut off a small piece from the black pipe cleaner (about 5 cm for the antennae). We begin to twist the remaining long part into a spiral.
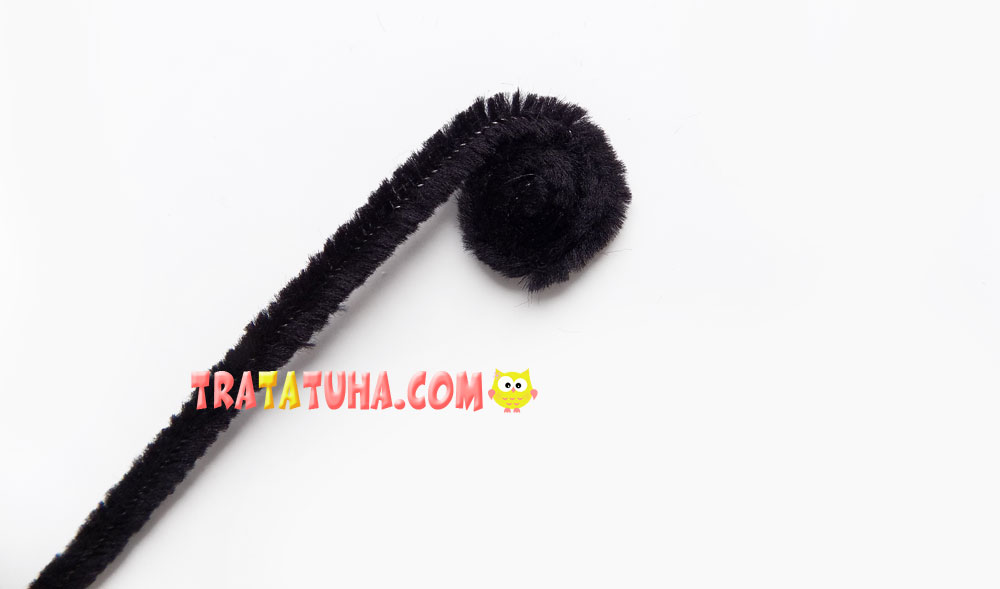
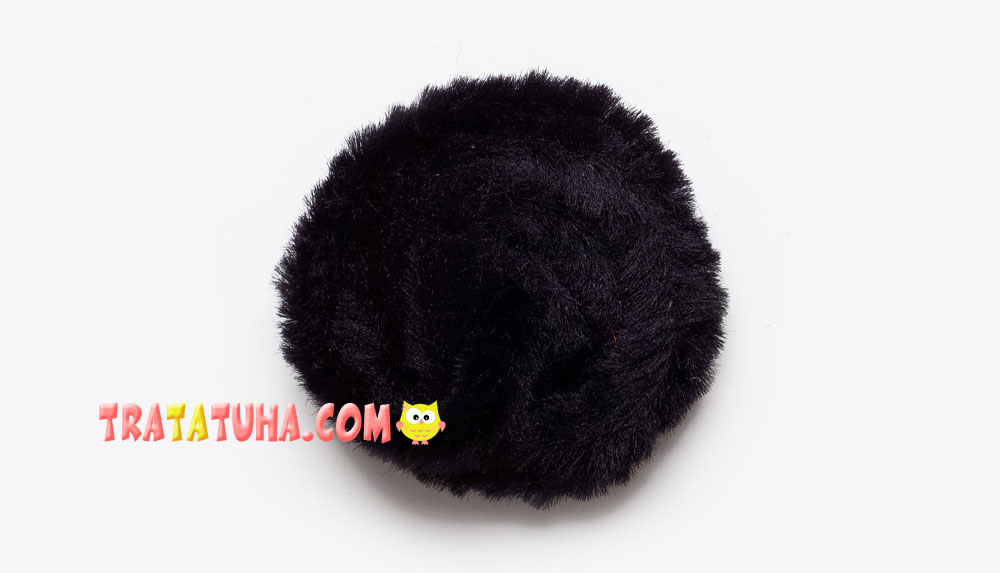
In this way, we must form a circle, we fix the tip of the wire in the center of the circle.
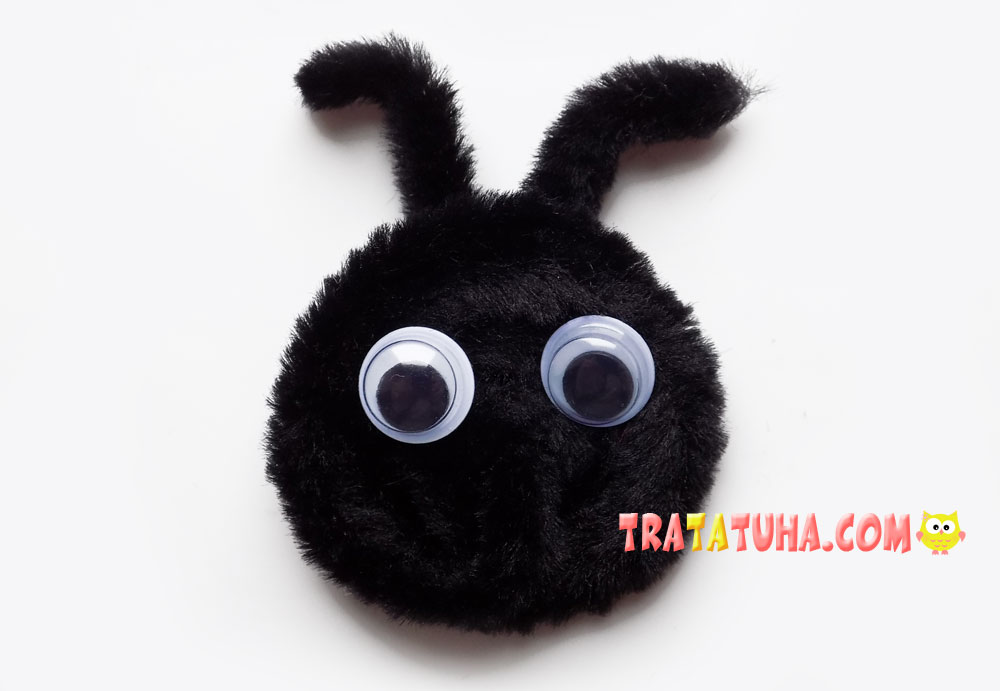
We make antennae from a small piece.
We fix them with hot glue at the top of the head.
Add decorative eyes. If they are without an adhesive backing, we fix them with a thermo gun.
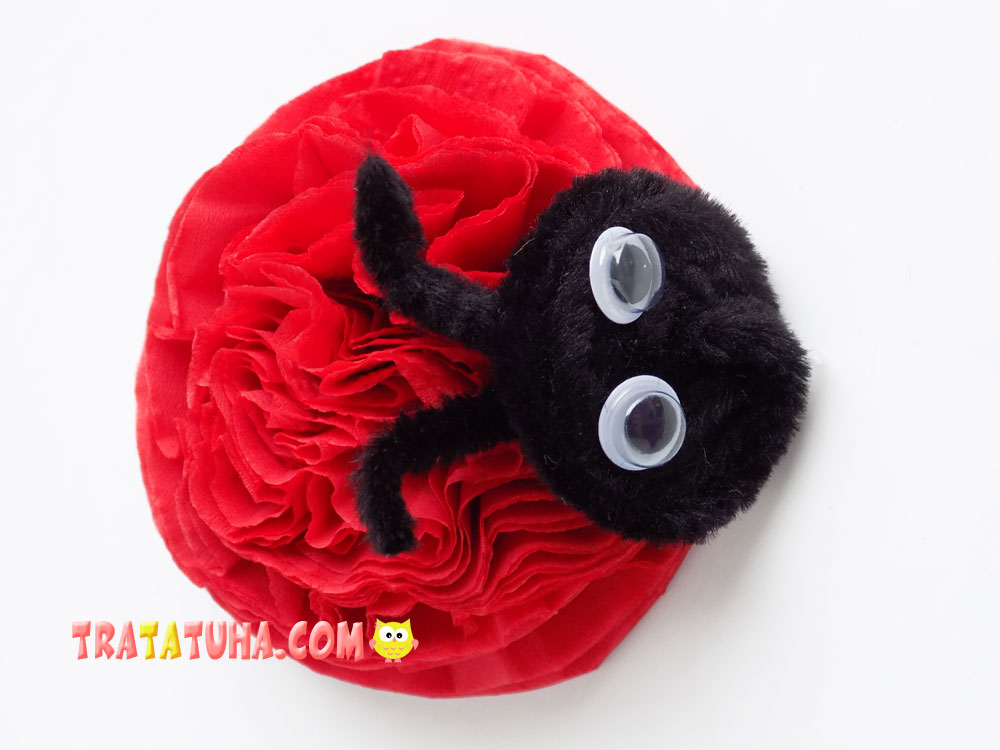
We connect together the head with the red body of the ladybug.
It remains to complete the points. To do this, use a hole punch and black paper. Glue the finished circles on the body.
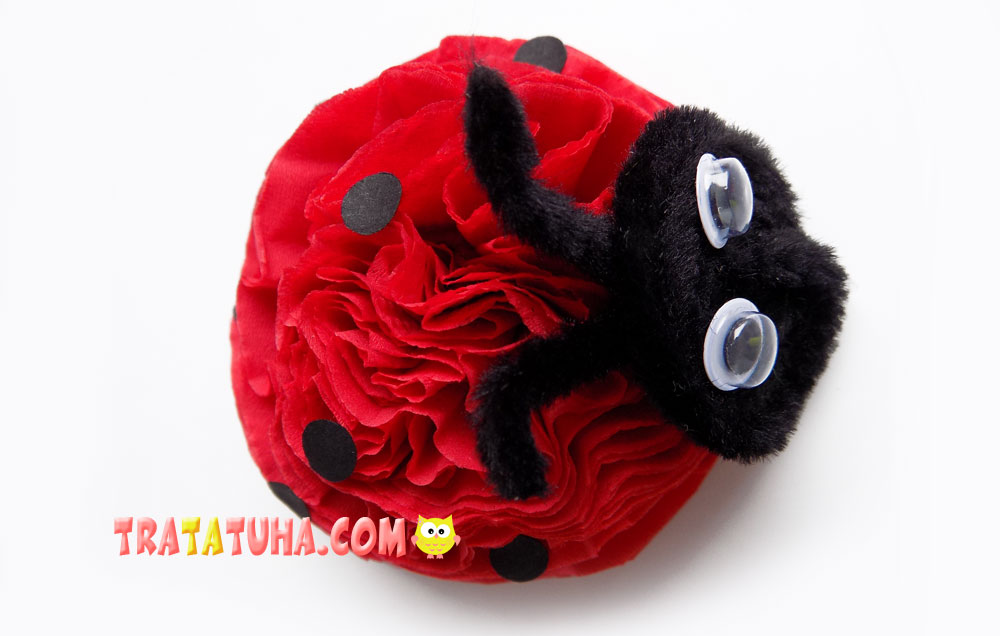
Tissue paper ladybug is ready.
Many other Insects Crafts for kids.
Crafts for Kids – learn how to make craft at home! Super cute crafts for all age groups!
Related Post: