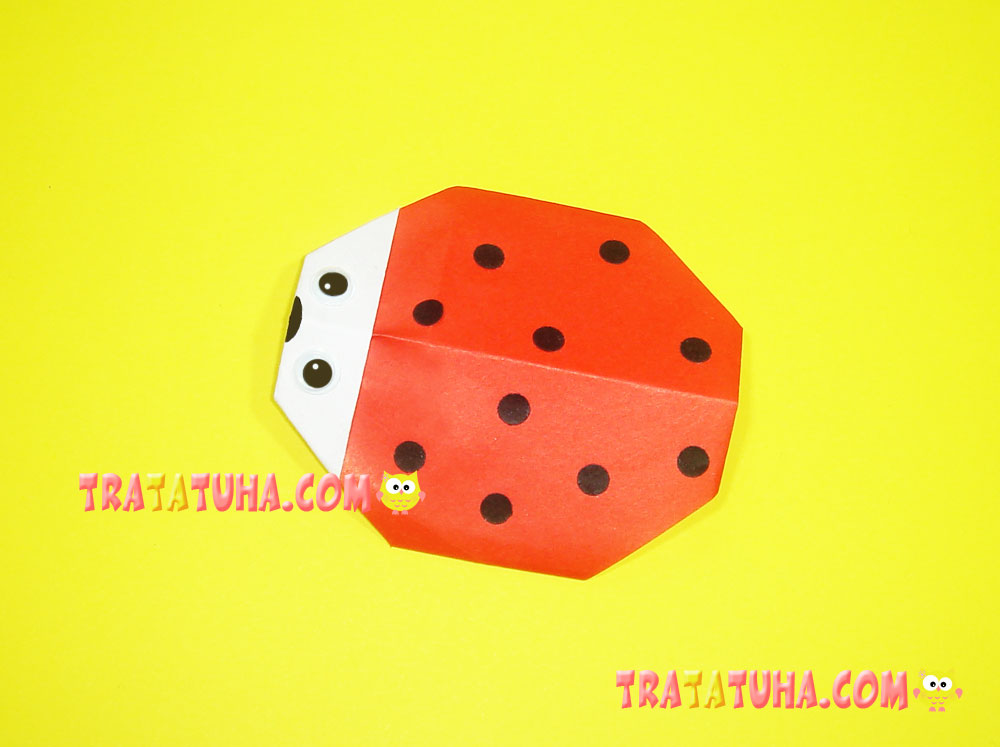
This origami ladybug is very easy. It will be a great option for kids and beginners. The technique is easy, as you only need to do simple and clear steps to finish this origami. Your collection of paper insects, as well as your top crafts of ladybugs will grow more.
You will need:
- Single-sided origami paper (one side should be red, and the other one should be white);
- Black paper for circles;
- Sticky eyes, black felt-tip pen, glue.
You can reduce the number of components just to origami paper and a black felt-tip pen, as you can use it to draw eyes, nose, and circles.
Origami Ladybug for Kids Step by Step
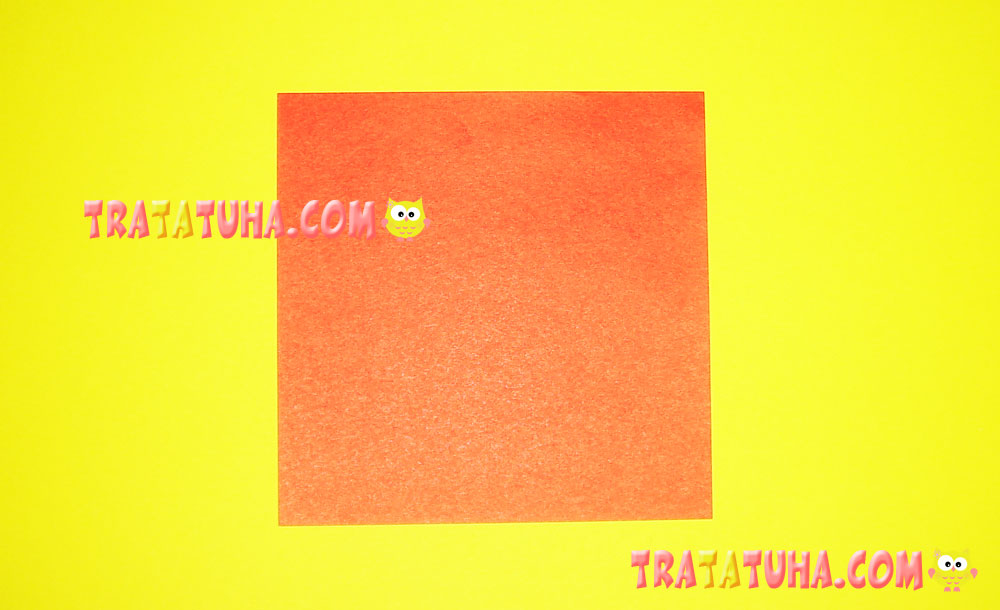
Prepare square single-sided origami paper or plain square paper of any size. Lay it in front of you the red side up.
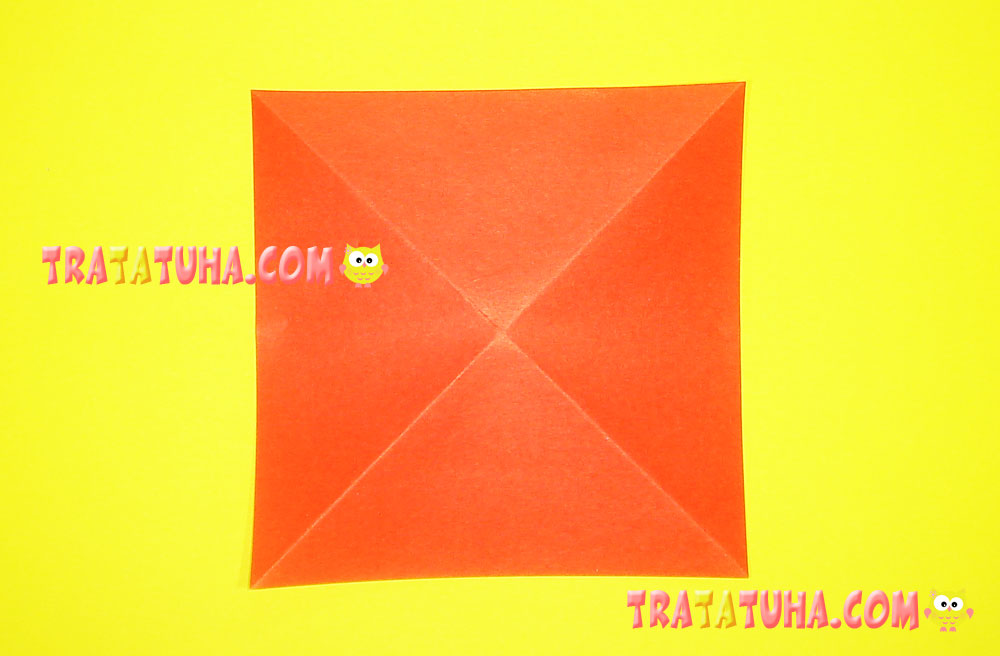
Fold it in half by connecting the opposite corners. Then fold it in half once again by connecting the other two corners.

Unfold the paper, and you will see cross folds on the square as a result.
Turn the square sharp angle up and fold the top corner down, as shown in the photo.
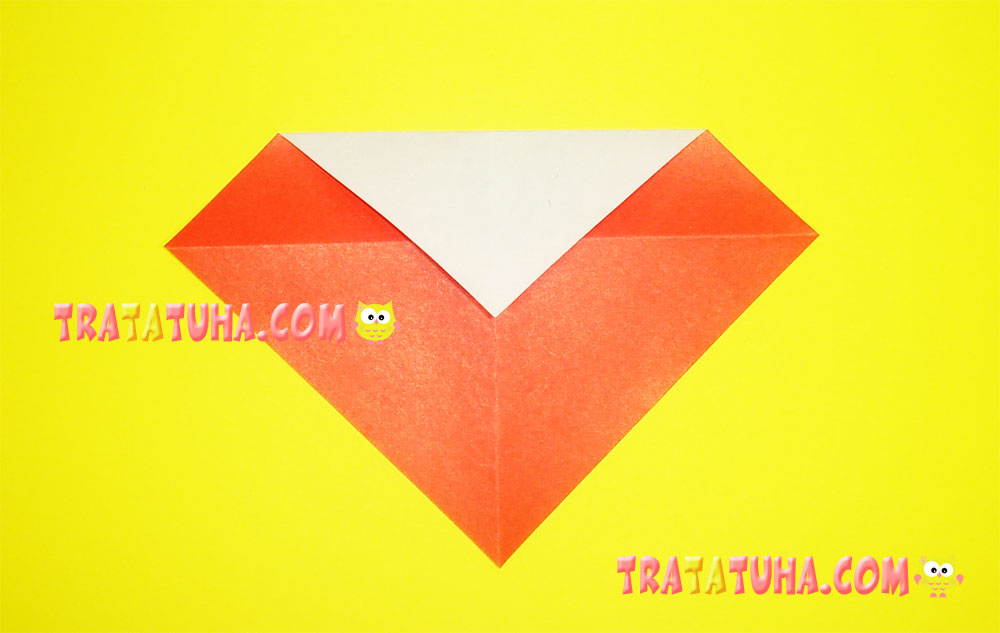
Now lift the same corner up, aligning it with the horizontal fold in the center.
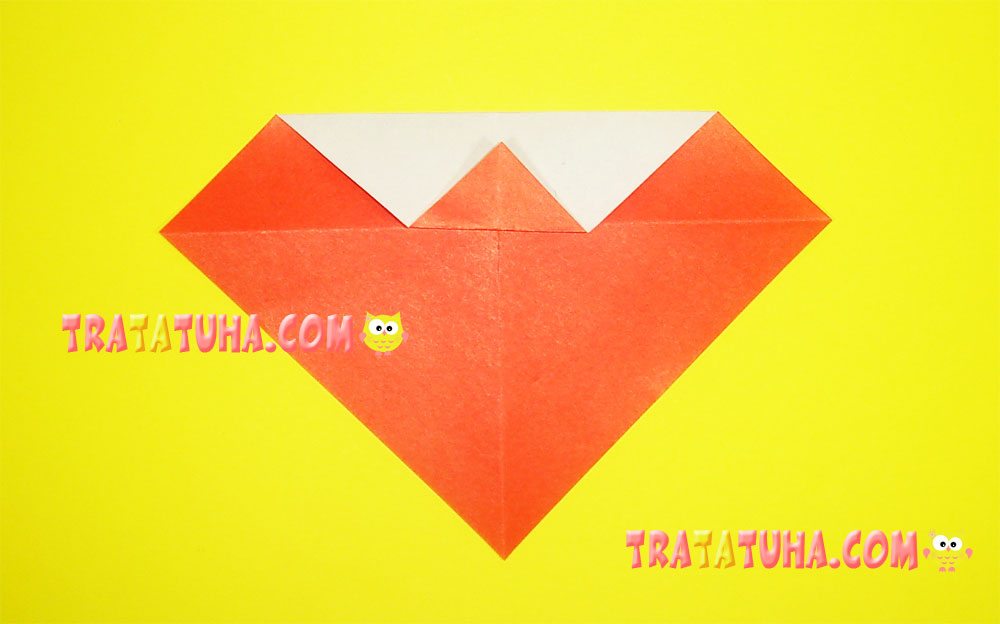
And the last step of your work on this part is to fold the former corner down once again. You will get a white stripe like this.
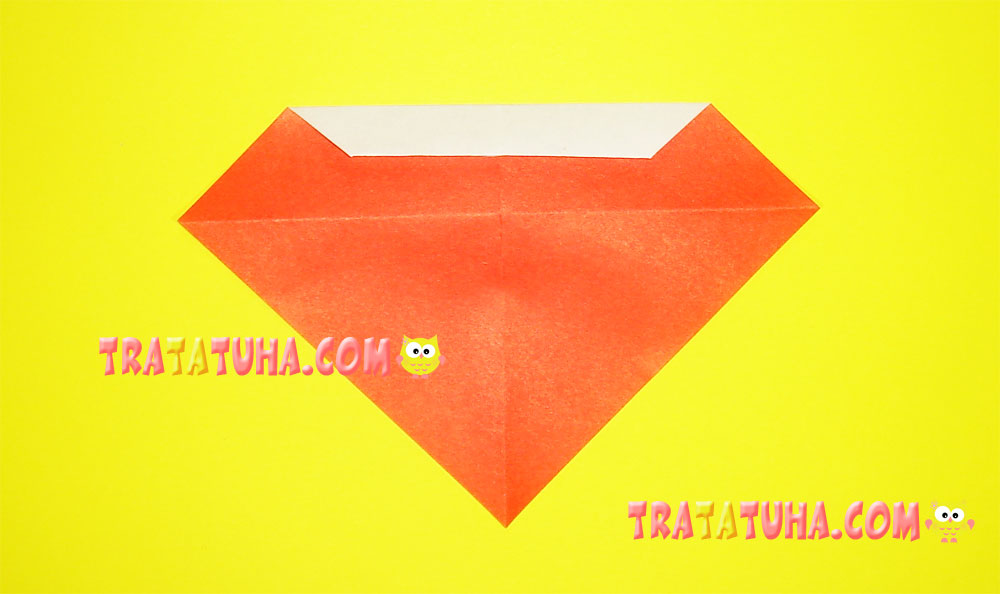
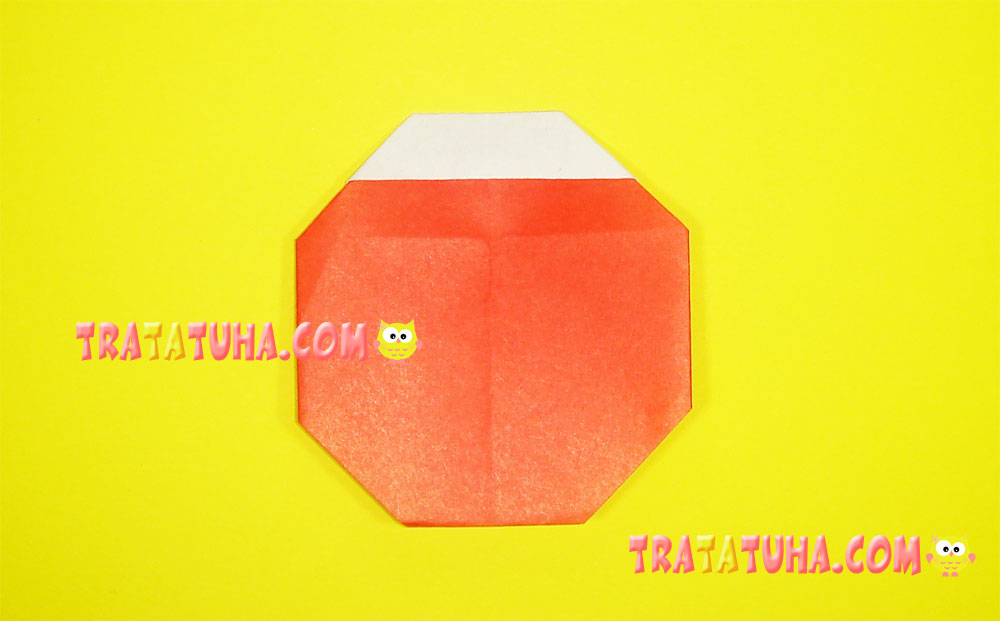
Turn the paper with the white back side toward you. Fold the right side, aligning it to the bottom edge. The folding is approximate, there are no particular sizes, the photo can guide you.

Now fold the left side in exactly the same way.
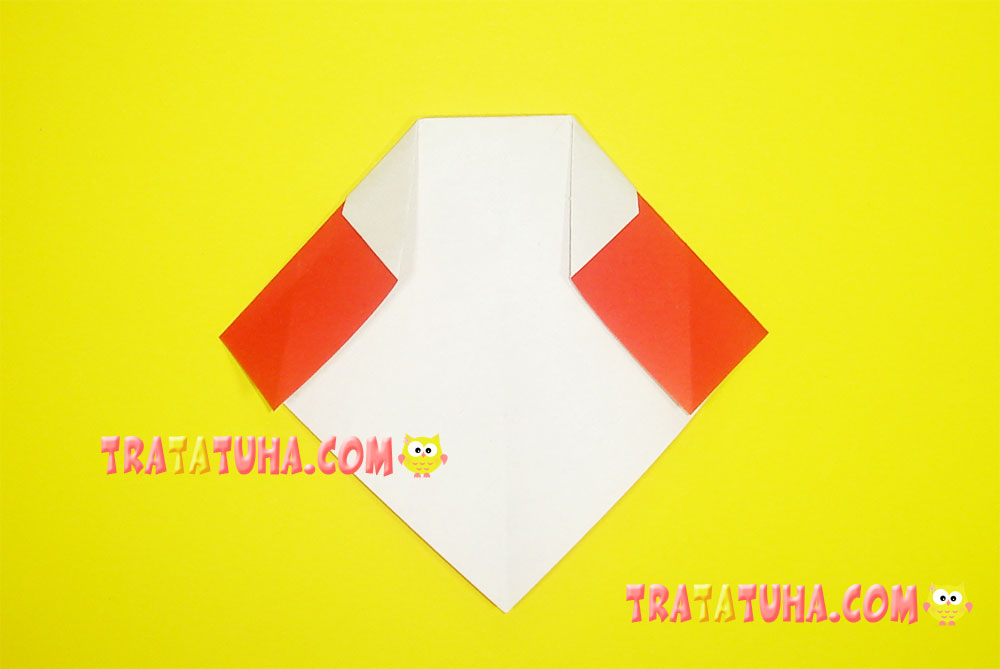
After that, fold the small corners on both sides and bottom. At this stage, you can adjust the circle by folding the corners more or less.
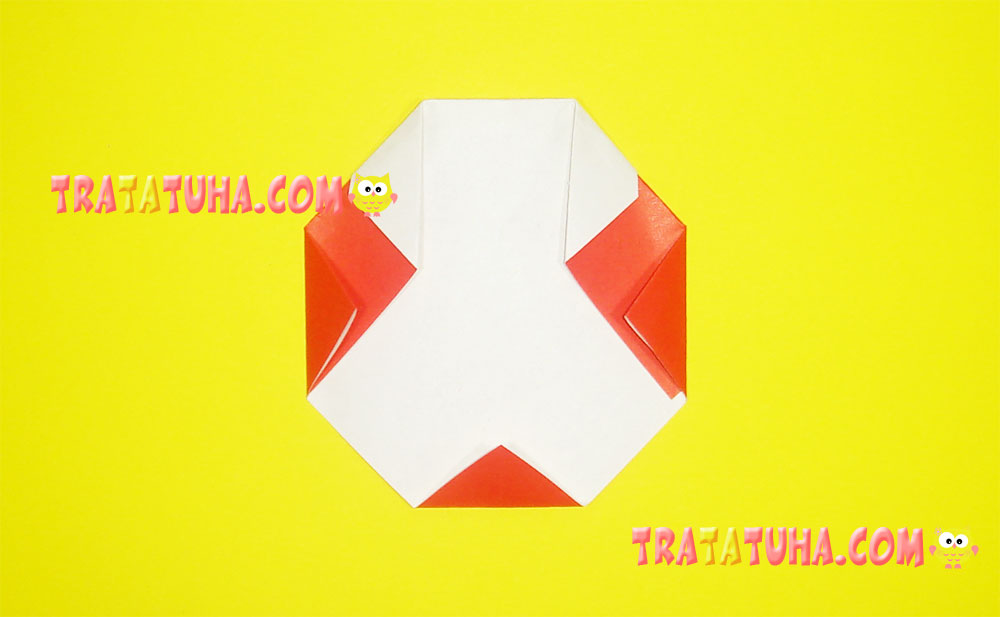
Flip the paper to the other side, and your origami ladybug is almost ready.
Glue the eyes, black circles, and draw a nose.
Many other Insects Crafts for kids.
Crafts for Kids – learn how to make craft at home! Super cute crafts for all age groups!
Related Post: