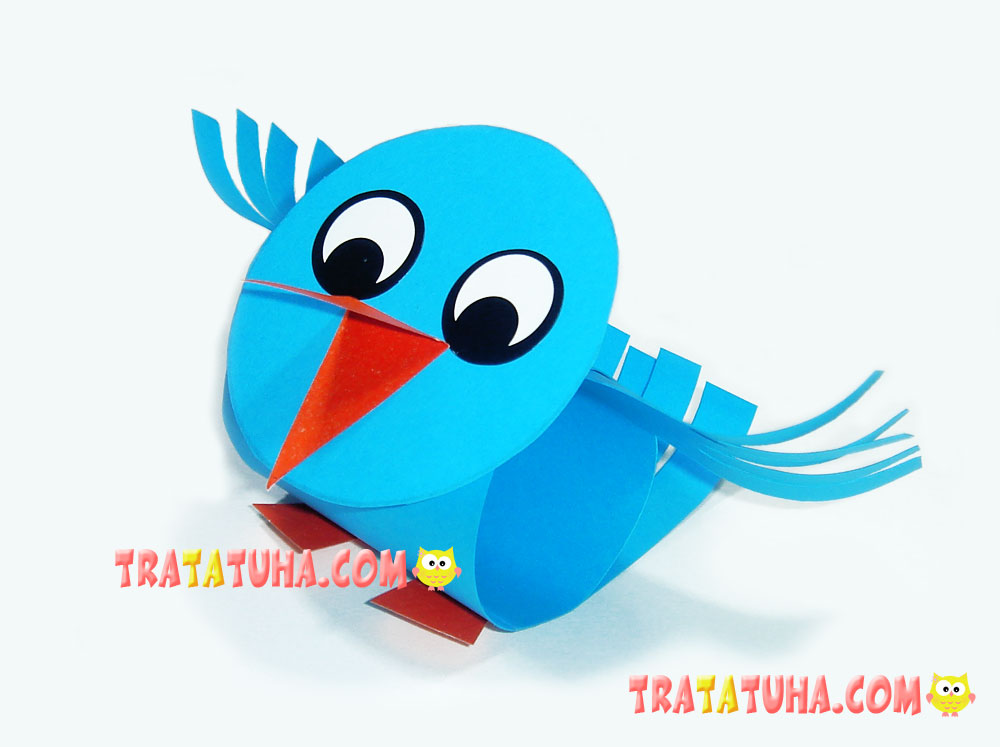
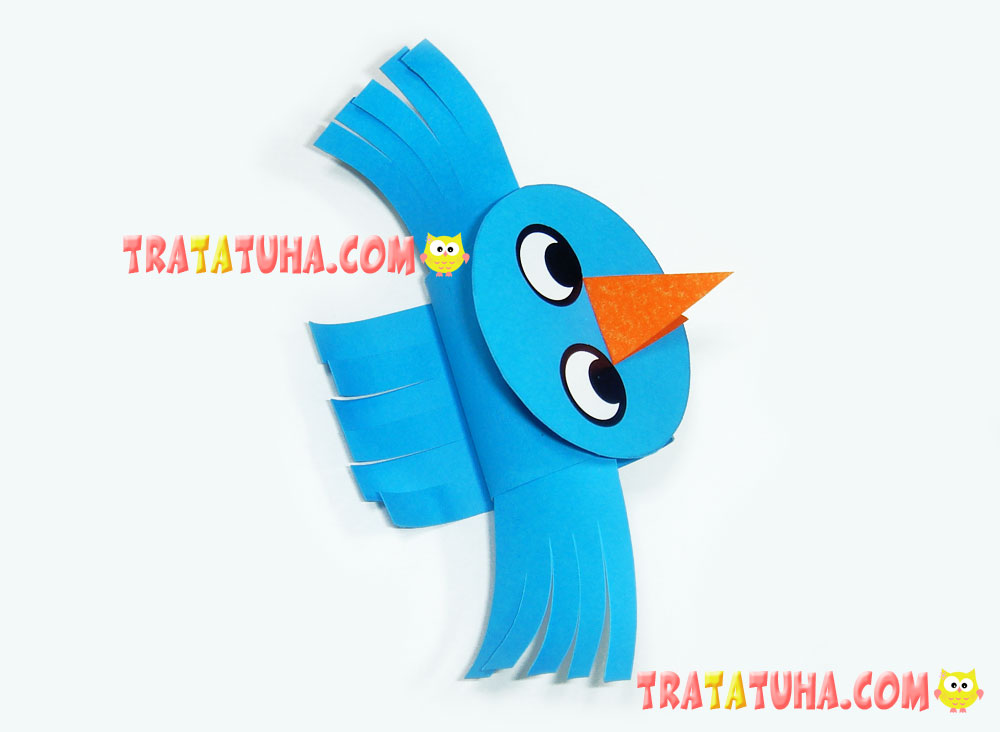
In children’s creativity, the use of paper rolls to create various characters is popular. Paper chick, thanks to this technique, is very simple, ideal for children.
It consists of a roll, which is the body of a bird and a mug-head. As well as strips, from which it is easy to make wings and a tail.
Materials used in the work:
- Blue cardboard (you can also take paper);
- Orange cardboard for the beak and paws;
- Sticky eyes;
- Scissors, glue, compasses.
How to Make a Paper Chick?
1. Cut off a strip of paper from which you will need to make a body, and at the same time a tail. The strip can be quite long, across the entire length of A4 paper. The longer the stripe, the fuller the tail.
2. Depending on the size of the bird, you will need two trapezoidal wings. Basically, it can be small rectangles.
3. Using a compass, draw and cut out a circle for the chick’s head. Sizes are optional, but the circle-head looks better only slightly wider than the strip for the body.
4. From orange (red, yellow) cardboard, cut out two triangles for the paws and one rhombus for the beak.

Stages of Work
Roll a wide strip into a roll so that part of it, on one side, remains unused in this process. Glue the roll with glue. The tail can be much longer than shown. Cut the tail into thin strips, make the same fringe on the wings. Twist it a little with a pencil.

Glue the eyes, beak on the circle-head. Attach the head to the body. Add paws, wings and the paper chick is ready.
Birds Paper – art and craft ideas for all ages.
Crafts for Kids – learn how to make craft at home! Super cute crafts for all age groups!
Related Post: