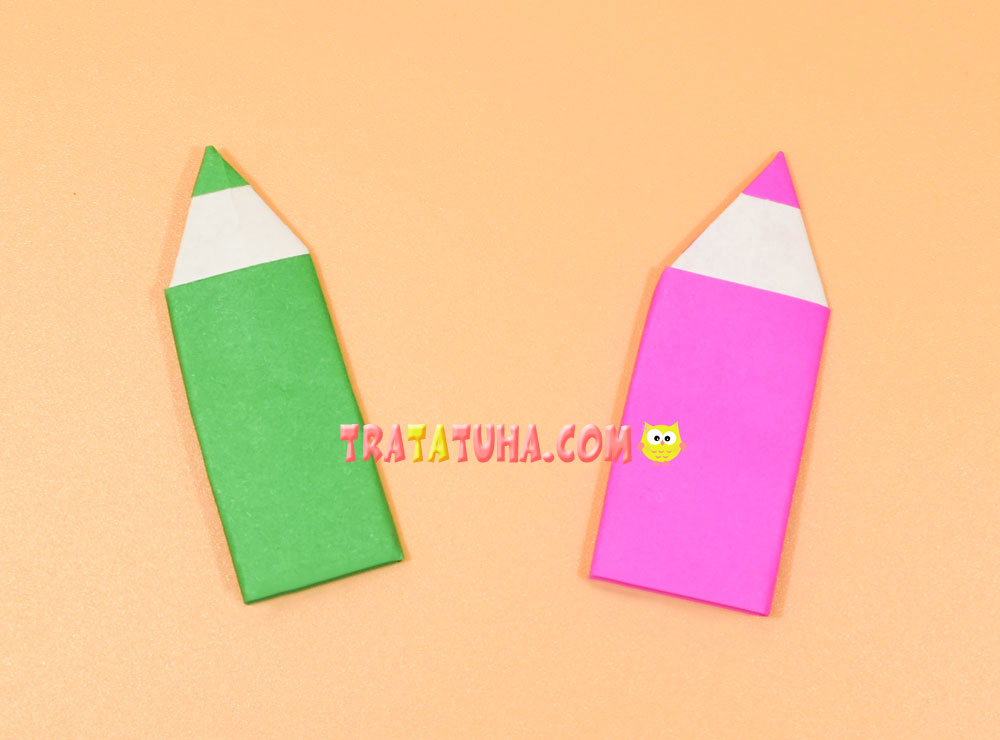
Bright origami pencil with instructions and step-by-step photos. Can be used as a bookmark, collages element, crafts.
What will be needed from the materials?
- Colored paper of any color, one side of which is in color, and the other is white;
- Scissors, ruler, if there is no ready-made origami paper.
Origami Pencil Step by Step
Prepare square paper.

Fold it in half to determine the middle.

Open up. Now fold the paper and fold it towards the middle to mark the fold between the middle and the edge. You can not completely bend, but only press the edge so that the guidelines we need are clear.

Next, bend the bottom of the paper up to the line we marked.

Bend down a small strip from above. Here you can be guided by approximate measures, determining at your own discretion the height of the future pencil lead.

Flip over to the other side. Fold the left side of the paper towards the center, marking the fold.

Bend back and direct the upper right corner to the fold made before.

The top corner should be in the center.

Now fold the left side, aligning it with the right outer side.

Fold up the bottom corners to make a triangle with a straight bottom edge.

Point the left corner to the right, aligning the bottom parts in one line.

Fold the right side to the left.

Fill the corner of the right side into the resulting pocket to secure and give integrity to our product.

Turn over, origami pencil is ready. Varying in size, you can use it as a bookmark, an element of a school composition.
Bookmarks in the form of a corner, see the selection — origami corner bookmark.

Related Post: