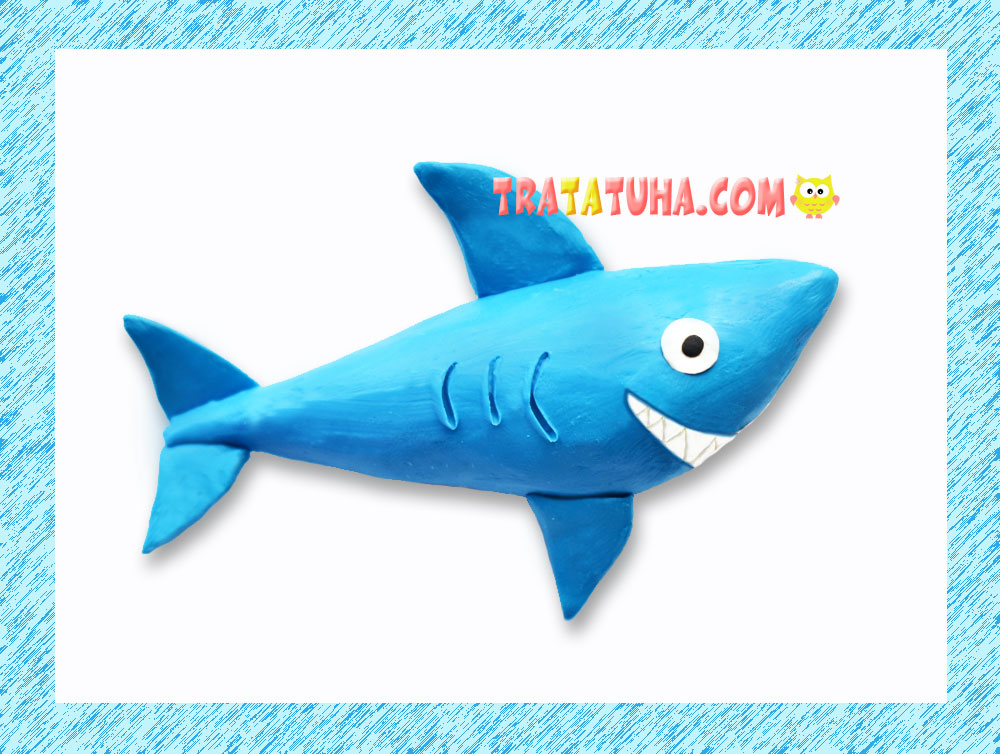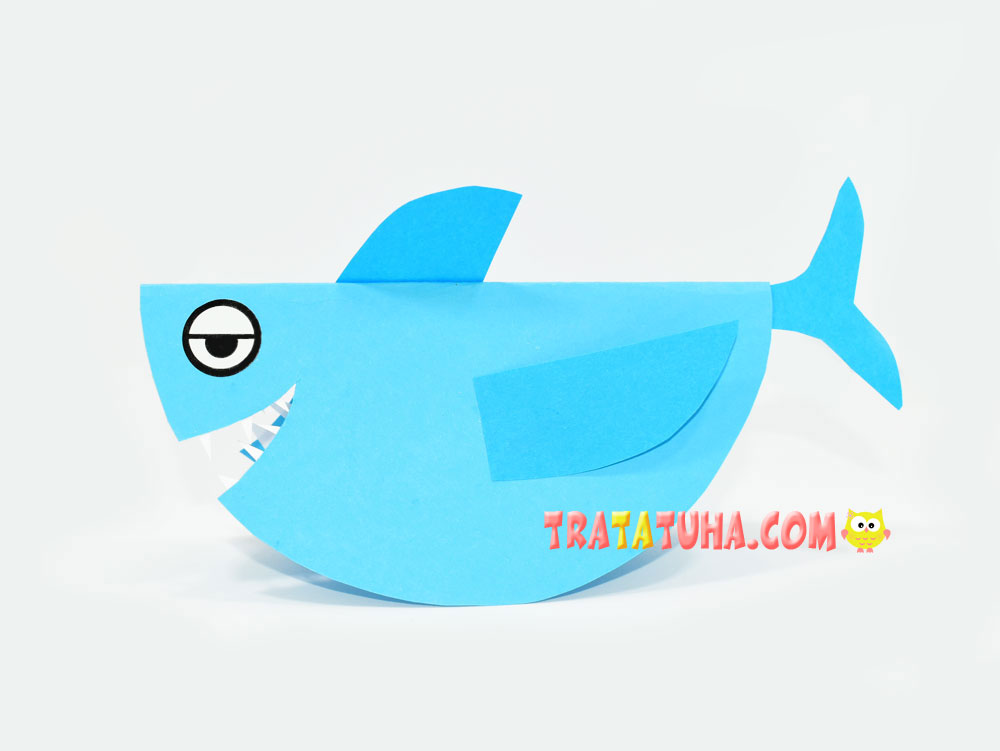
A very simple paper shark step by step. Consists of a paper circle and small details – fins. A good option for children’s creativity.
Materials for work:
- Colored cardboard, for fins you can take colored paper of a similar shade;
- White paper for teeth;
- Sticky eye (you can simply draw it with a felt-tip pen);
- Compasses, scissors, glue.
Paper Shark Step by Step
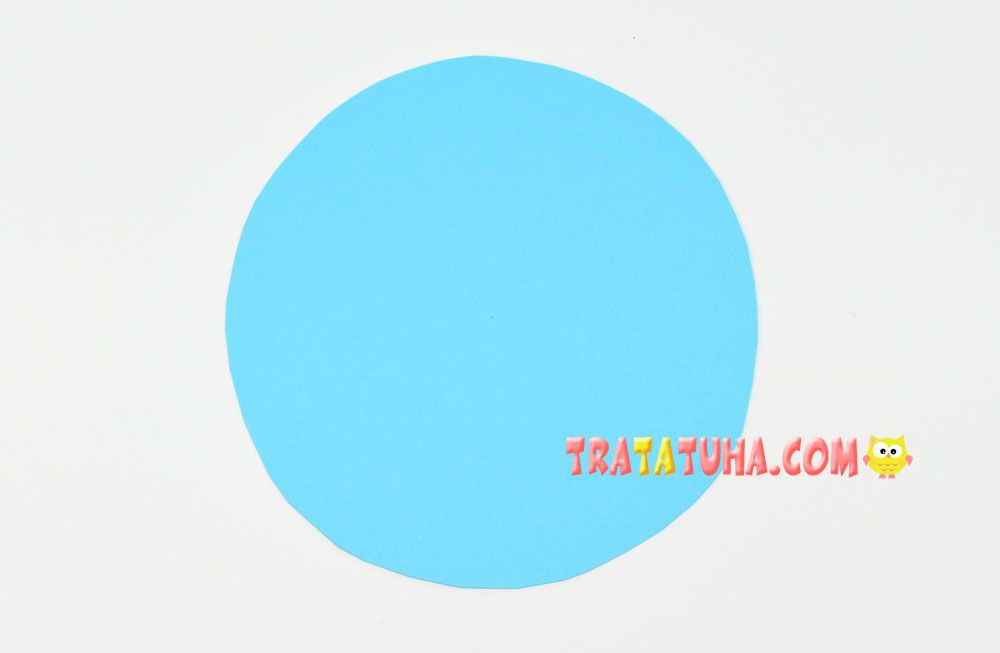
Draw a circle on the cardboard using a compass. Dimensions at your own discretion. Depends on how big you want the shark. Cut out a round piece.
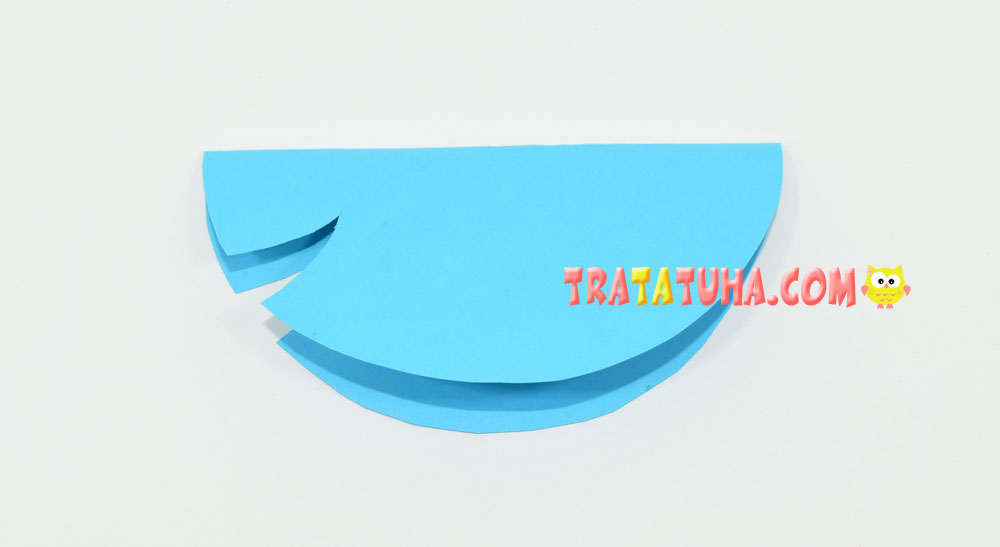
Fold it in half.

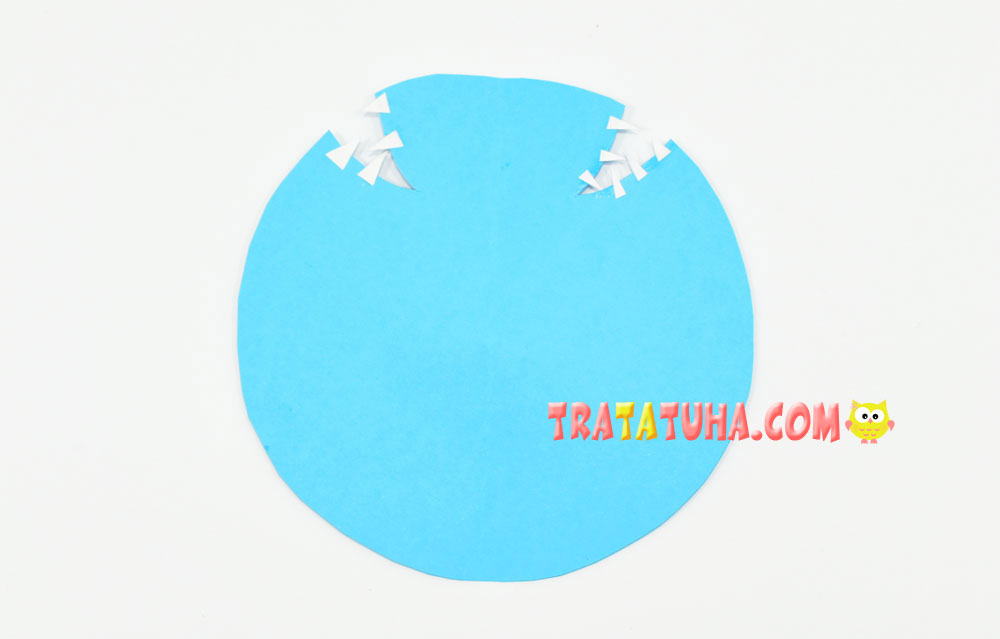
On the side, cut a small triangle, slightly curved upwards, to make a mouth. You can first display it with a pencil, and then cut along the contour.
Open the circle. Cut out a few small triangles from white paper. Glue them along the edge of the cuts. Get predatory shark teeth.
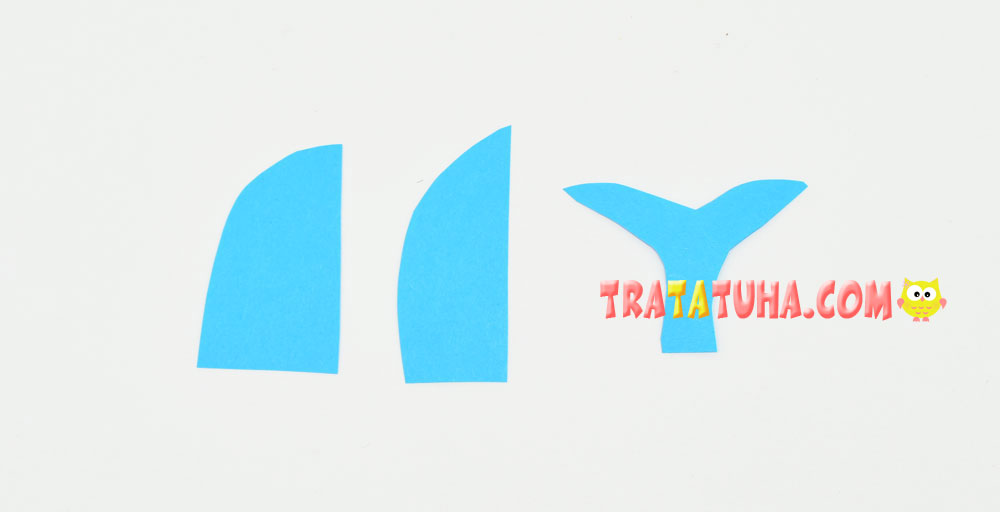
Prepare the fins: one forked caudal, one for the back and one for the lateral area.
Fold the circle in half, glue an eye (or two on each side) and fins on the sides and back.
That’s it, the paper shark is ready. Thanks to the rounded bottom area, it can wiggle in a fun way that kids will surely love. And the cardboard will give the craft stability, will help ensure that the parts of the circle do not move apart.
The craft is very simple, children can quickly do it in a class to familiarize themselves with the world around them.
Even more interesting ideas in the selection are paper crafts.
Related Post: