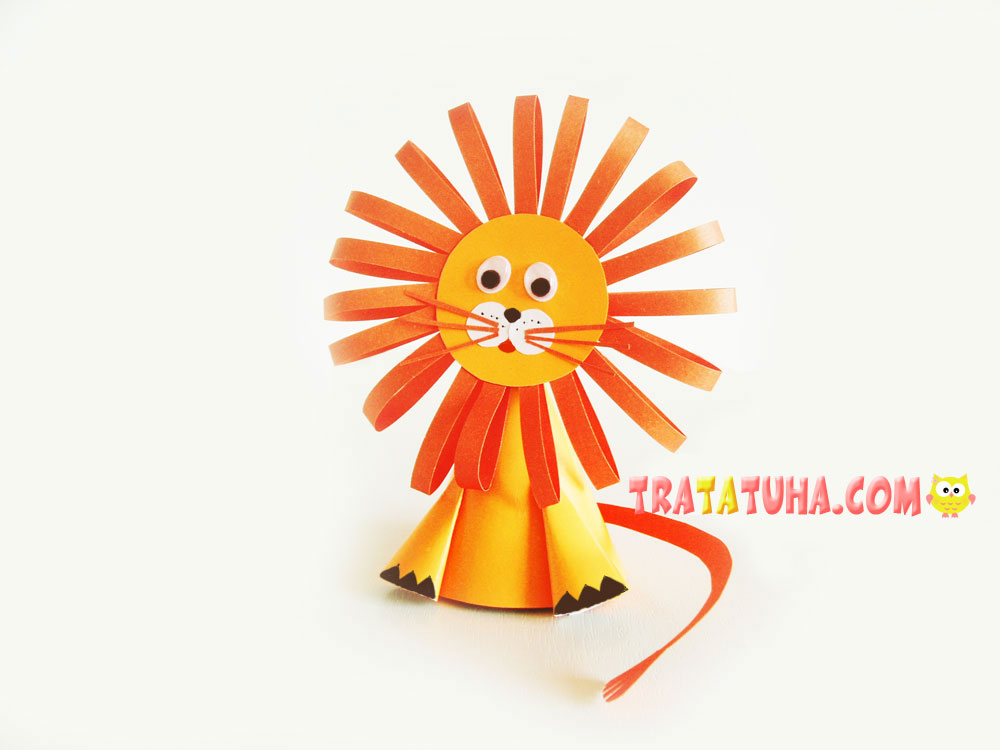
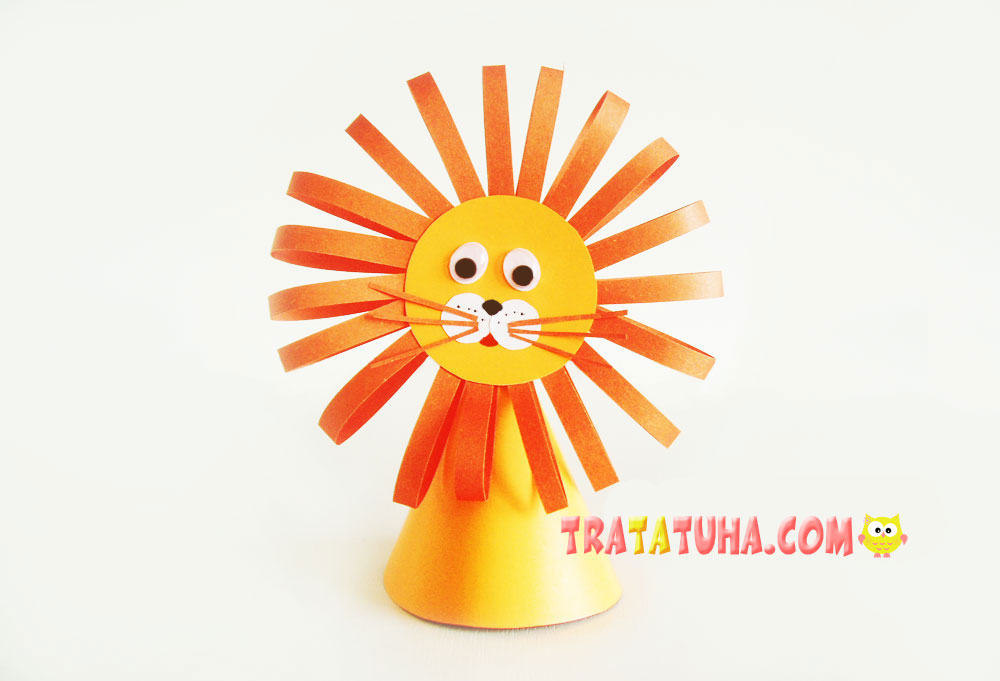
This paper lion combines two popular craft-making methods – cones and strips. The lion’s body and paws are made of cones of various sizes, and the mane is of thin strips glued into a loop. A cute craft; however, it’s the one claiming attention, patience, and diligence. And help of adults, perhaps.
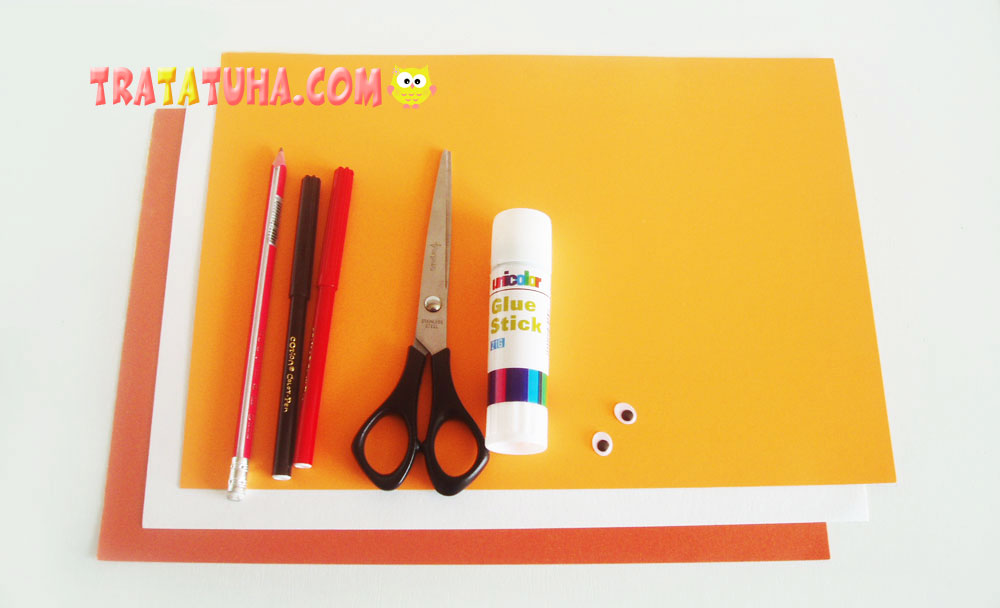
What will you need for the craft?
- Orange cardboard for a body and paws;
- One shade darker orange paper – for a mane and a tail;
- A bit of white paper to make circles for a snout;
- Moving eyes;
- Black and red felt pens, a glue stick, scissors, a writing pencil, compasses.
Paper Lion of Cones and Strips Step by Step
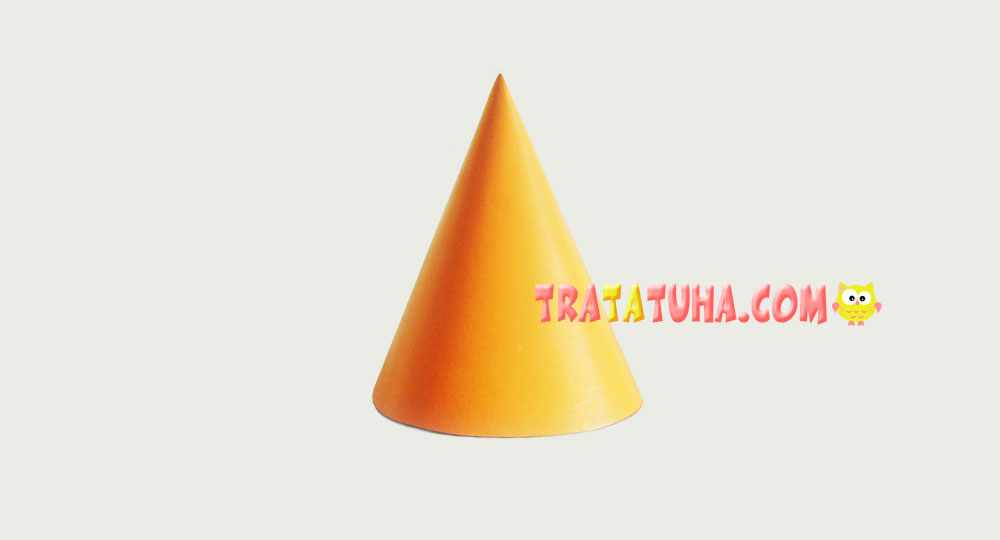
Since the lion’s body a cone, it’s the first part we should make. For this purpose, cut out a circle cut it in half. We will need only one half for the craft.
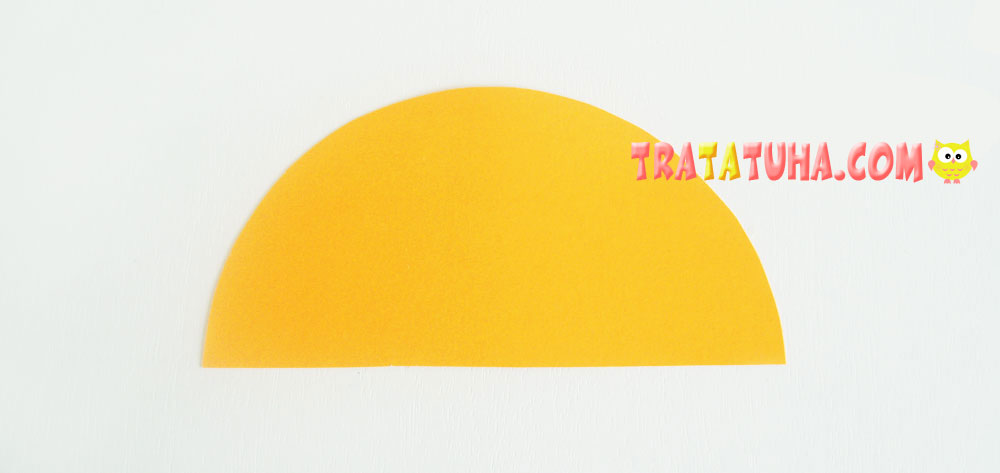
Twist it to make a cone, glue the sides together to get a cone- shaped lion’s body.
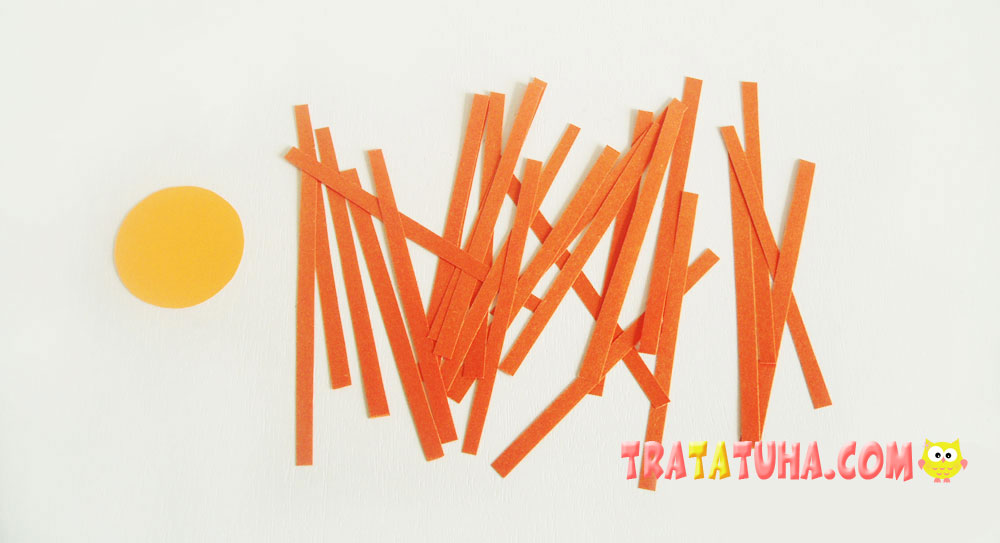
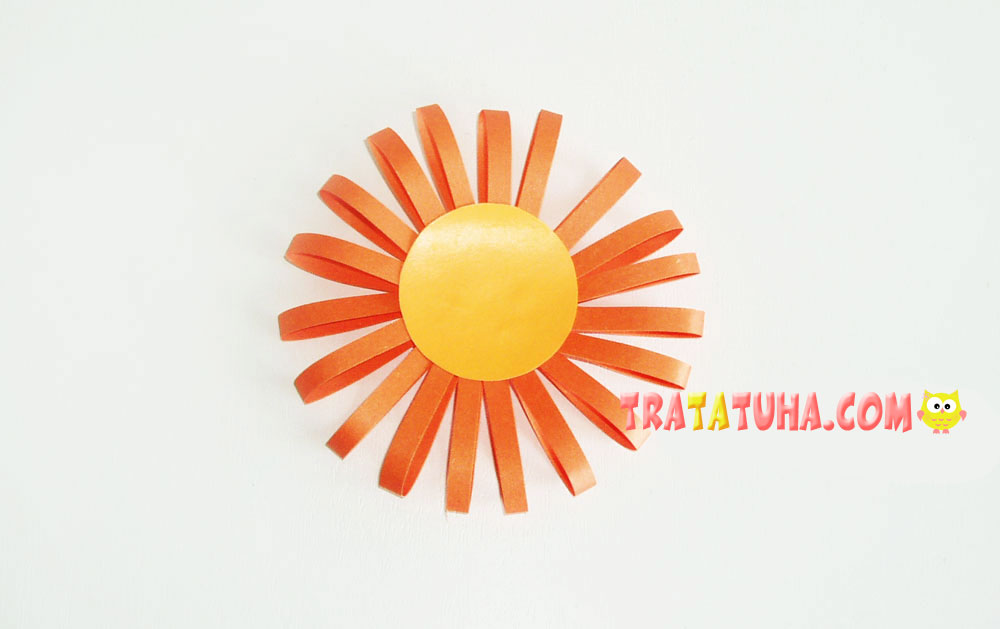
Now, it’s time to make the predator’s head with a mane. To make it, cut a circle out of orange cardboard; take orange paper and cut it into a plenty of thin strips. Their length and width depends on the lion’s height and the size of its head. Therefore, fold the strip in half and try it on the head. Check, whether the mane is too long or too short. And only after you have decided on the strips length, you can cut them.
Glue the tips of all the strips together, trying to avoid a sharp fold in the middle. It would be perfect if there is no fold at all, since drop-shaped rings and, accordingly, the lion’s mane will look much more attractive.
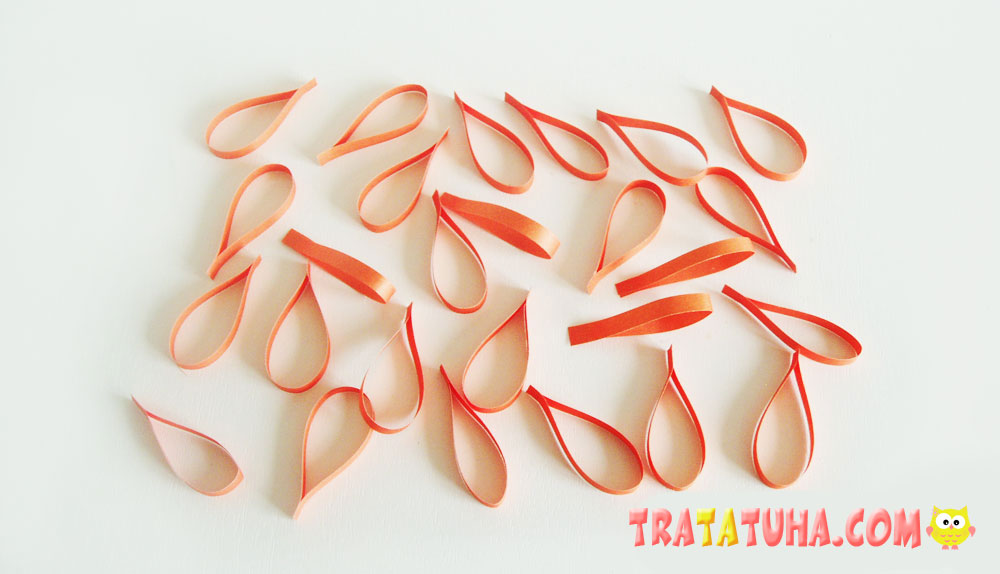
Stick the strips one by one around the orange cardboard circle. If you have single-sided paper, you should attach them to the back side. You can cut out another circle and glue it atop the first one at the intersection of strips, but this is optionally.
Glue the lion’s eyes, snout, and whiskers made of the thinnest strips of orange or brown paper. Draw a nose, a mouth, and dots on the snout with a black felt pen. Stick the head to the cone-shaped body. We have already made an amusing paper lion.
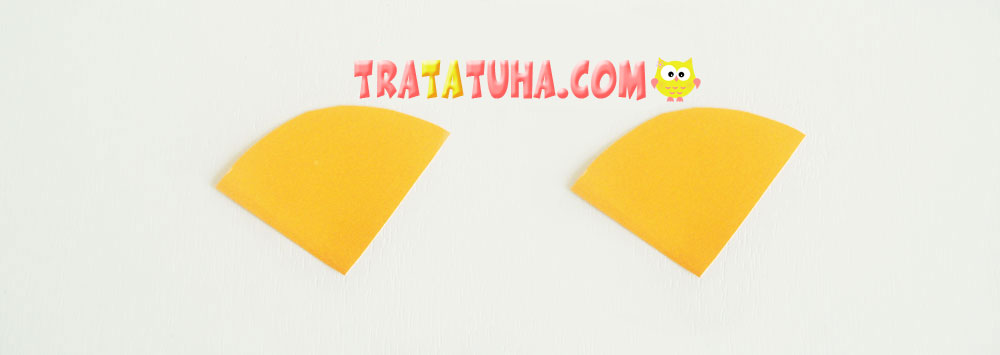
But we still need to make paws and tail for it. The paws are also made of cones, but smaller ones. We will need one part of a circle for them. In other words, draw a small circle, divide it into 4 parts, and cut two of them for paws.
Twist them to get thin cones and glue them together. Cut a long curvy tail with a switch on the tip out of orange paper. You can slightly cut the switch with scissors or draw small lines with a felt pen.
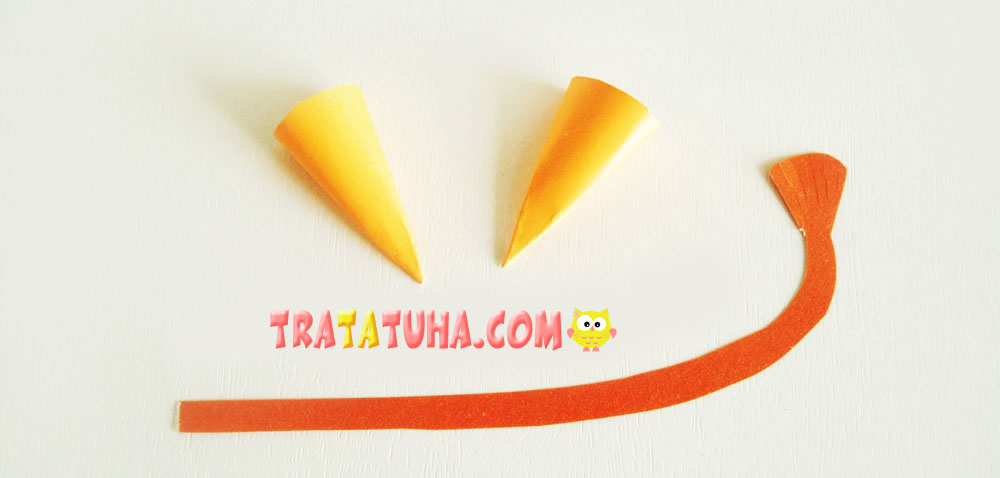
Glue the cone-shaped paws at the lion’s front side and draw three triangles on them – they will make claws. Stick the tail at the back; since it is long, all its beauty should be seen in the front.
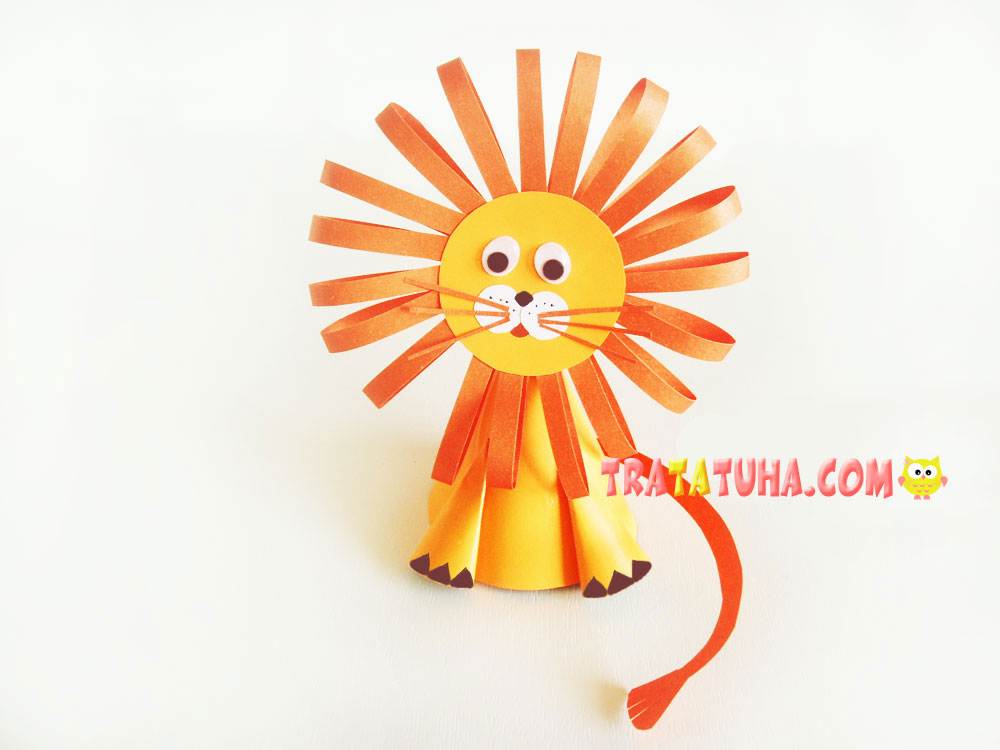
That’s all, this cute paper lion resulted from such interesting and diverse activities.
Many other ideas in the collection of Paper Animals Craft.
Crafts for Kids – learn how to make craft at home! Super cute crafts for all age groups!
Related Post: