Follow this step by step guide to craft a funny pinecones hedgehog. Provided there are all the necessary materials, the whole project will take you no longer but 15-20 minutes.
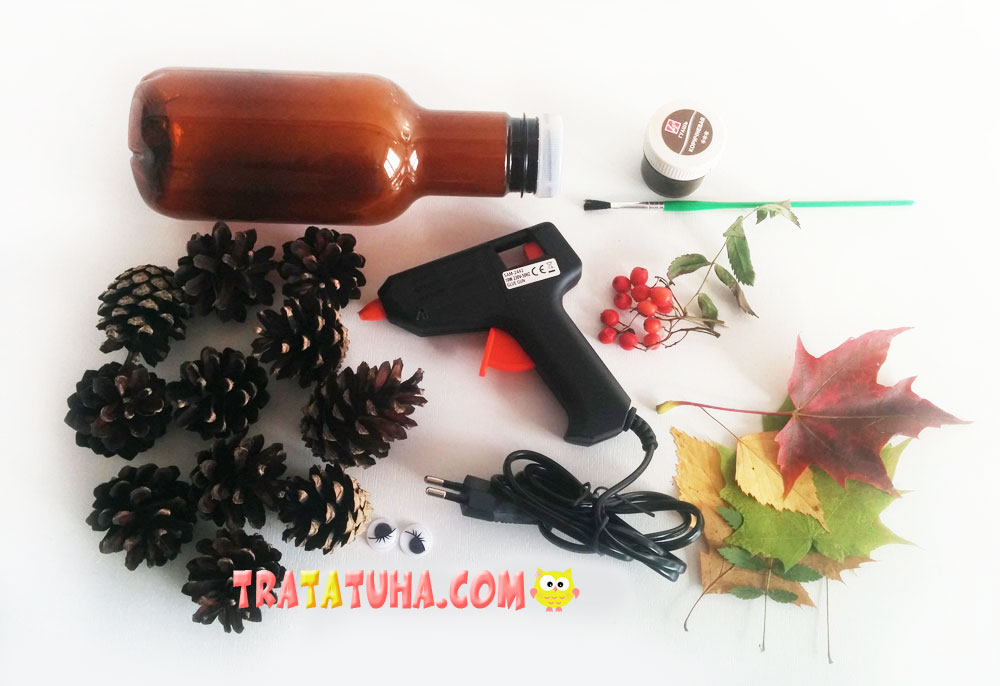
For this craft, you will need to prepare:
- Pinecones;
- One plastic bottle (brown, if possible);
- A hot glue gun or a hot air gun;
- Brown gouache or play dough;
- Plastic toy eyes;
- A brush;
- Leaves, ash berries for decoration;
- Double-sided or one-sided adhesive tape for fixing the decor.
A hot glue gun is ideal for working with cones and plastic because other glues will not be suitable for such purposes. I tried CA glue and superglue, and they both failed to fix the cones as needed. Since cones have a hummocky, often uneven surface, only a small part of the cone can be in contact with the plastic, so ordinary glue cannot hold the cone properly. Therefore, it is better to spend a little more money and buy a hot air gun, which will allow you to make any crafts with cones, plastic, and other materials. Such a device fixes everything very quickly and solidly.
Pinecones Hedgehog Step by Step
How to prepare the pinecones
Once the cones are collected, they need to be processed. Wash them thoroughly in warm water and soak them in the vinegar and water solution in a proportion of 1:1. Then let the cones dry well. This all applied to the already ripe (open) cones. If the cones are still raw (closed), you may omit the vinegar treatment but just wash them properly in quite hot water. Then you should take one of the following measures:
- Boiling the cones for 15 minutes;
- Baking the cones for one hour in an oven;
- Heating the cones in a microwave oven.
At my time, I tried each of the abovementioned methods. But I liked only the one where the cones are placed into a microwave oven. If the cones are boiled, there is too much steam and odor released, not to mention a wholly spoiled pan.
Treating the cones in a bake oven takes too much time, and there is also a high risk to over-fry them. But, the microwave gave the perfect result. I covered a plate with several paper towels, and I put my cones on it. Next, I placed the plate with cones into my microwave and switched it on for one minute. Then, I opened the microwave’s door, let the steam off, turned the cones upside-down and put them back into the microwave again for one minute. I repeated that procedure nearly 7-10 times unless my cones got completely open. But anyway, it is much quicker when messing with a microwave and a pun.
How to Craft a Pinecones Hedgehog?
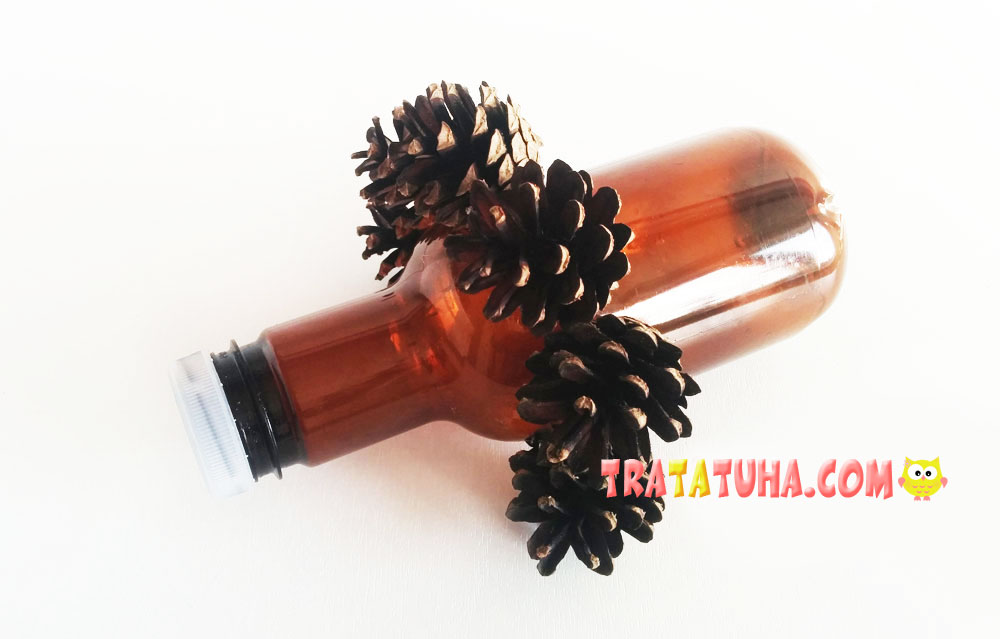
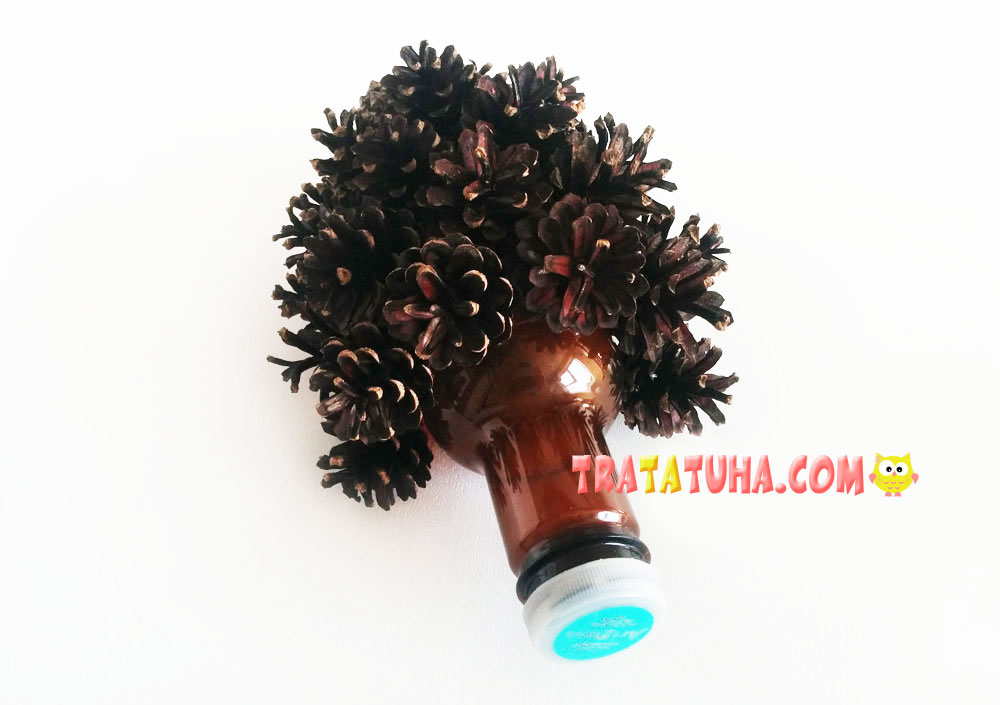
If the necessary requisite is ready, it is time to proceed directly with crafting the hedgehog. Take the most attractive cones of the same shape and size to be used in the front, that is, closer to the hedgehog’s face.
Take a cone and attach it to the bottle to see in which point the cone will touch the plastic because it is exactly this area where the glue must be applied.
Switch a hot glue gun on, wait for 5 minutes, then apply a small amount of glue on the cone’s side and quickly press it to the bottle on top.
In the same matter, glue up the whole first raw around the hedgehog’s face.

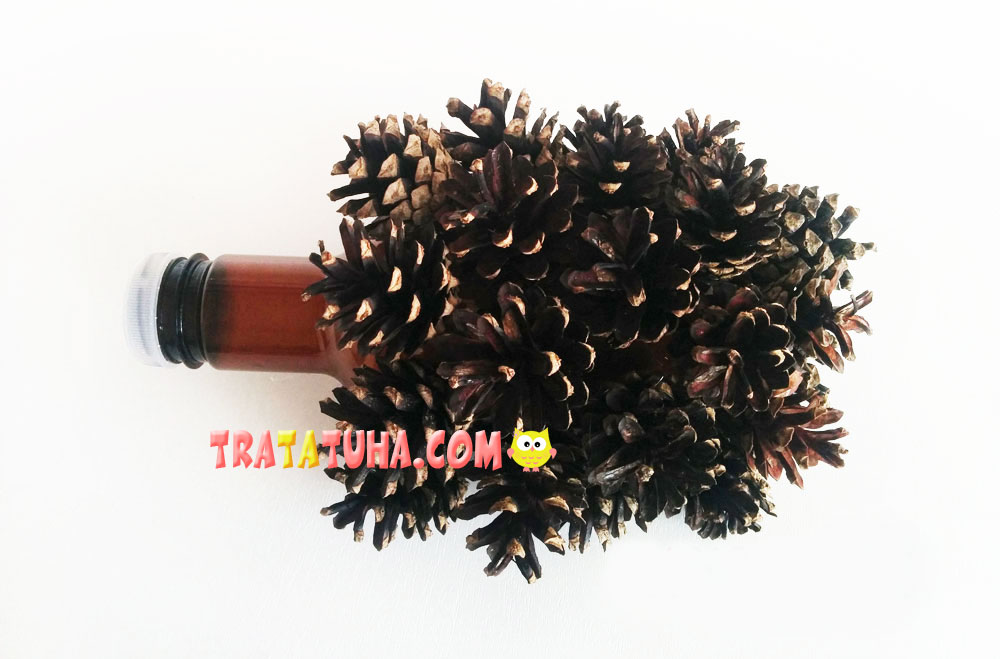
Process the second raw in the same manner, tightly pressing the cones to each other. Try to pick cones relatively of the same size and shape.
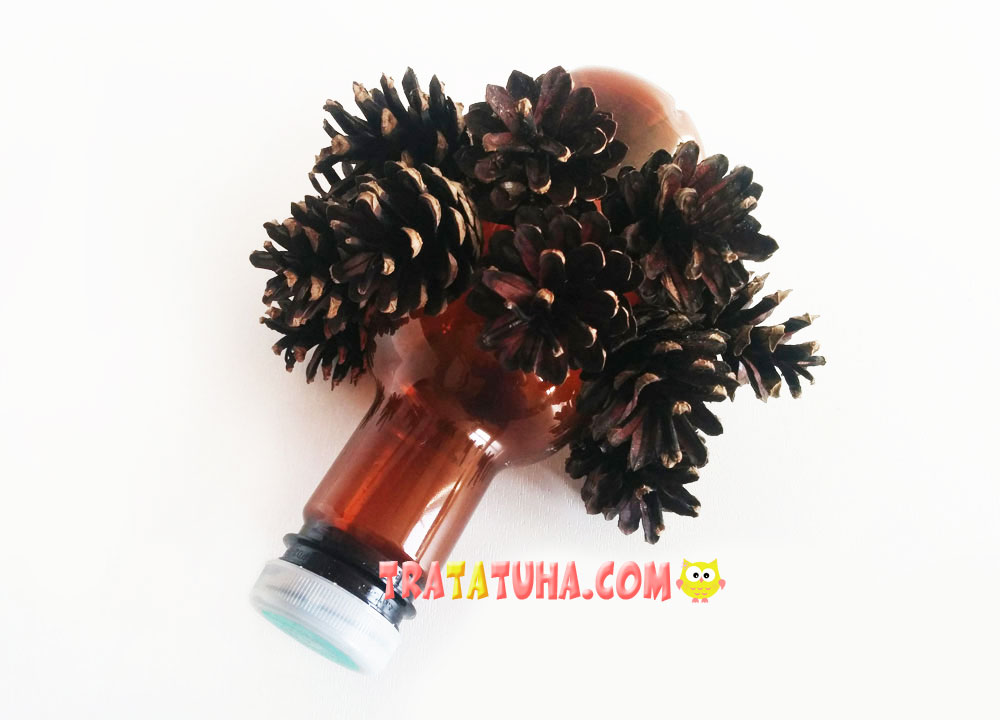
Glue up the whole bottle with cones. Here you do not have to glue the cones sidewise – and it even will not work out. Most often, the cones will be placed in an upright position.
Side view.
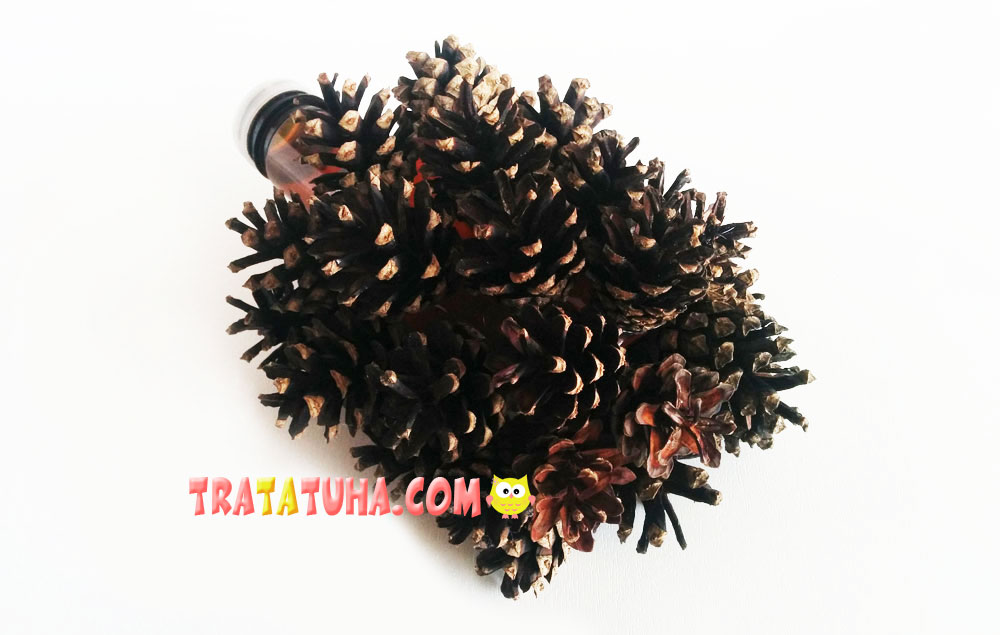
The back part of the plastic bottle glued with pinecones.
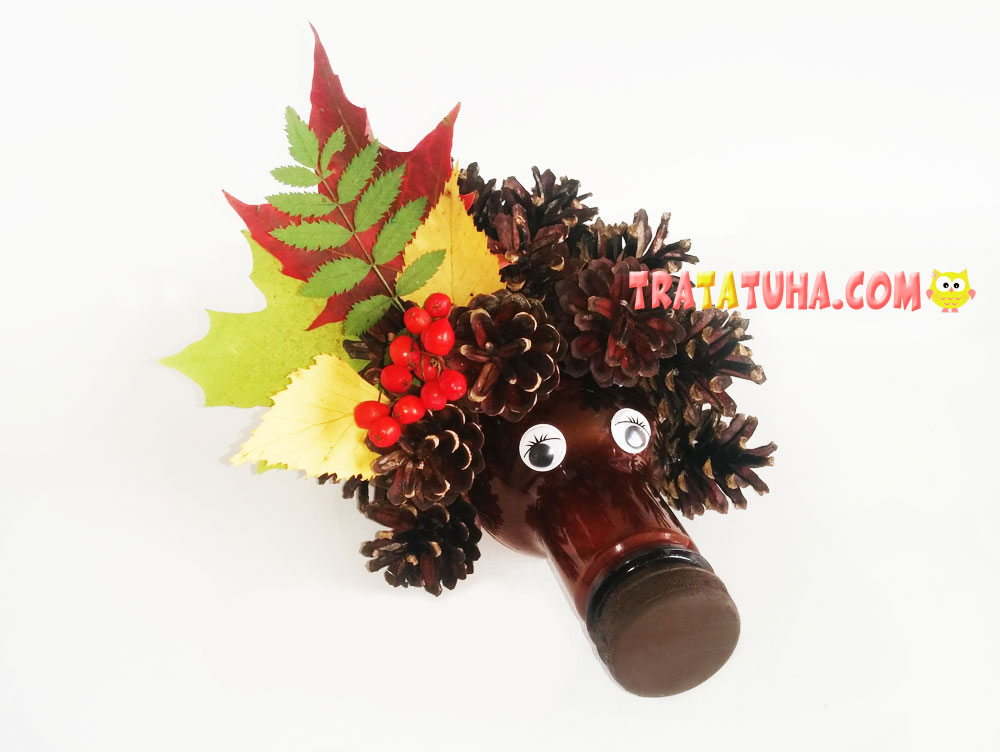
The main work is ready. Now it is time to switch your fantasy on and endow your hedgehog with a character.
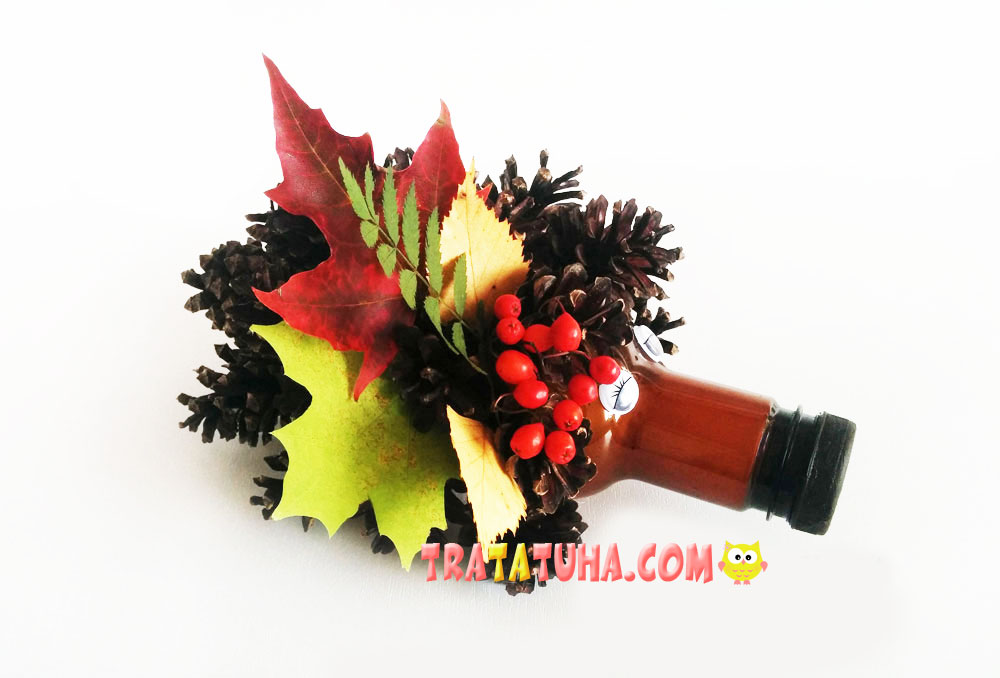
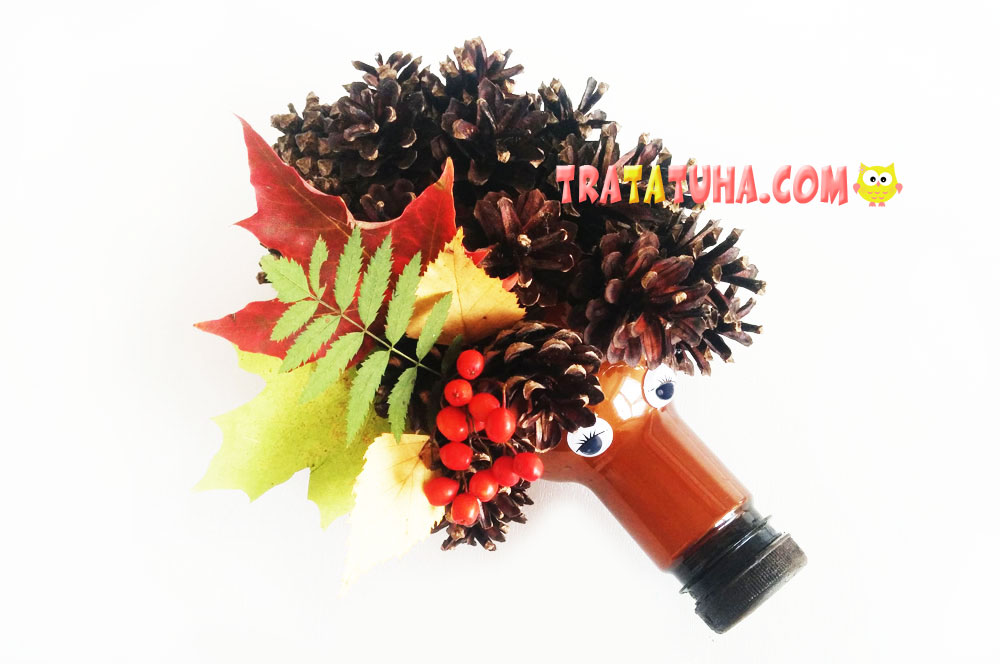
My daughter and I decided that our hedgehog should be a lady. That is why we glued toy eyes with eyelashes. You can make the eyes from paper or play dough. Then we painted the bottle’s cap with gouache, but you can cover it with brown play dough, as well.
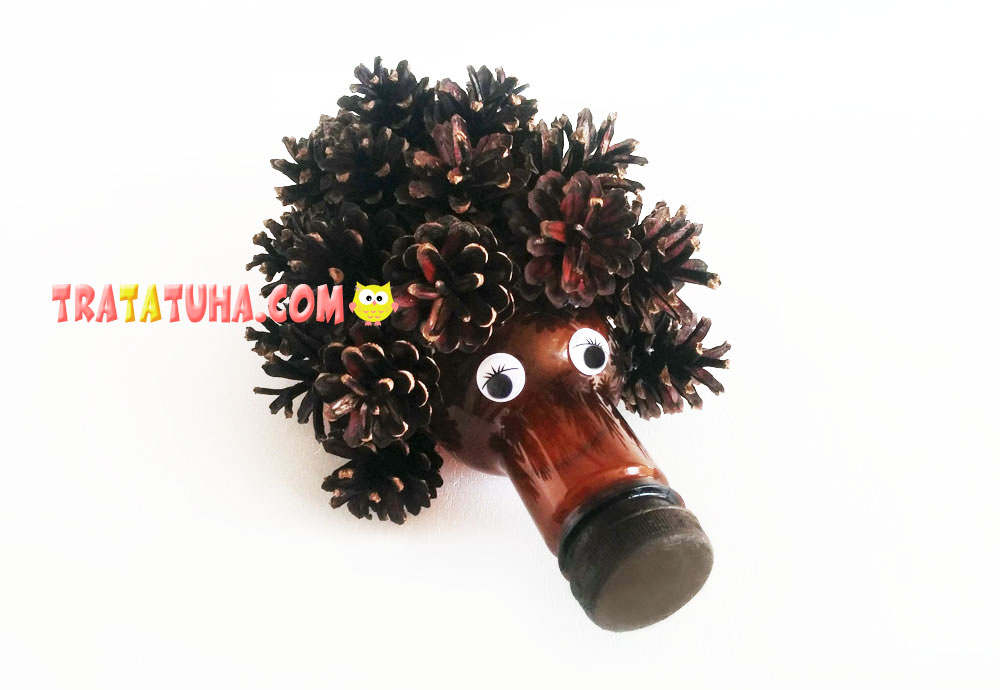
And on the hedgehog’s side, we applied ash berries and several leaves using adhesive tape. The ready handicraft is quite durable, and you can glue it to a small board or foam.
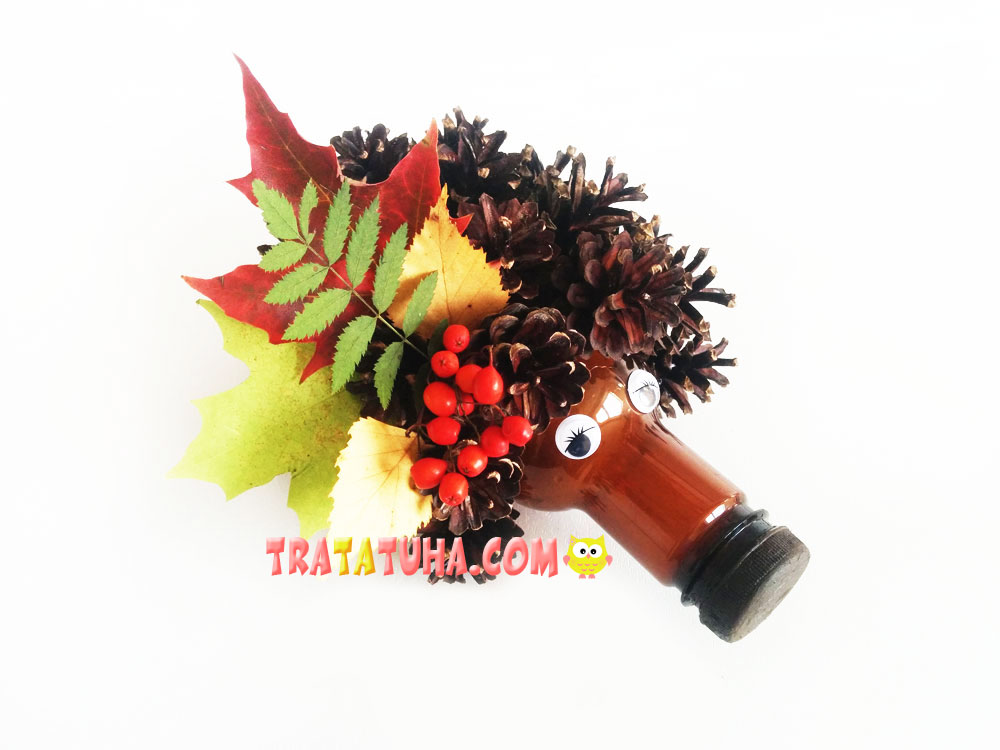
The funny hedgehog, namely a hedgehog lady from pinecones and a plastic bottle is ready. It is not a big deal it the nose seems a bit protruding – the lady is anyway beautiful and elegant.
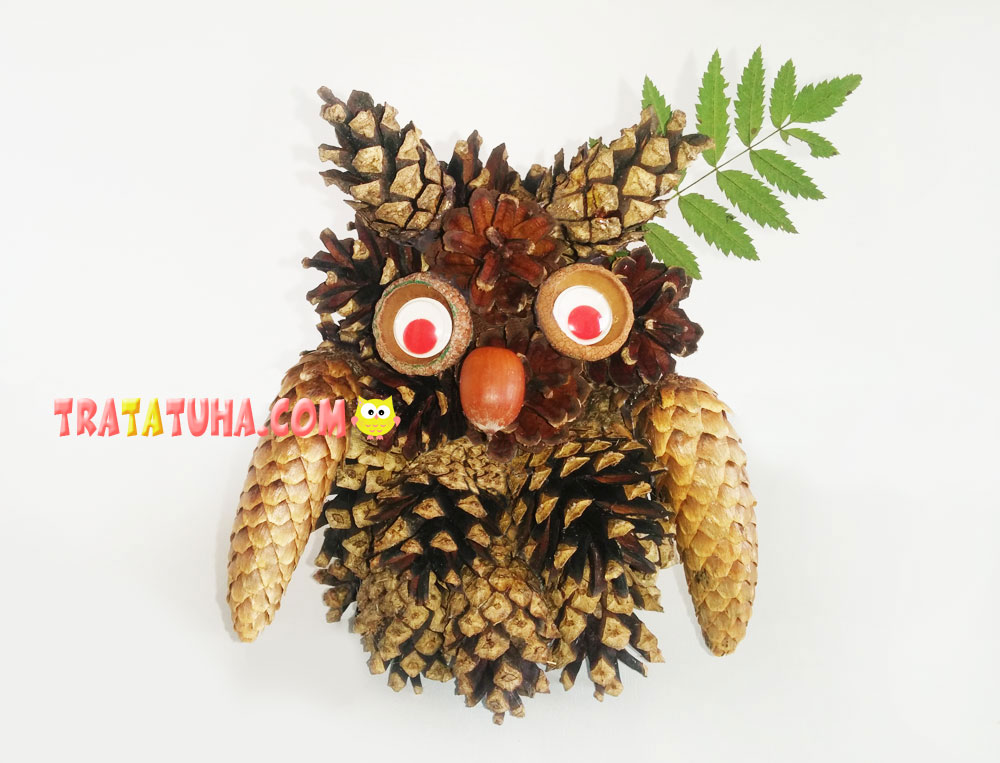
Another good option for an autumn craft is a owl of pinecones.
See more ideas about Pinecones Crafts.
Crafts for Kids – learn how to make craft at home! Super cute crafts for all age groups!
Related Post: