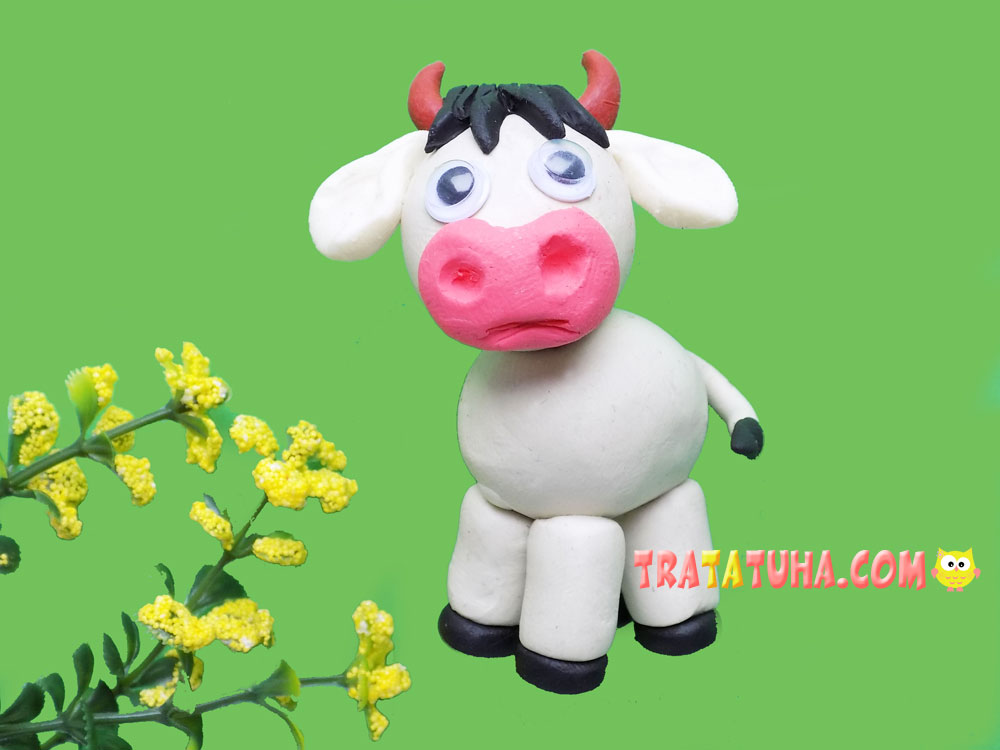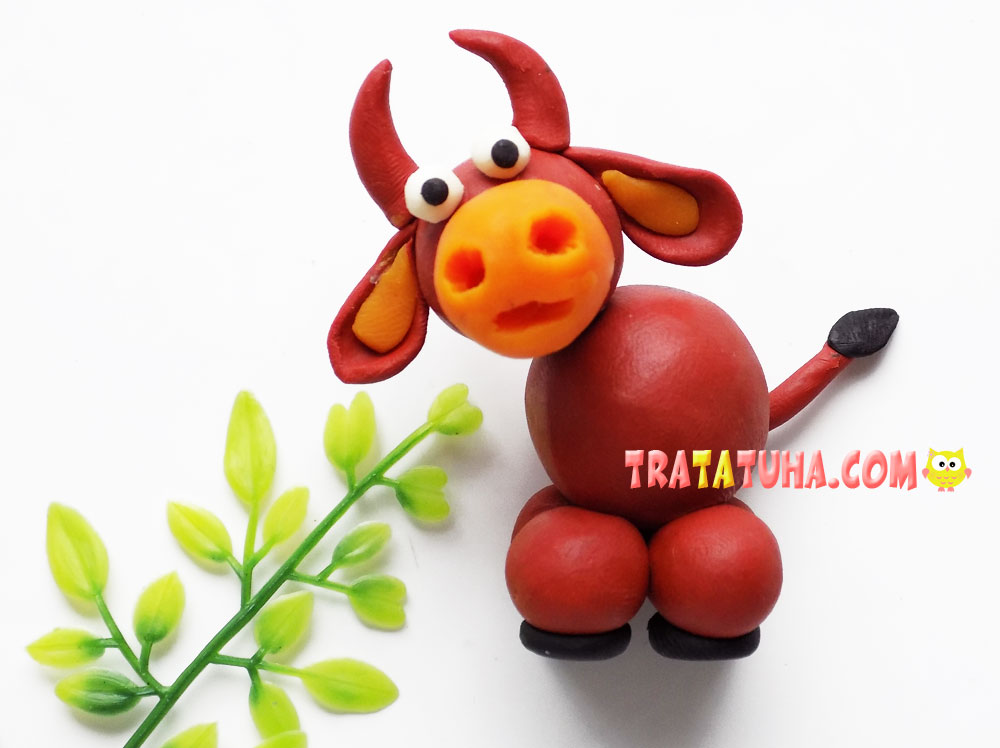
This tutorial is a funny clay calf, which consists of several round parts. As a result of simple step-by-step actions, your child will also have such a craft.
To sculpt our crafts, we will prepare:
- a set of clay;
- stack
- match.
Clay Calf: A Step-by-Step Review
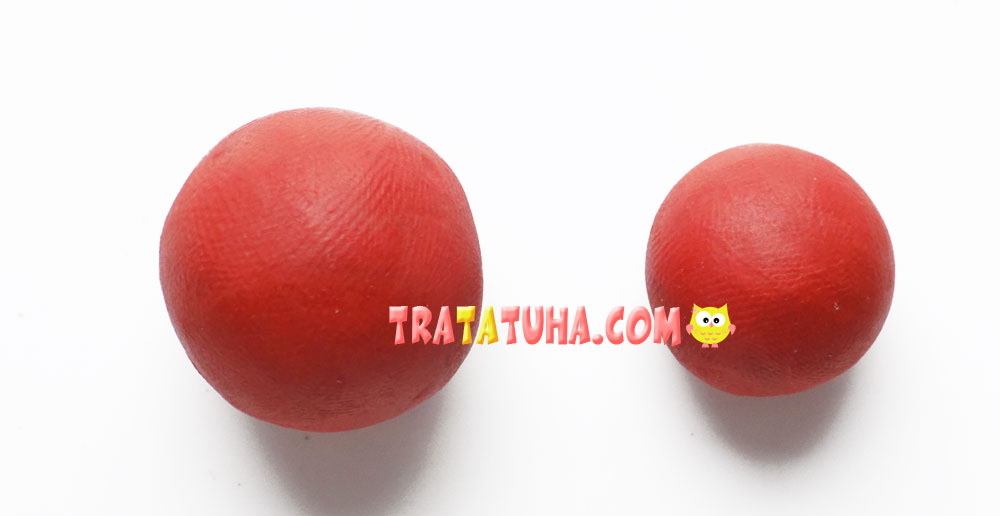
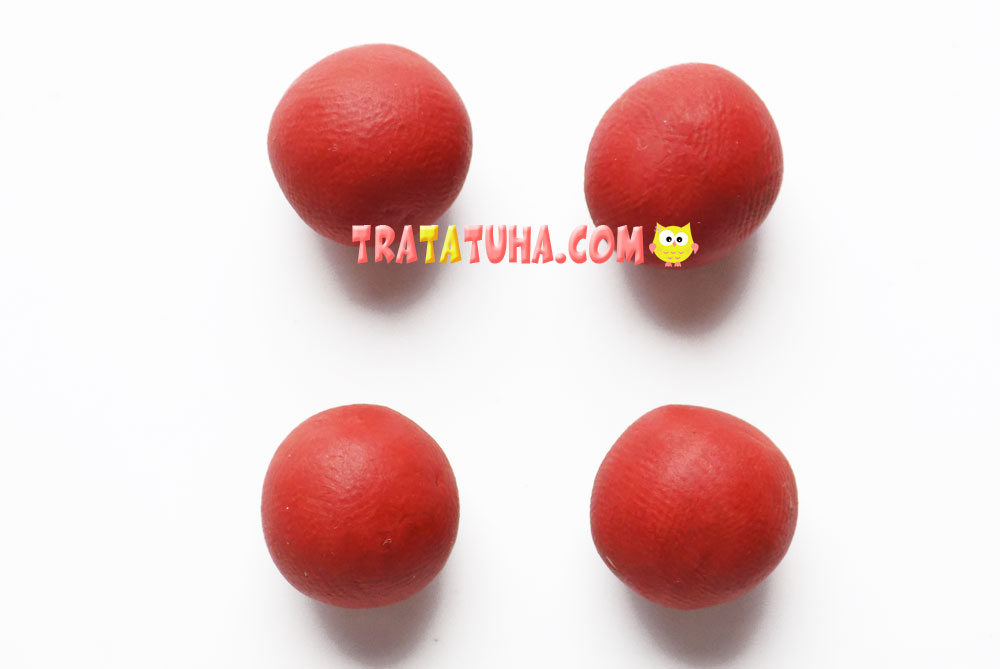
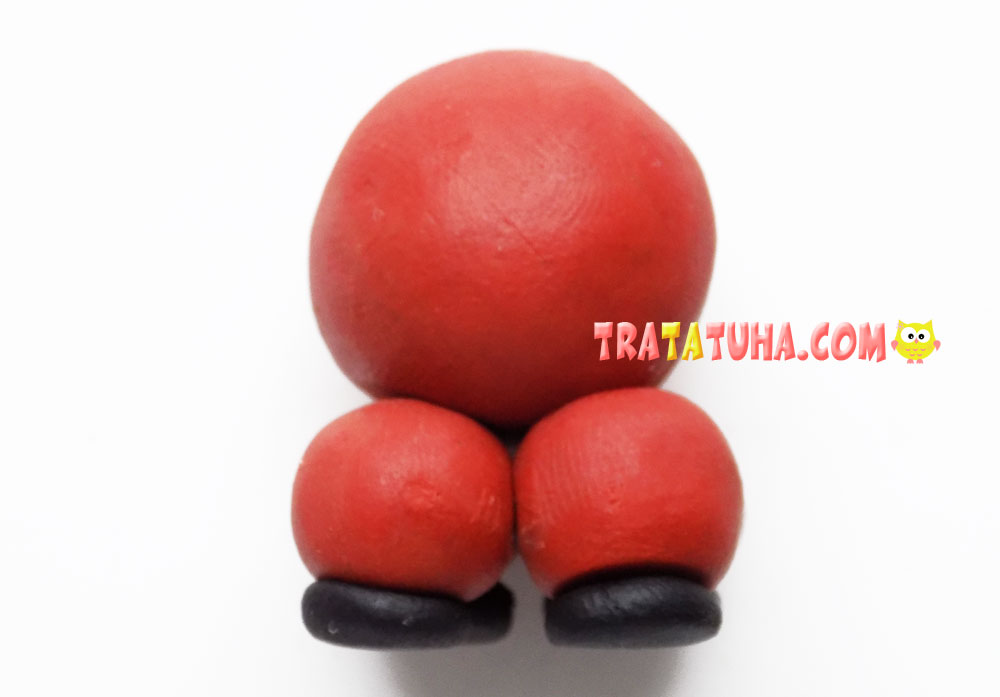
First, roll up a couple of balls from brown clay. We need them to create the head and body of the future calf.
Another 4 small balls are required for the legs of our animal.
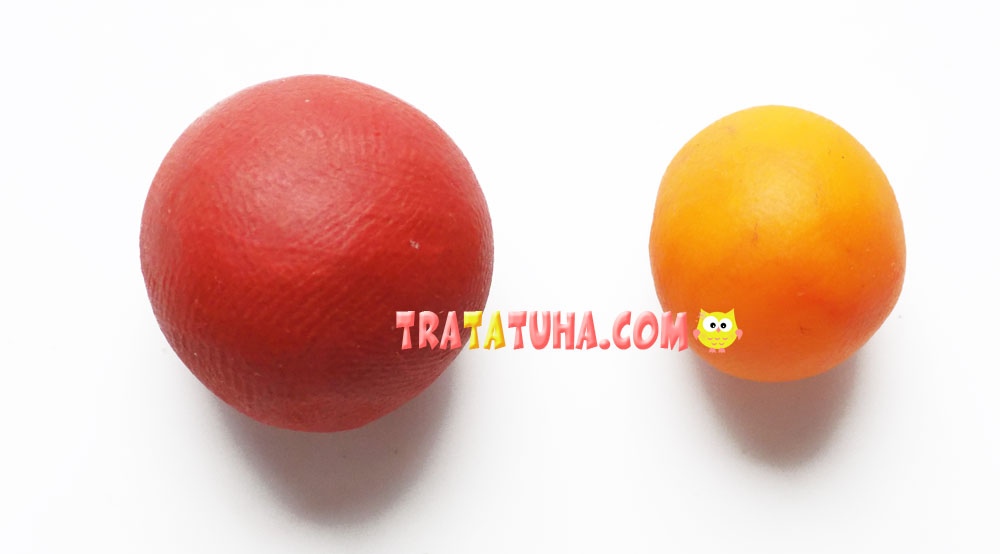
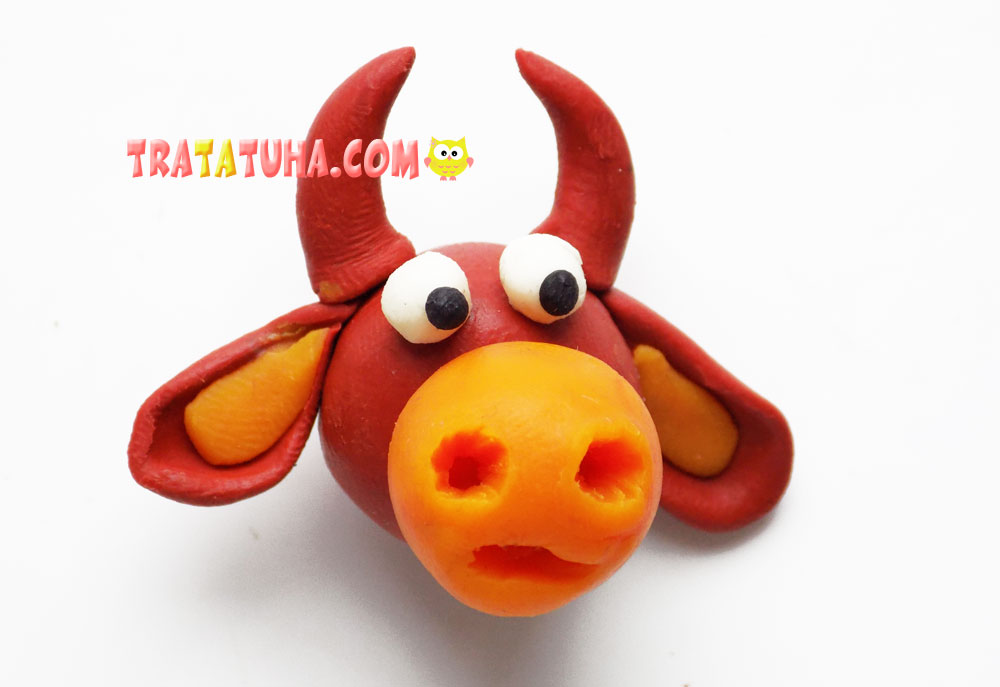
Additionally, for the muzzle of the calf, you need to roll a ball of orange clay. In size, it should be slightly smaller than the brown blank for the head.
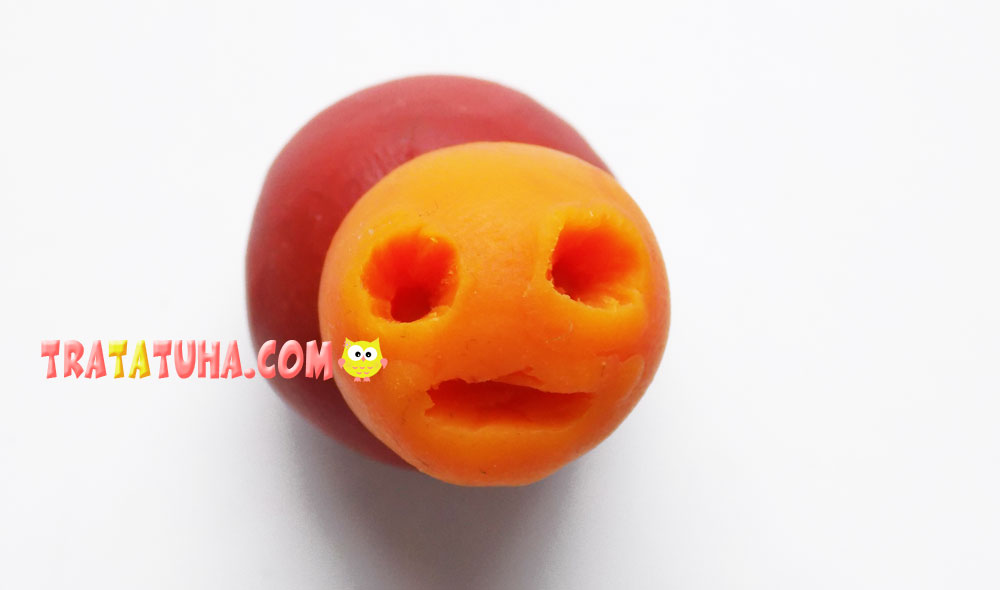
Slightly flatten the orange ball and combine it with brown. After that, with the help of a match, we designate the nostrils and mouth of the calf.
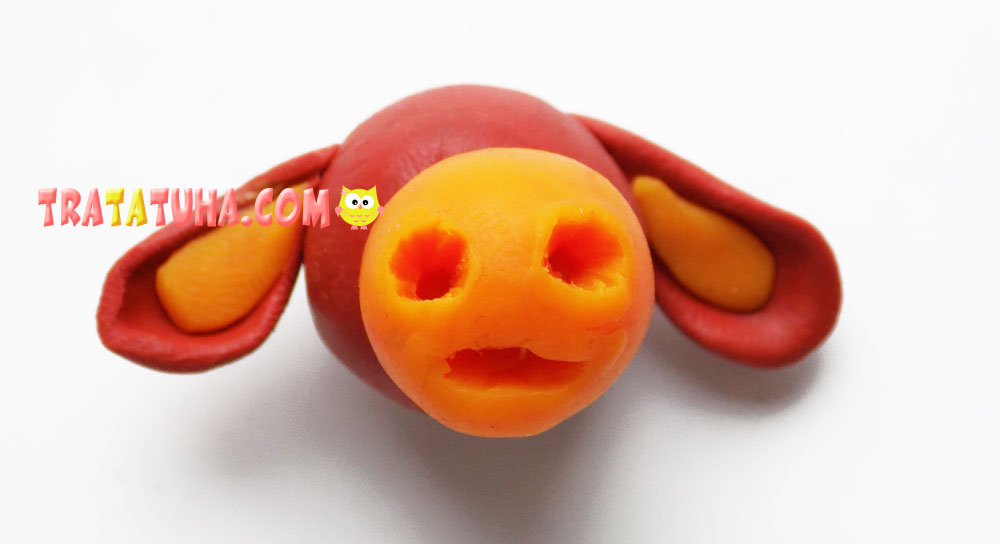
We fix the ears on the sides of the head. We sculpt them from brown clay, and add details of orange clay to the middle.
We fix brown horns on top of the head. And from small balls of white and black clay we make eyes.
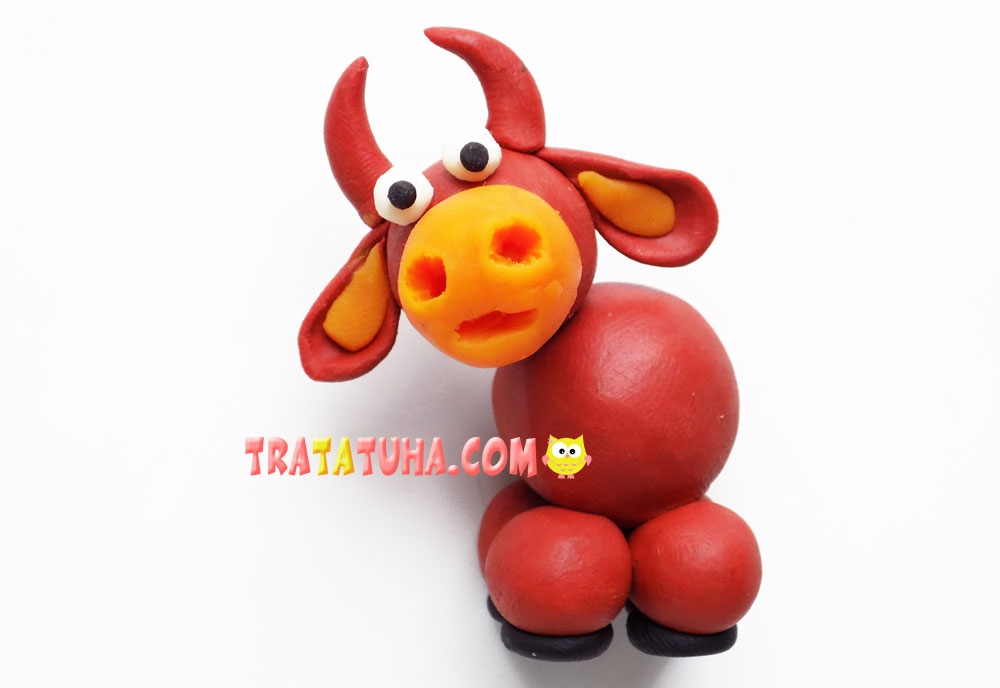
Now you need to connect the legs to the body of the calf. But first, on the legs (small brown balls), we must fix the hooves made of black clay.
Next, we connect the body together with the head. To do this, you can use a match or a toothpick. We break off a wooden stick of the required length, insert it first into the body, and then fasten the head.
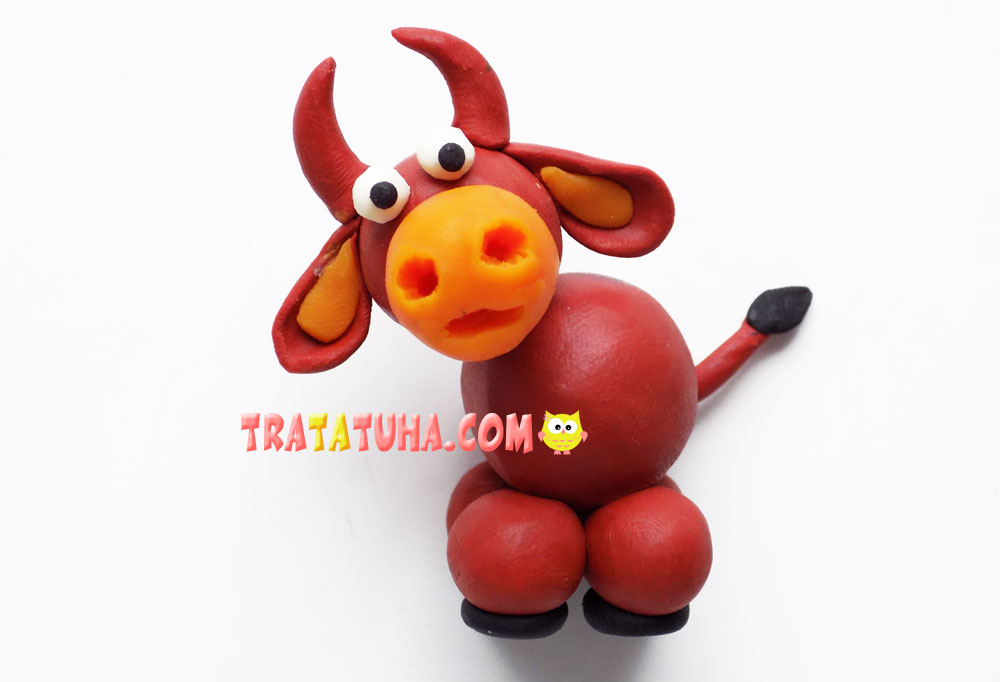
Finally, let’s add the calf’s tail. We will make it from clay of two colors — brown and black. We roll the base in the form of a flagellum from brown clay, and we need black to form a small brush at the tip. We fix the resulting tail on the body. Clay calf is ready.
More collection ideas:
Related Post: