Clay turtle for children’s creativity. Step by step molding. At the beginning of the lesson, you can talk with your child about the varieties of turtles. Pay attention to the fact that these animals can live both in water and on land.
To sculpt such crafts, we will prepare:
- green, brown clay;
- plastic stack;
- decorative eyes.

Clay Turtle Step by Step
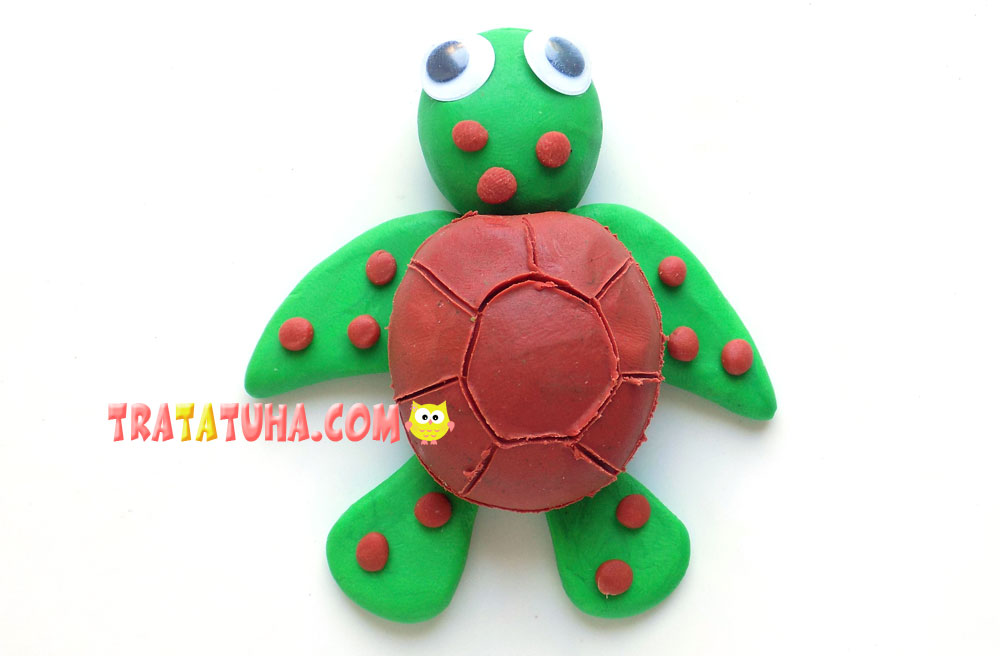
First, we will take brown clay and make a large ball out of it, which will become a blank for the shell of the future turtle.

Then we use green clay, we roll a smaller ball out of it, they will be the basis for the turtle’s head.

4 more balls need to be rolled out of green clay, of which we will make limbs. Please note that these balls should be of different sizes – 2 of them are slightly larger, while others are smaller in diameter.

Now we give these balls the desired shape, flattening them. So we made fins for a water turtle.

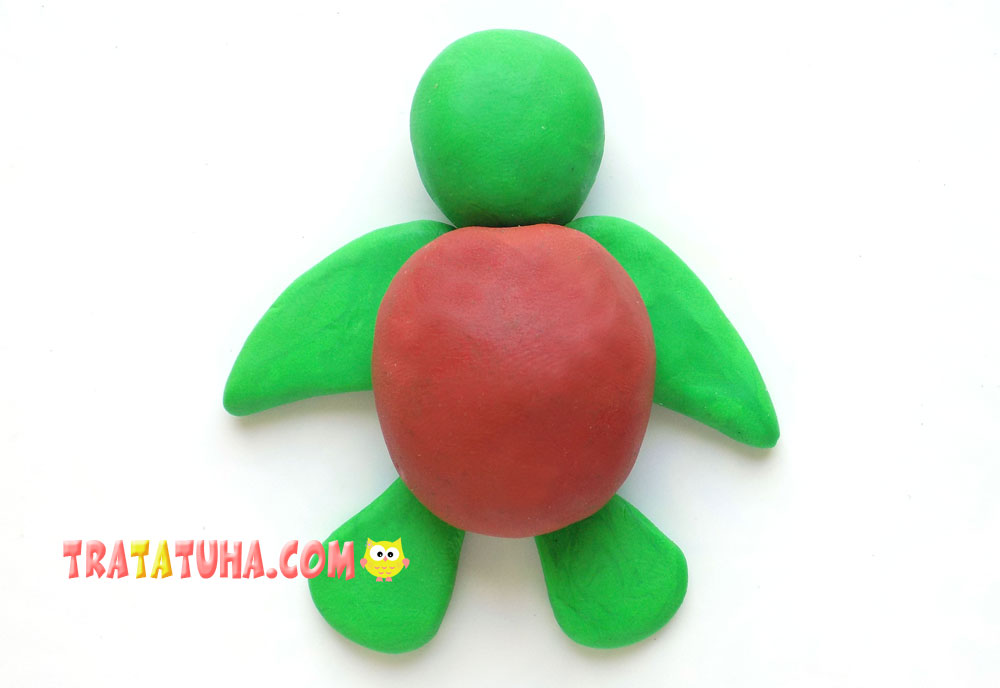
From green clay, you will need to make another blank, on which we will connect all the elements. First we roll the ball, and then we squeeze it, giving it a flat look. First of all, fix the head.

Then add the limbs on the sides.

From above we fix the shell, molded from brown clay.
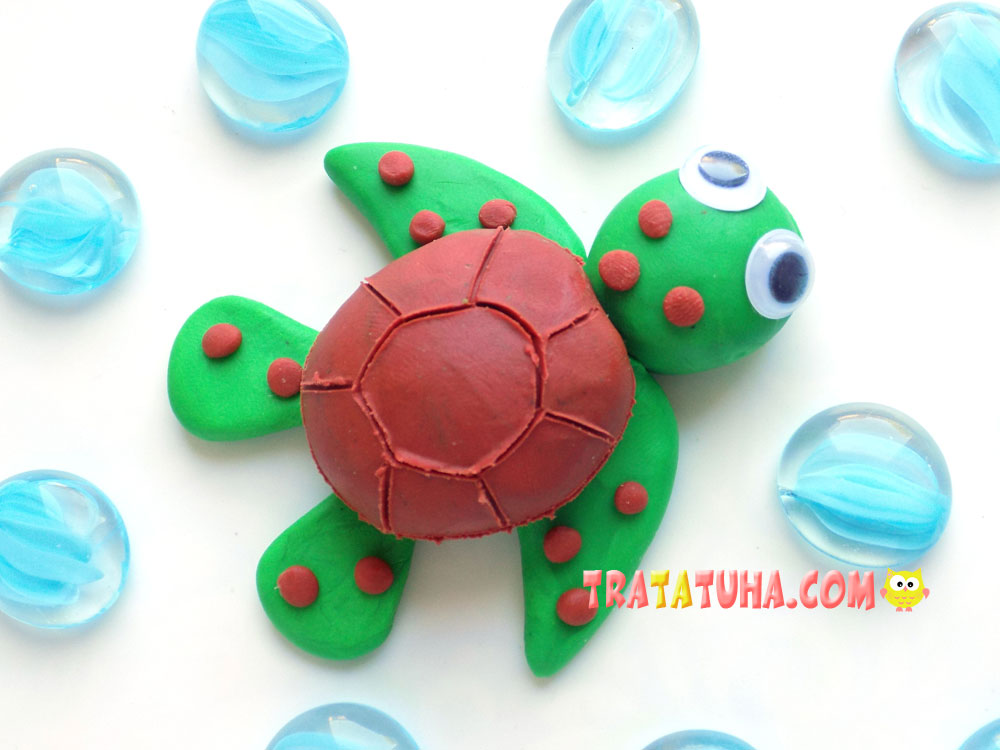
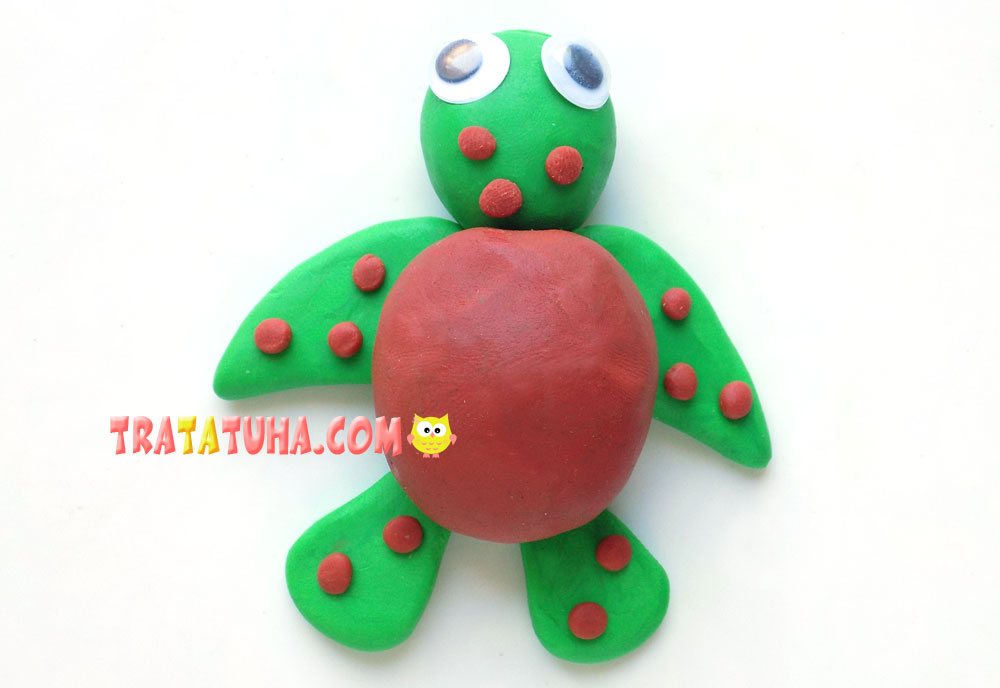
Add decorative eyes. We use ready-made plastic eyes, if there are none, then you can make them small balls of white and black clay. The stack denotes the mouth.

We will decorate our craft with small balls of brown clay, fix them on the fins and the head of the turtle.
It remains to designate the pattern on the shell. To do this, we will again use a plastic stack. Clay turtle is ready.
See more ideas about Clay Crafts.
Clay Animals – art and craft ideas for all ages.
Crafts for Kids – learn how to make craft at home! Super cute crafts for all age groups!
Related Post: