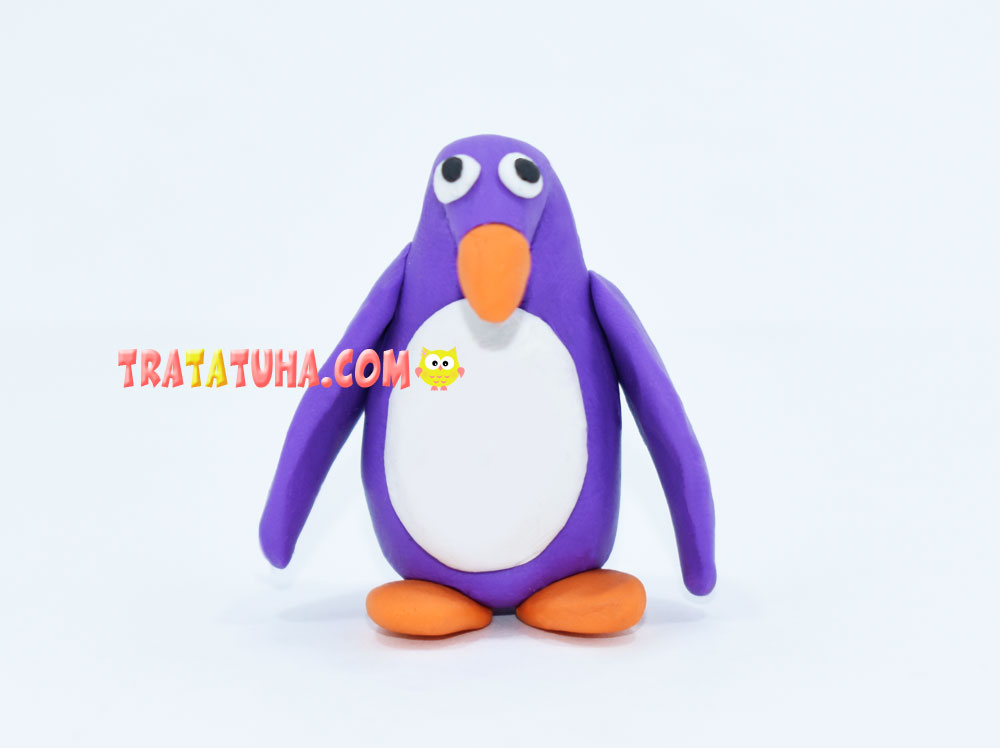
How to make a clay penguin for kids. Step-by-step photo instruction for sculpting a funny penguin. Simple, original idea.
Materials used:
- Purple clay;
- White clay;
- Orange clay;
- A little black for the eyes;
- Plastic knife (stack);
- Surface coating (special molding board).
How to Make a Clay Penguin Step by Step
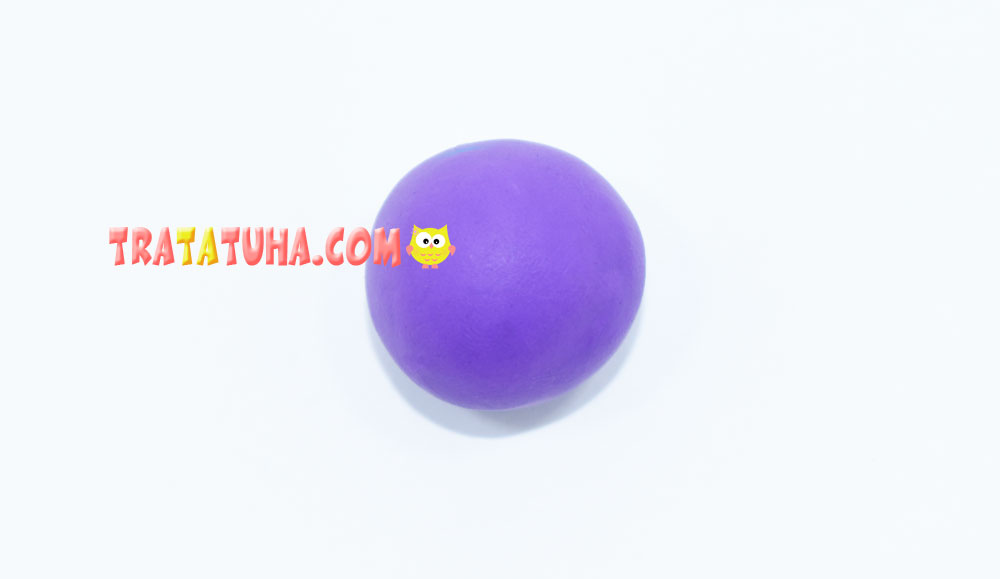
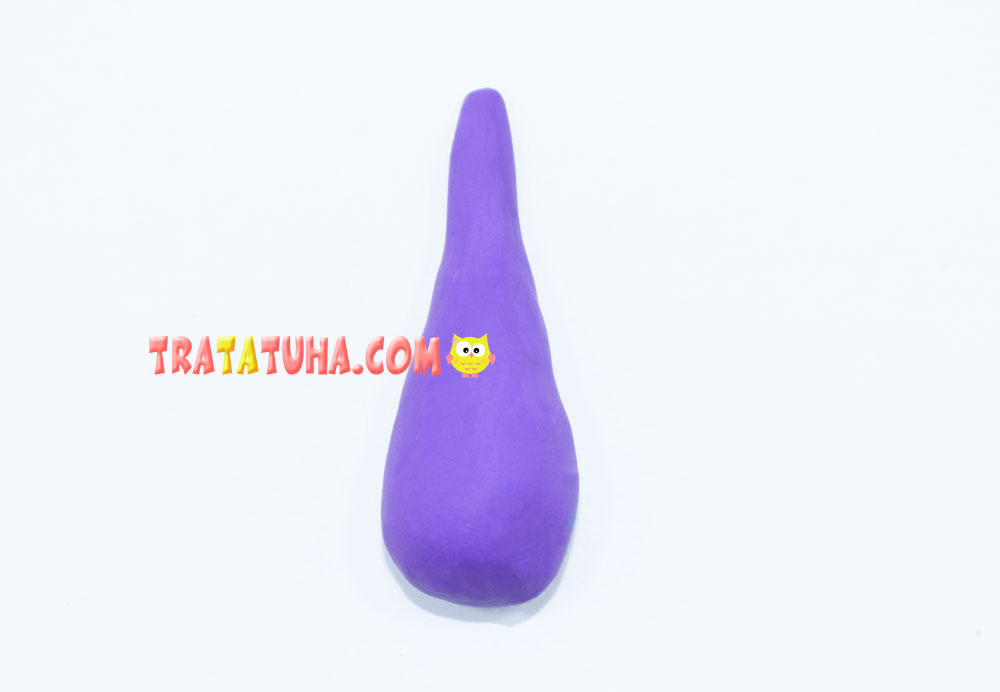
Knead the clay and roll it out on a flat surface (you can also use your hands) to make a ball.
Continue rolling, focusing on one side and rolling in that area with your finger. You should get such an elongated drop-shaped figure.
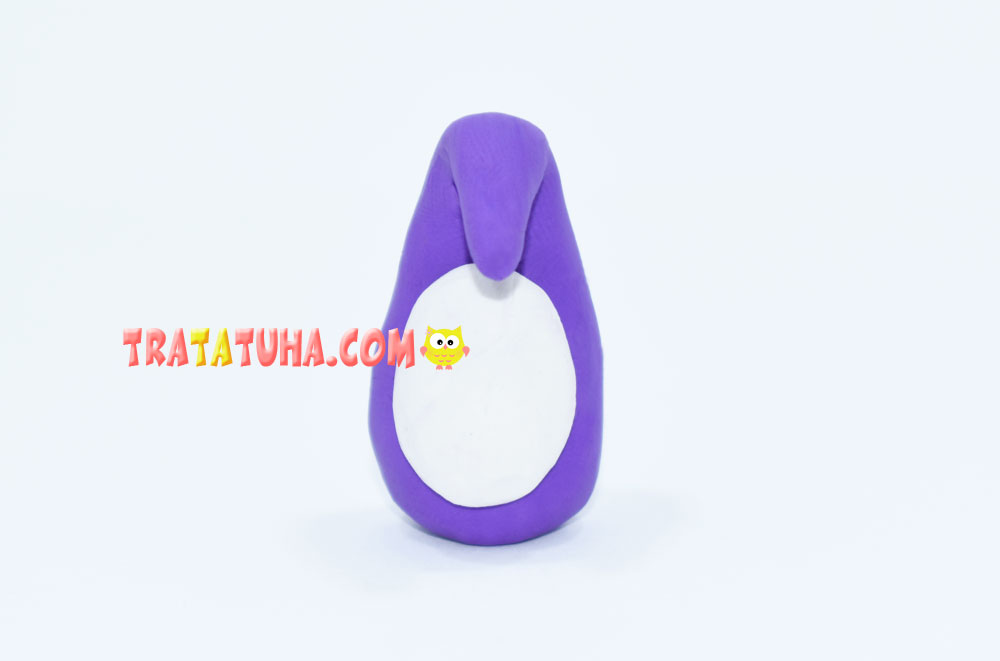
Cut off quite a bit of white clay, roll up the ball and flatten it with your palm. Glue to make a white penguin tummy.

Bend the upper narrow part of the teardrop-shaped figure down, so we can easily get the head of a bird.
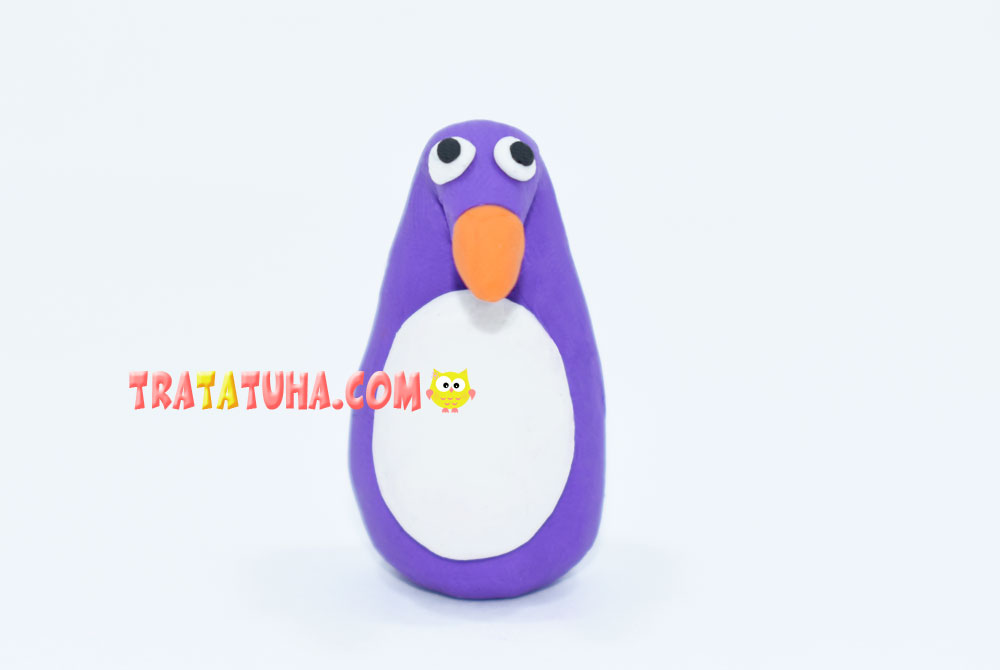
Roll out small balls of white clay, glue them on the head to make the eyes of the penguin. Glue even less black on top of the white balls – there will be pupils.
Roll out an oval from orange clay and glue it on the tip of the nose.
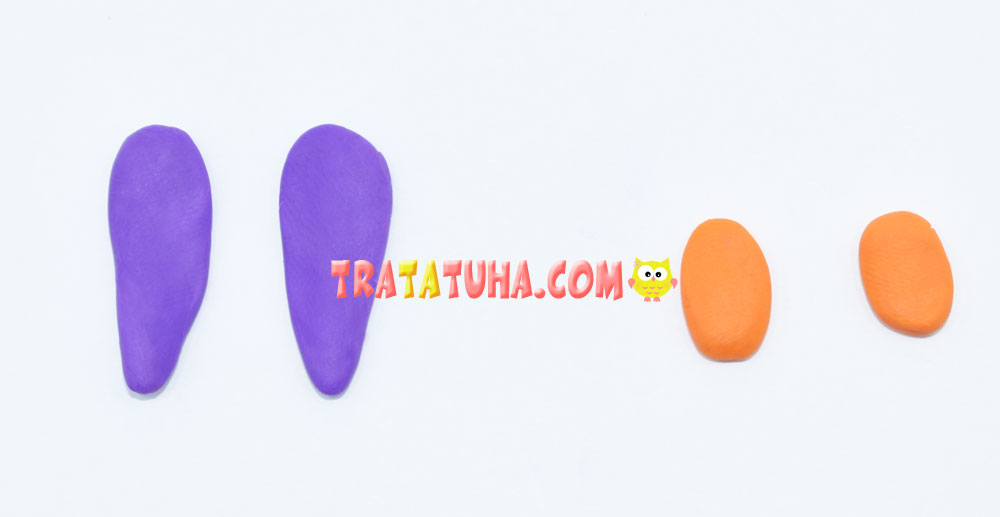
The clay penguin is almost ready, it remains only to make wings and paws. To do this, roll the purple clay into two oblong cone shapes, and turn a little orange clay into two ovals.
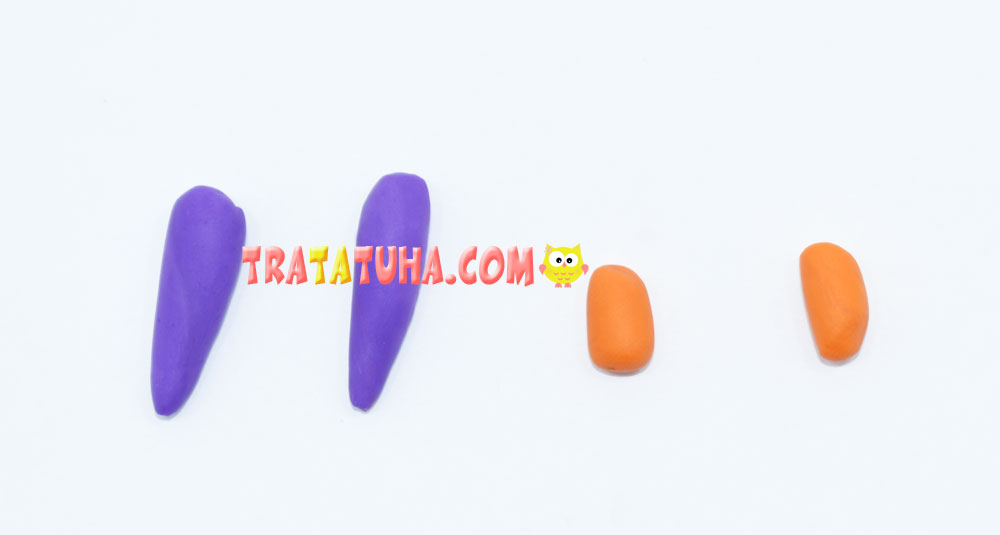
Flatten the details with your finger.
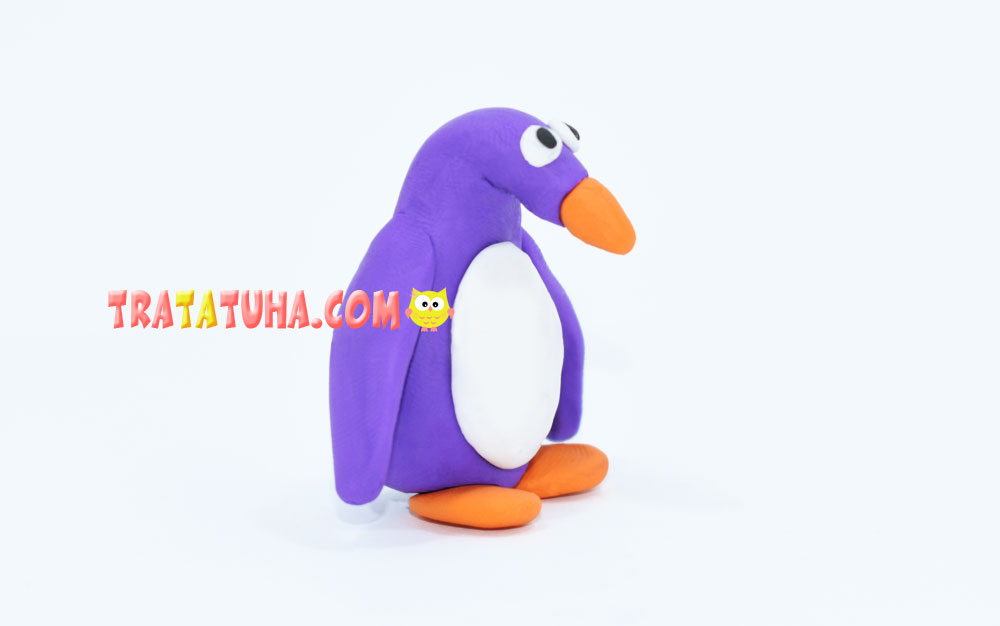
Stick the wings on the sides of the bird, and the paws on the bottom. Clay penguin is fully completed.
See more ideas about Clay Crafts.
Crafts for Kids – learn how to make craft at home! Super cute crafts for all age groups!
Related Post: