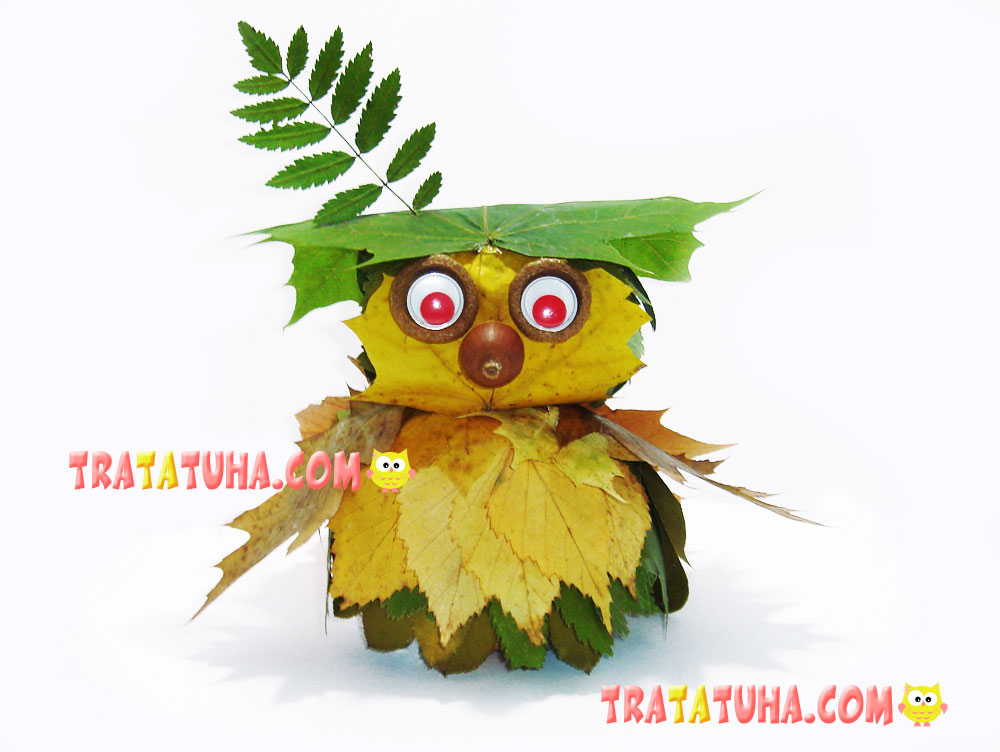
A colorful volumetric leaf owl will nicely decorate an exhibition at an autumn festival and will bring smiles on the faces of both children and adults. If you have plenty of dry autumn leaves, make sure to make such a craft with your kid – it is not difficult at all.
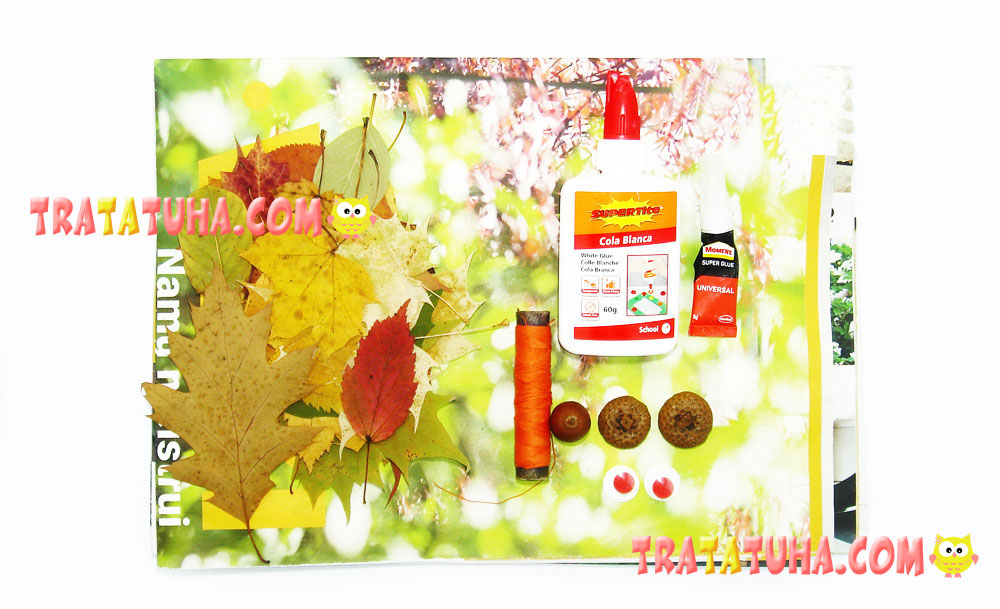
You will need
- Newspapers, magazines, leaflets, any soft paper;
- Dry leaves;
- Acorn for a beak and 2 acorn caps for eyes;
- Thread;
- White glue. At some points you might need superglue or a hot glue gun.
How to make a DIY leaf owl?
Crafting a frame
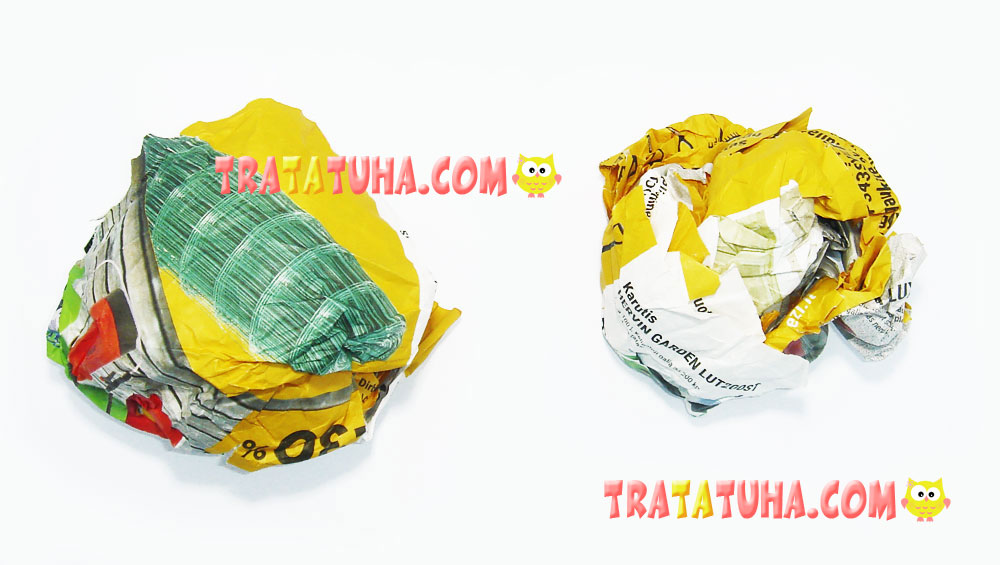
First, you need to make a frame for your future owl which you will stick the leaves on. Initially, I intended to use papier-mâché (you can learn how to prepare it from my video where I make a frame for a pine cone owl). But this time I didn’t want to waste time on drying the frame, so I decided to make it from dry paper.
You need to take enough paper and vigorously crumple it into some kind of a ball. The size depends on your own preferences – the larger the owl you want, the more paper you will need. Make a bigger for the body and a smaller one for a head.
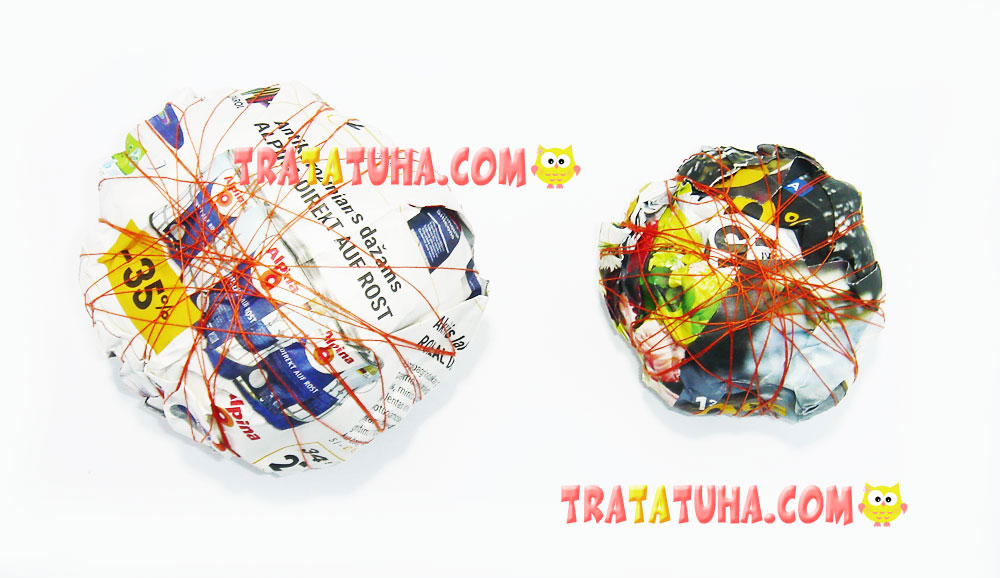
Next, you need to make these lumps a bit rounder by covering them with paper and wrapping them with threads until you get something which looks like a ball.
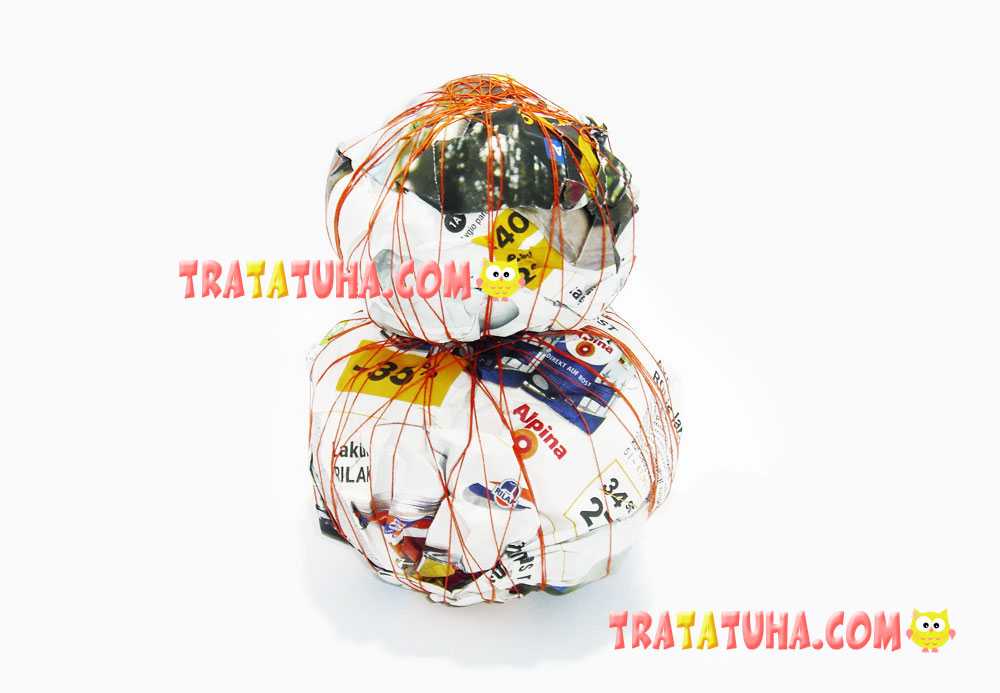
Glue a small ball on a big one using superglue or a glue gun – the leaf owl frame is now ready.
Sticking the leaves and making the owl image
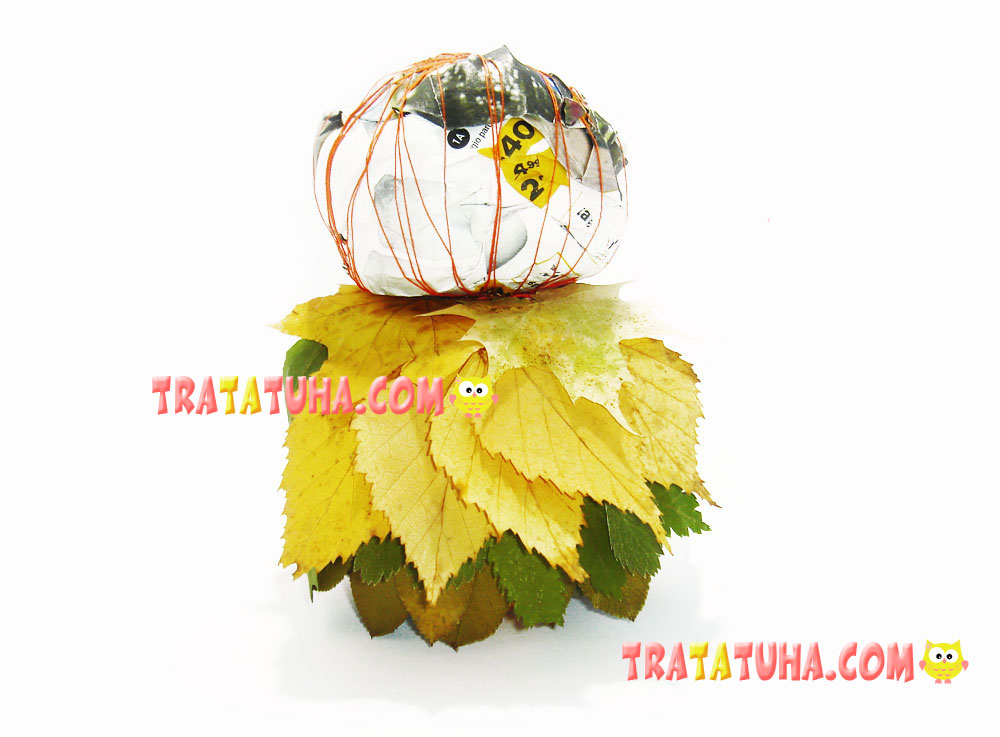
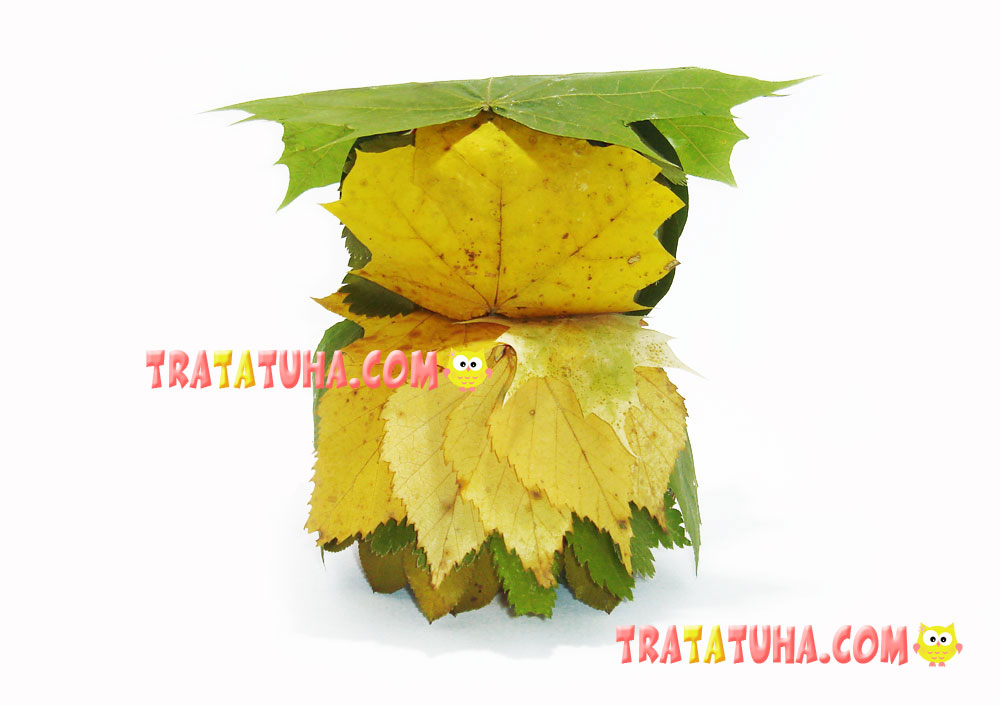
The appearance of your owl will ultimately depend on the leaves you will use. The simplest way is to use the same size leaves of any tree – for example, aspen. They simply need to be glued in rows, starting from the bottom, by overlapping the layers. Unfortunately, I only had leaves of different trees, so I had to use my imagination.
I used small green leaves at the very bottom. The belly is made of yellow aspen leaves.

I added a couple of maple leaves on the owl’s chest.
I glued the leaves with white glue. It works fine, but it will take some time to fully dry. At some point, my patience ran out, and I grabbed my hot glue gun. A few minutes later everything was ready. I covered the owl back with green leaves using a glue gun. I could use it from the very beginning, but I wanted to show that if you don’t have a glue gun, you can use regular glue. That’s right – you can, and it sticks the leaves to paper well, but it takes extremely long to wait.
I also planned to cover the head in the same way as the body, that is, to use small yellow leaves on the front and green ones on the back of the head. But unfortunately, I ran out of such leaves and I had to use what was left. Therefore, I glued a maple leaf to the front part and small green leaves to the sides in order to follow the general style.
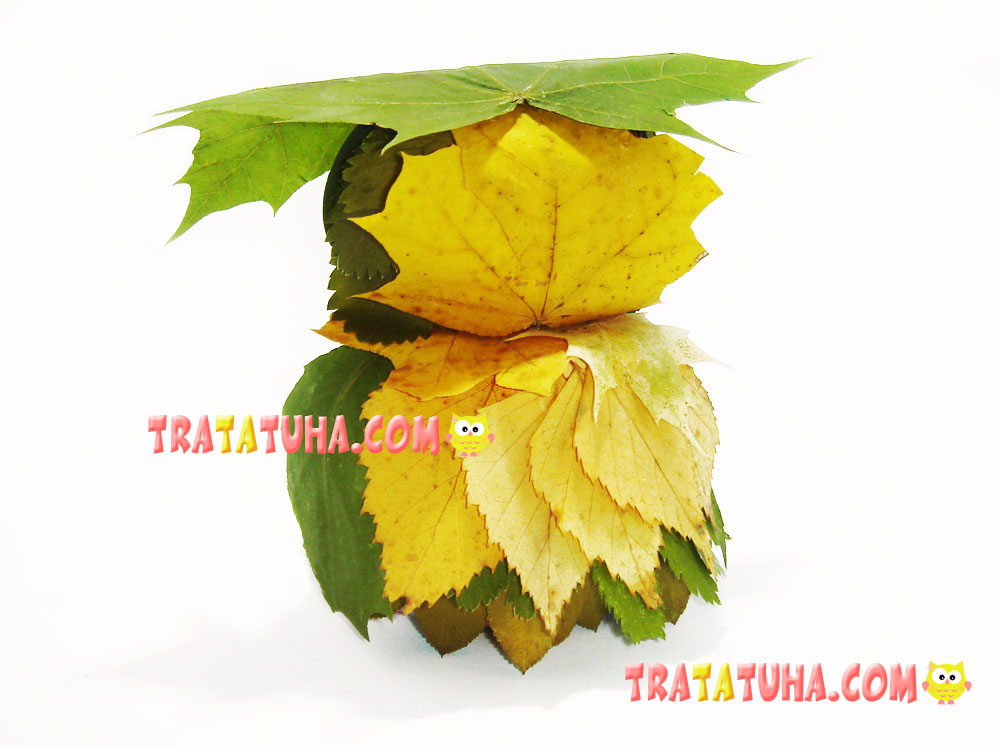
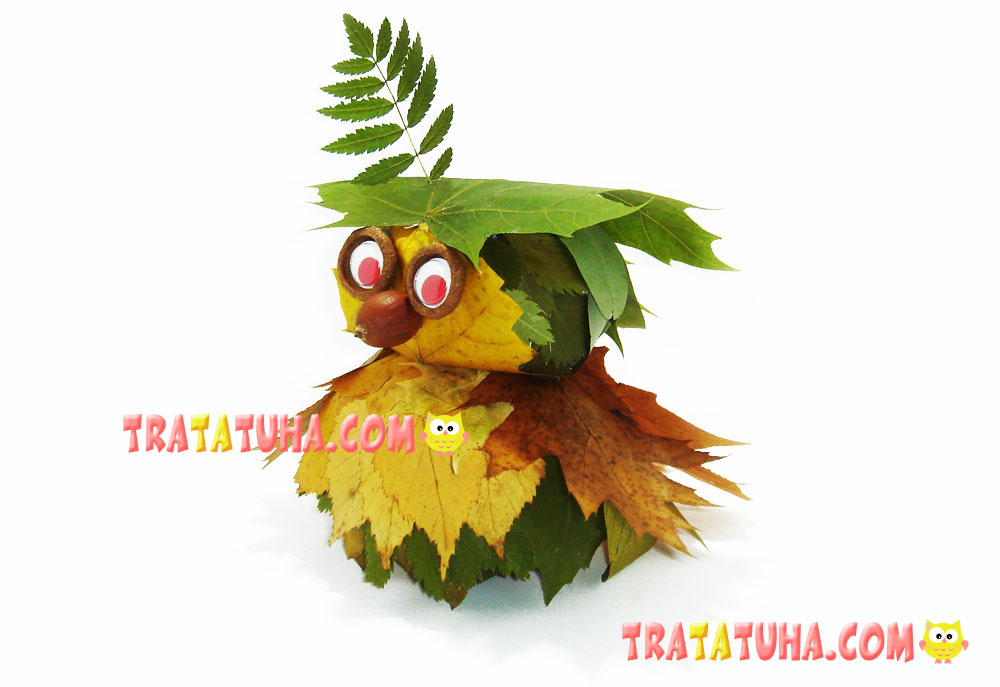
I also glued a green maple leaf on top – its tips will look like those eyebrows that owls have. My owl has acquired a look of a bird wearing some kind of a mortarboard that judges or professors have (as they often depict them in pictures and cartoon moves).
Our volumetric leaf owl is almost ready. At the very end, I used a glue gun to add two acorn caps to give my bird the eyes and I also used the acorn itself as the nose. I glued oak leaves on the sides to create some sort of wings and decorated the owl’s look with two moving eyes and a small accessory in the form of a twig on the top.
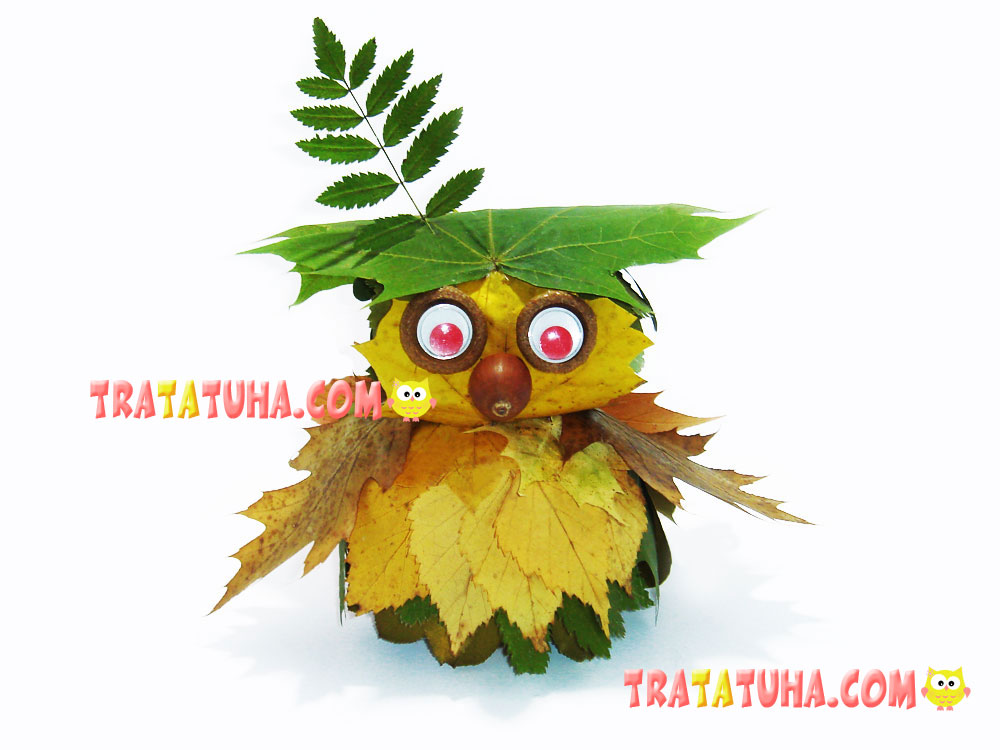
I could easily make pupils from natural materials – for example, using the same small acorns painted black or brown or using small chestnuts.
Crafts for Kids – learn how to make craft at home! Super cute crafts for all age groups!
Related Post: