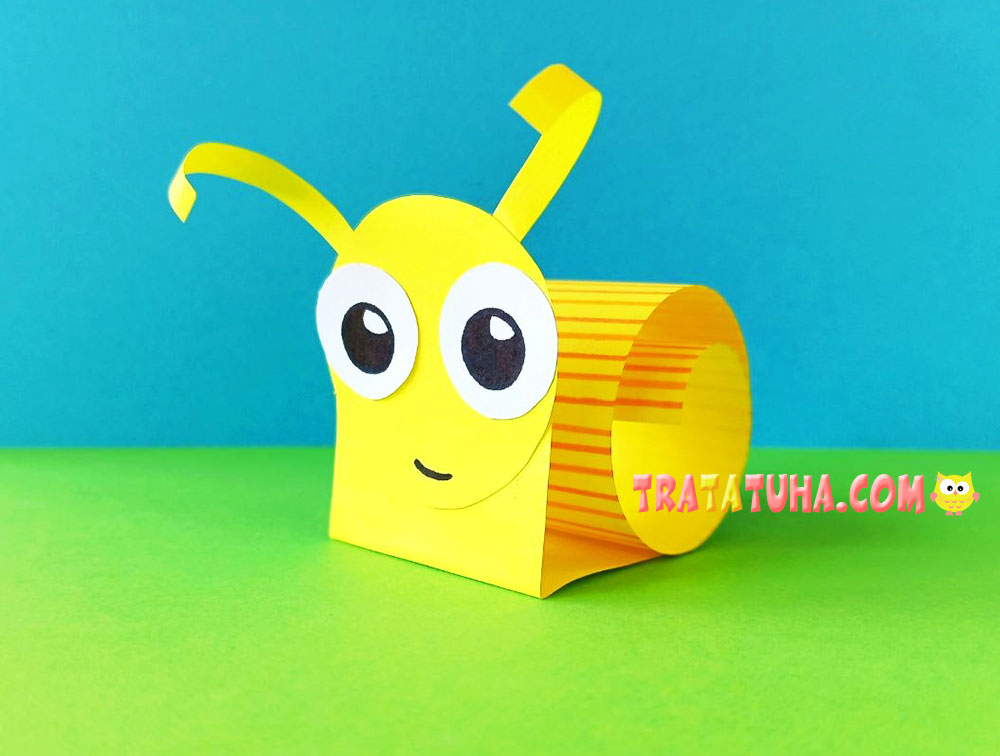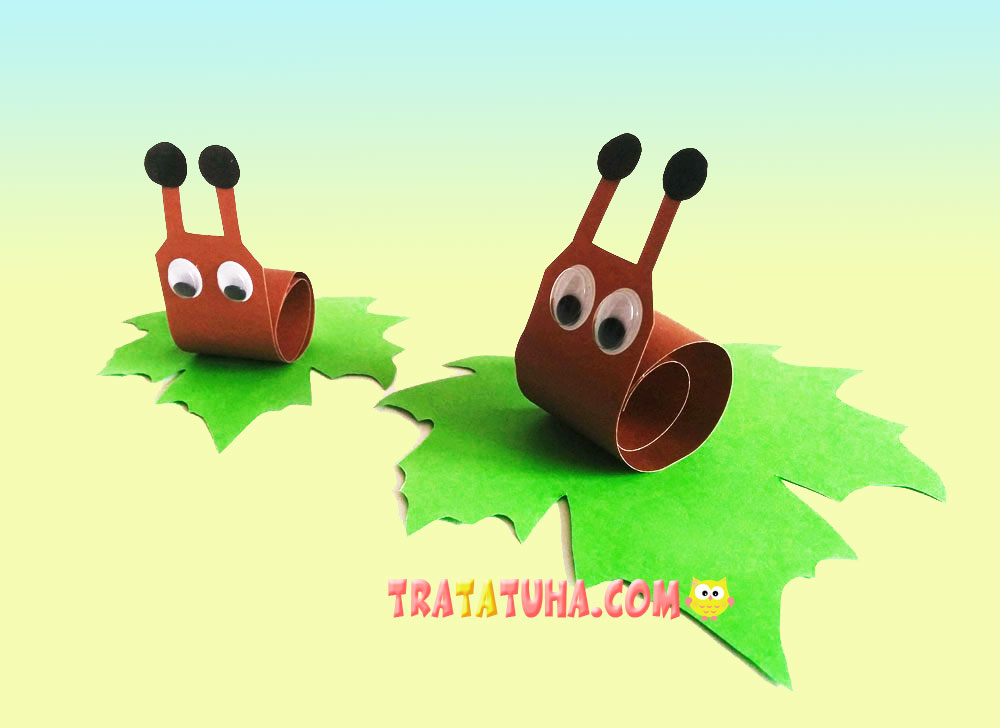
Paper snail does not take much time, as it is done very easily and quickly. The only slightly difficult moment in the work is the maple leaf.
But the template of any sheet can be printed on the Internet or redrawn, and then used as a homemade stencil.
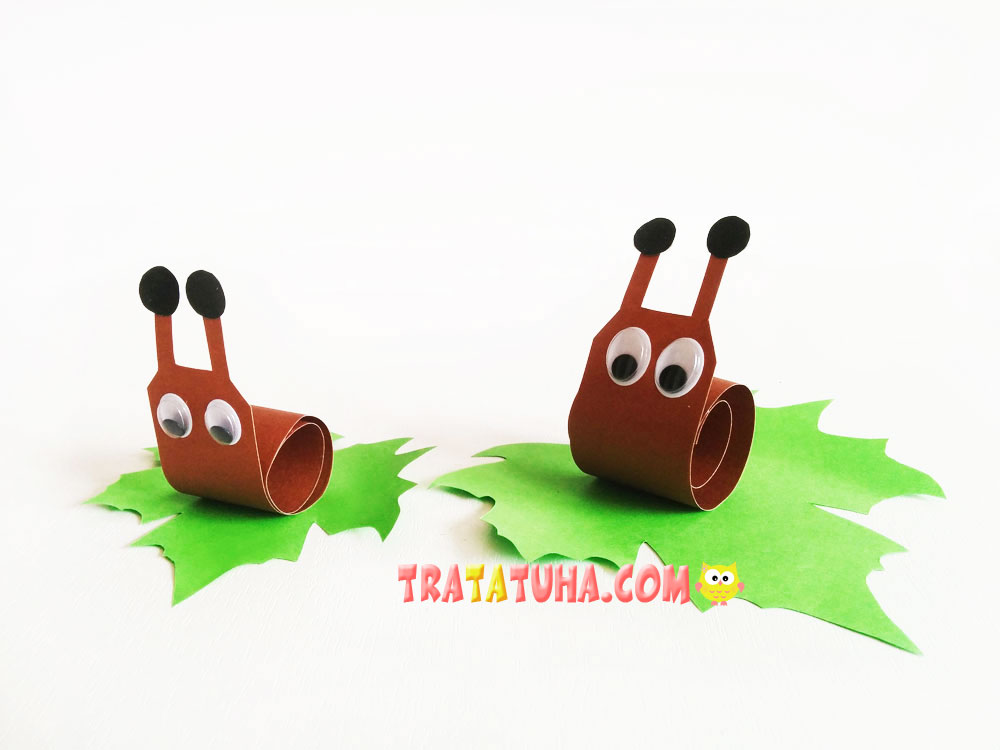
What will be needed for crafts?
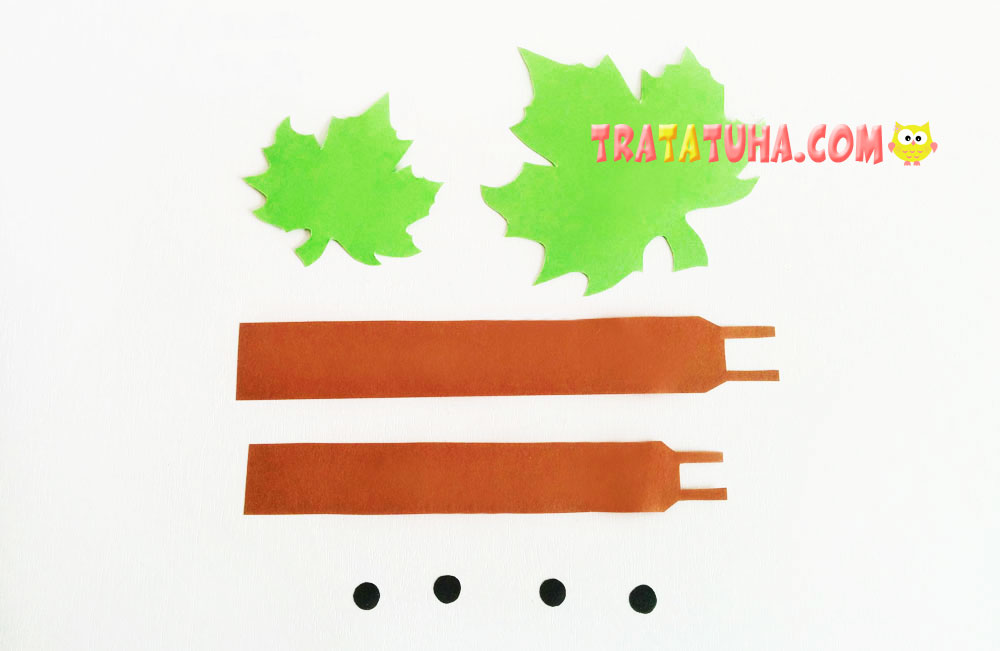
- Colored paper brown and green;
- Moving eyes, if they are not there, you need quite a bit of white and black paper;
- Scissors, pencil, glue stick.

Paper Snail Step by Step
Prepare a stencil with a maple leaf, circle it on green paper and cut it out.
Depending on the size of the sheet, cut out a strip of brown paper and cut out the tendrils on one side. I have a large stripe 3 cm wide and 22 cm long, including the mustache.
You will also need two black circles, which will be at the tips of the antennae. If there are no eyes, make them from white and black paper: cut out two circles or ovals, the black ones are smaller than the white ones. Glue the black pupils inside the white circles and get great eyes.
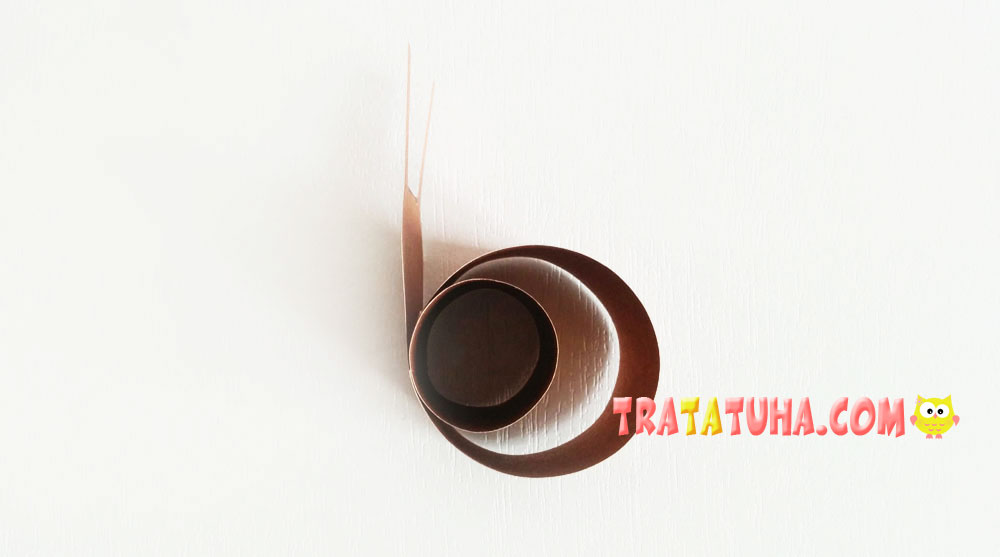
After all the components are ready, start collecting them into a single whole.
Roll a strip of brown paper into a loose roll. Inside, make a smaller ring and secure it with glue. It is also necessary to glue the area of the neck or head with a large ring so that the roll does not unwind.
After that, glue the eyes of the snail, black circles on the tips of the whiskers, and attach the snail itself to the maple leaf. Depending on where you will have a bonding point, a paper snail can look down sadly, up in surprise, or thoughtfully ahead. A green maple leaf, which may well be autumn yellow, needs to be slightly lifted up at the tips to make it uneven. After all, this is already a fallen leaf, it shrinks a little, crumples.
More ideas in the collection — Crafts for Kids
Related Post: