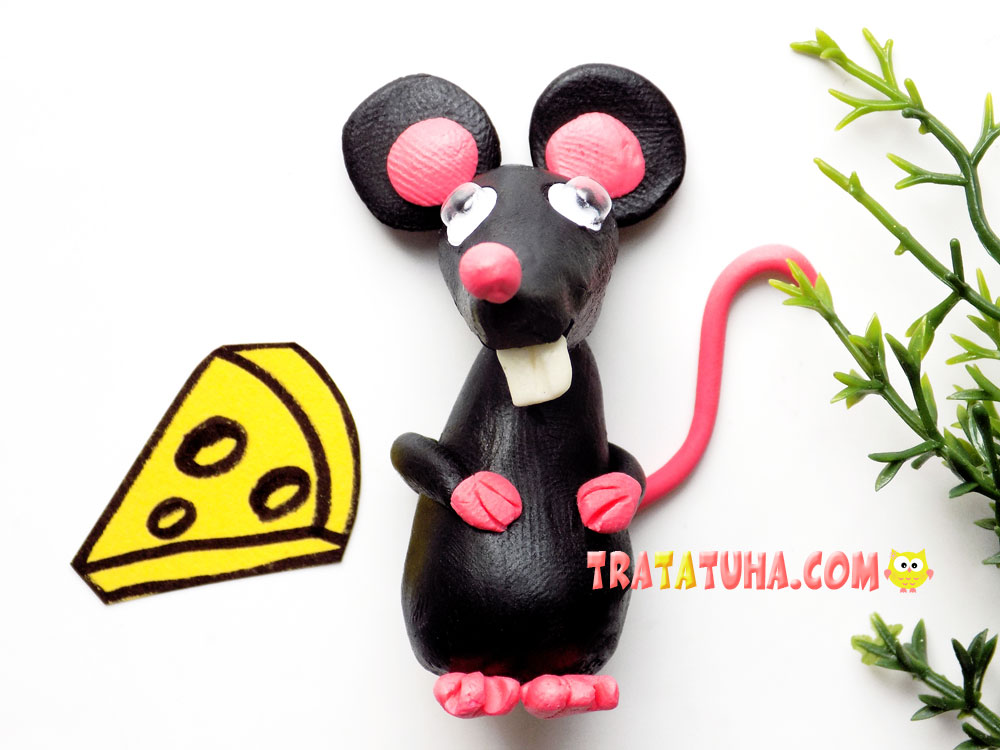
This tutorial is a clay rat. A simple craft for children’s creativity step by step.
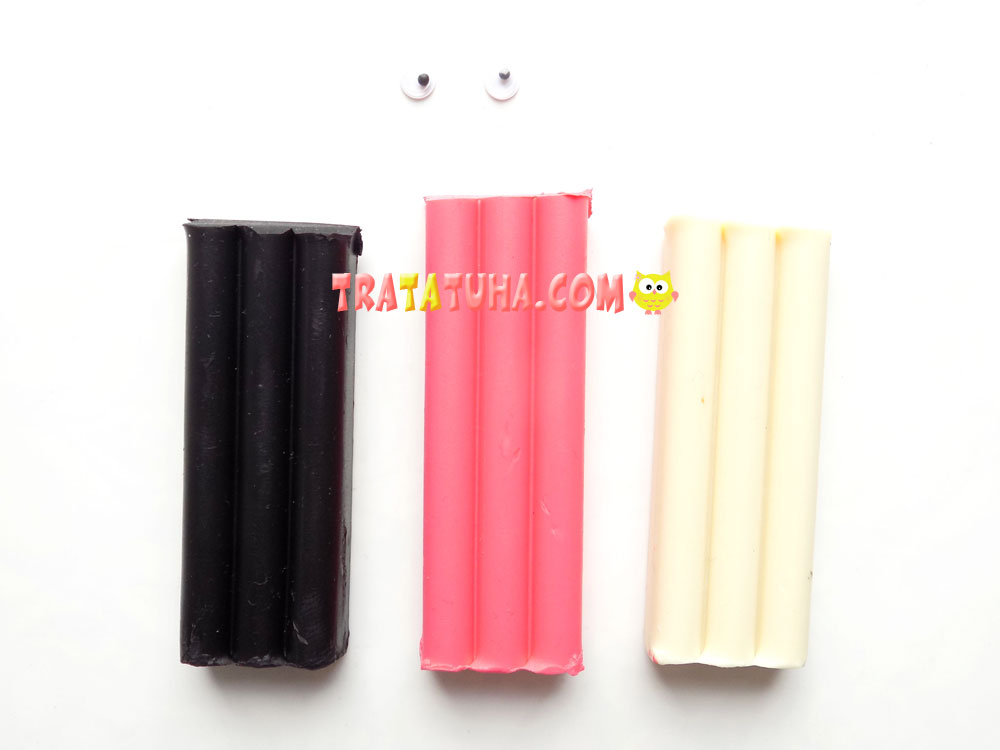
To sculpt a rat, we will prepare:
- white, pink and black clay;
- small decorative eyes;
- stack (toothpick);
- stand to protect the surface.
Clay Rat Step by Step
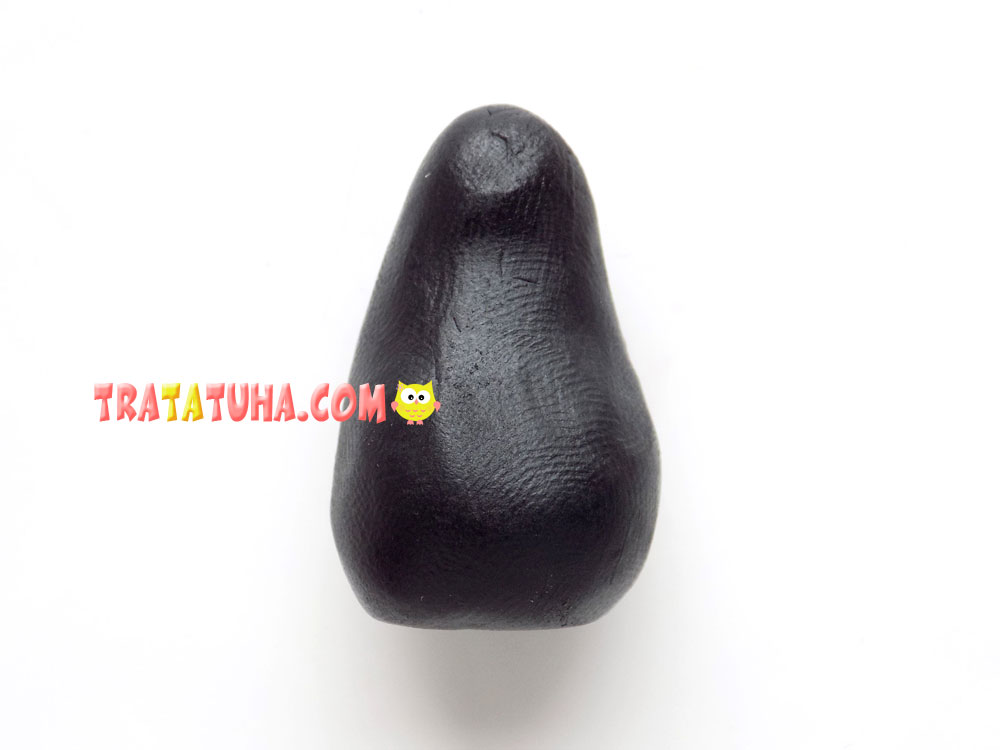
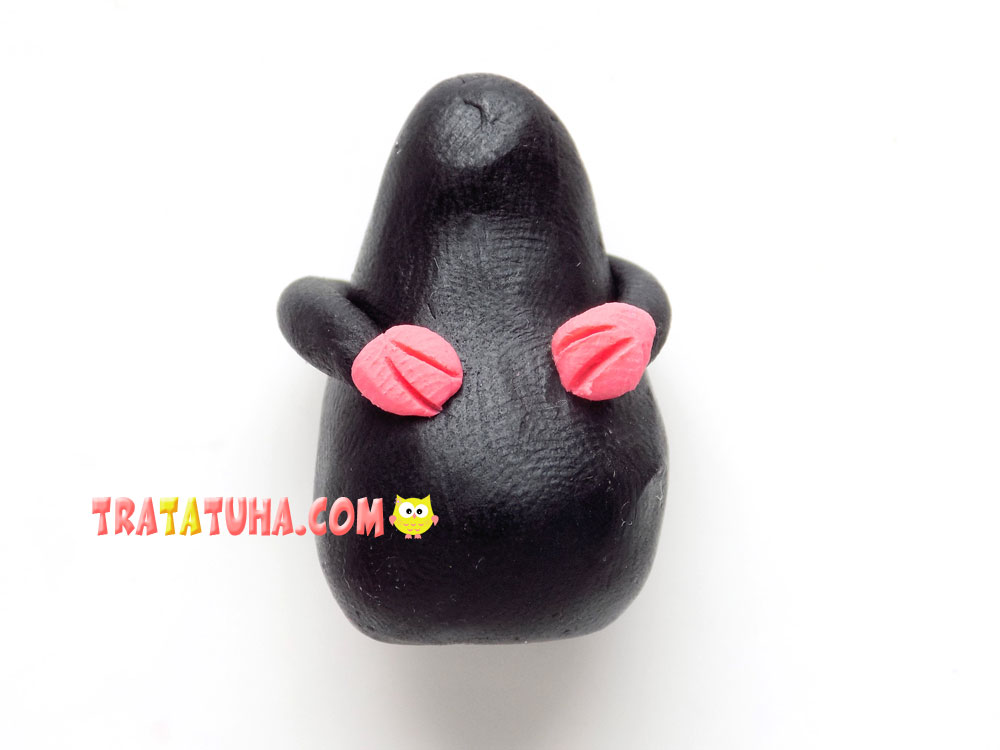
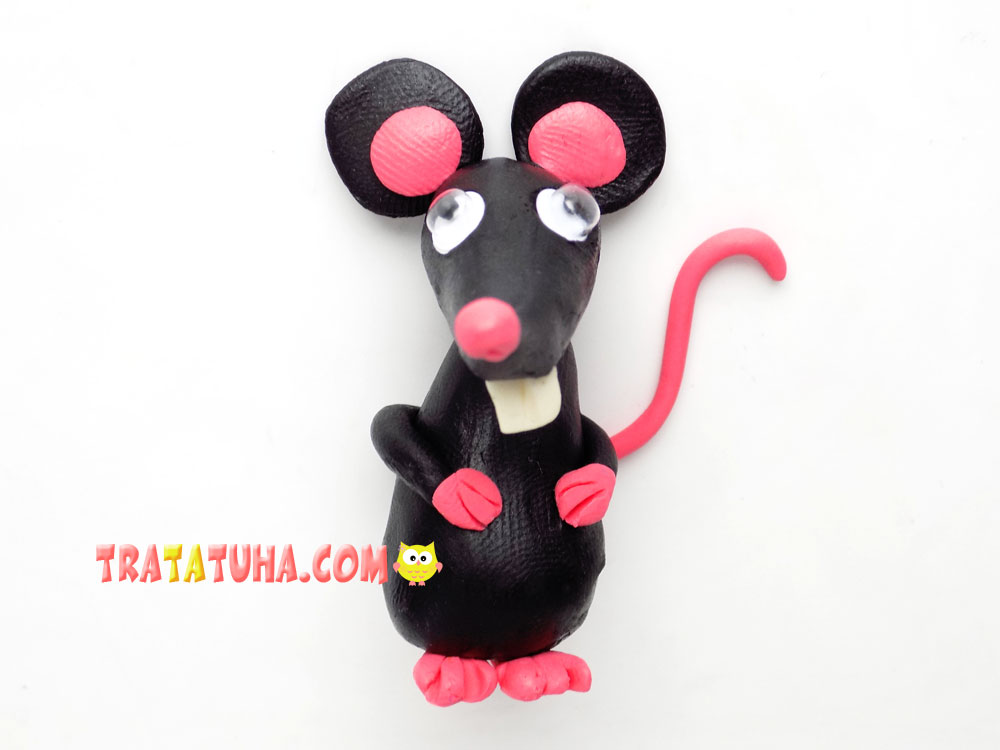
First, let’s sculpt the torso of the future rat. It will have a slightly elongated pear-shaped shape, where its lower part is wider than the upper one.
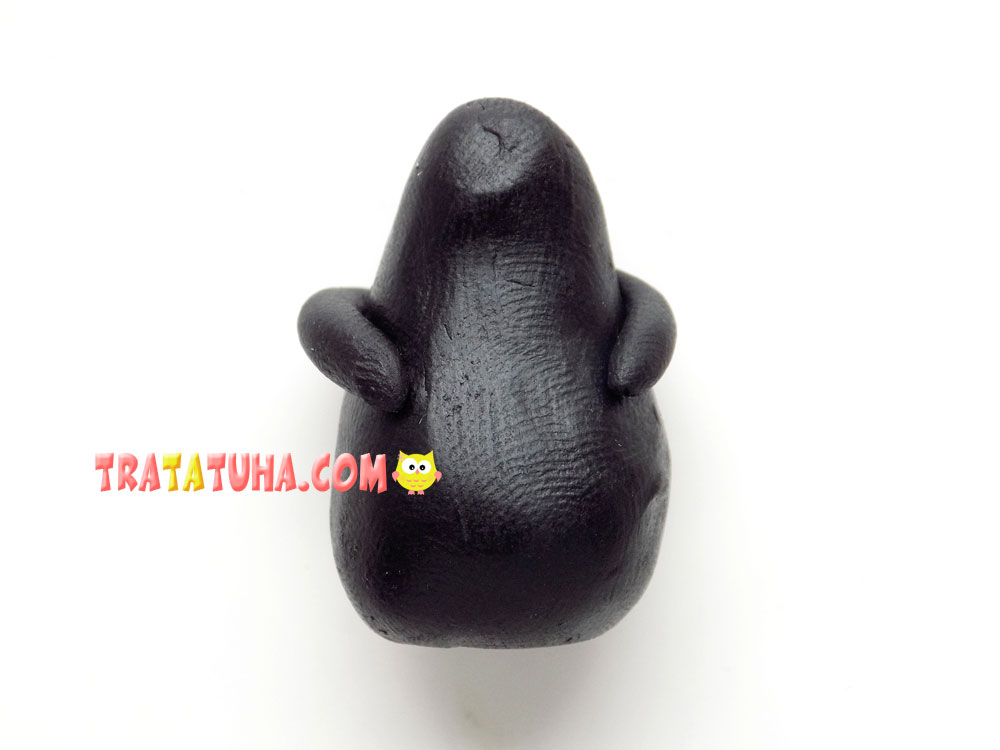
Let’s add thin paws, which we will fix on the sides of the body in the middle part.
We will decorate the tips of these paws with pink clay. This may require a toothpick or stack, which we will apply a few strokes.
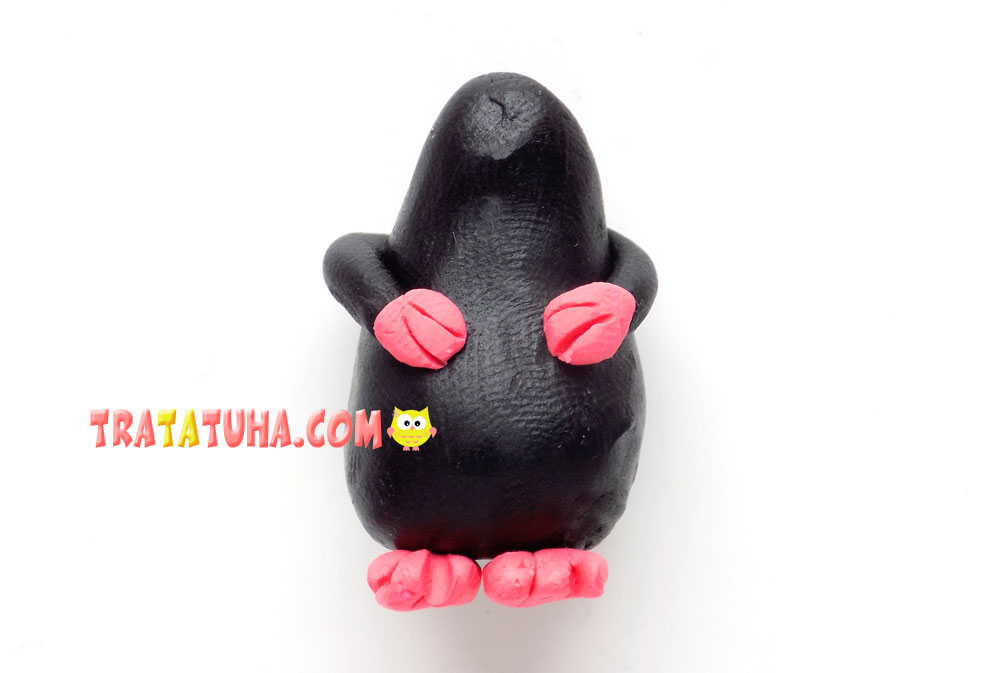
Let’s make the lower legs of the rat completely pink. To create paws, roll pieces of clay into balls, press, give them a slightly oval shape. On one side, make cuts with a stack or a toothpick.
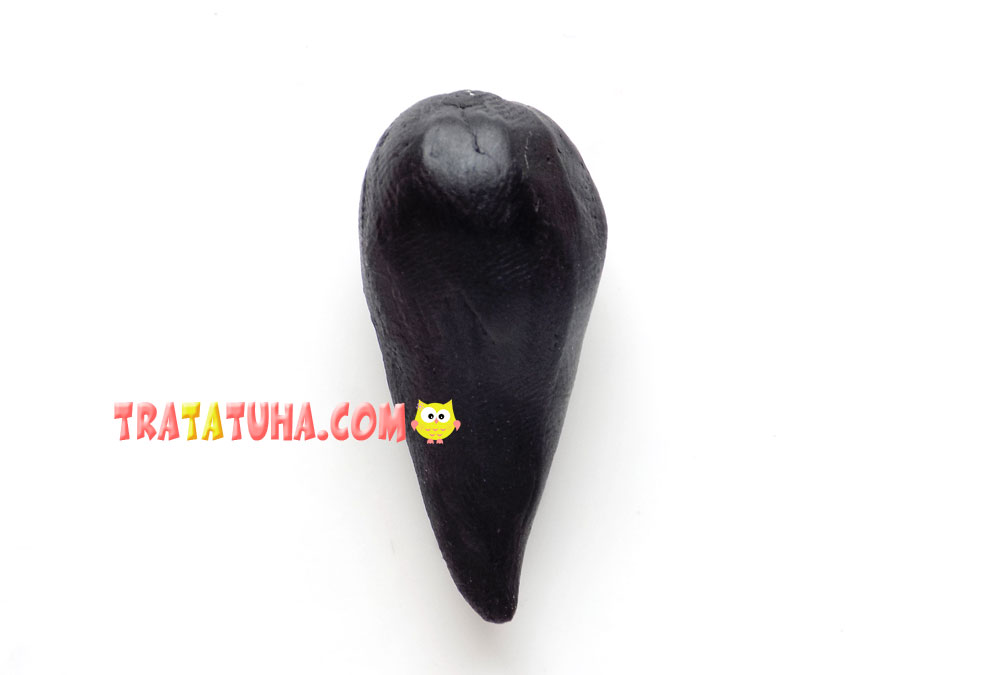
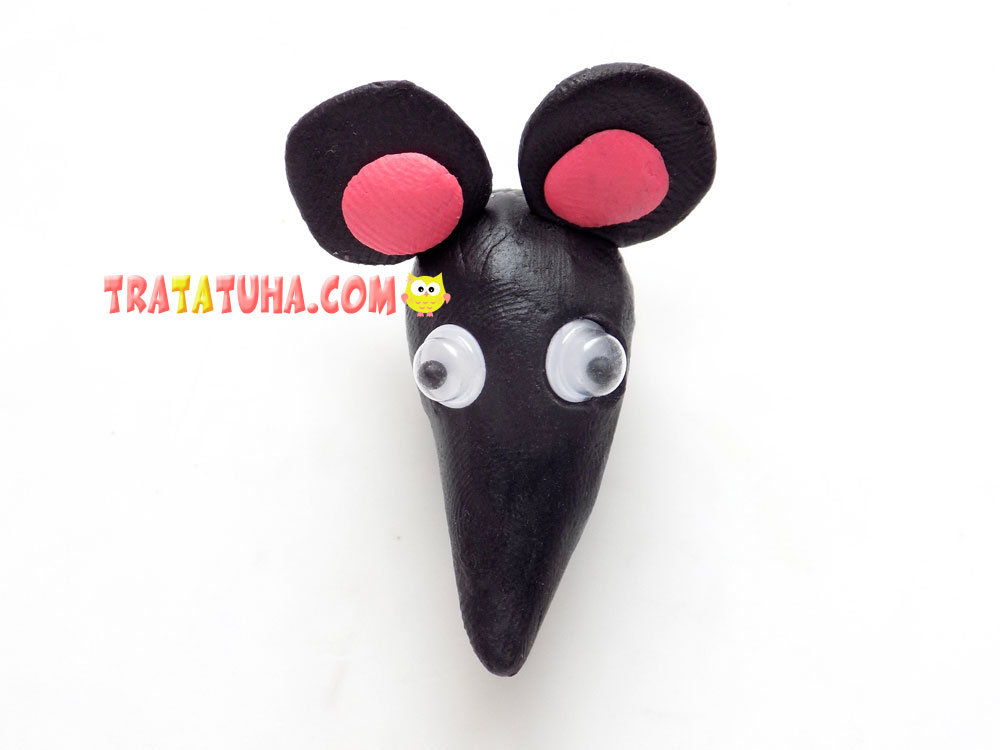
Now again we need black clay. From it we sculpt the head of a rat. It will be a voluminous blank, similar to a droplet.
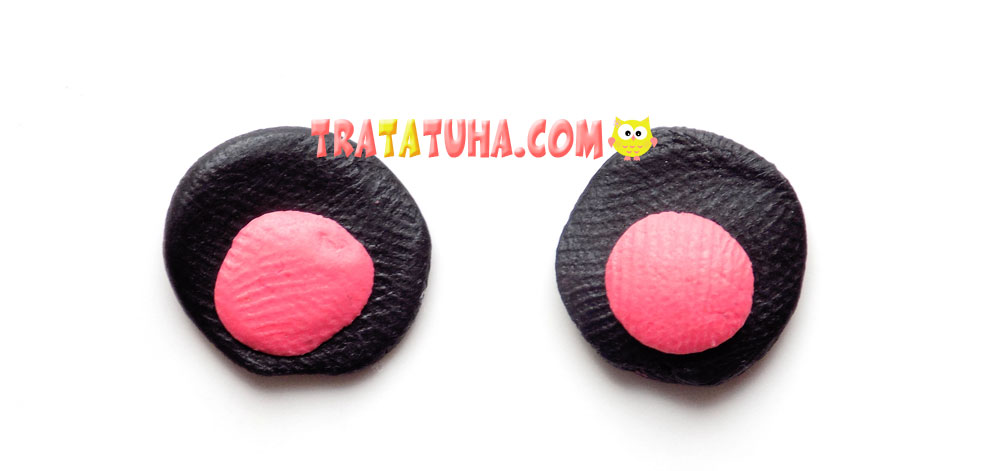
We make ears. To do this, first roll a couple of balls, and then give them a flat look. Here such a round shape will be blanks for the ears. We will decorate their center with small pink circles.
We fix the finished ears on the head of the rat. Then add decorative eyes.
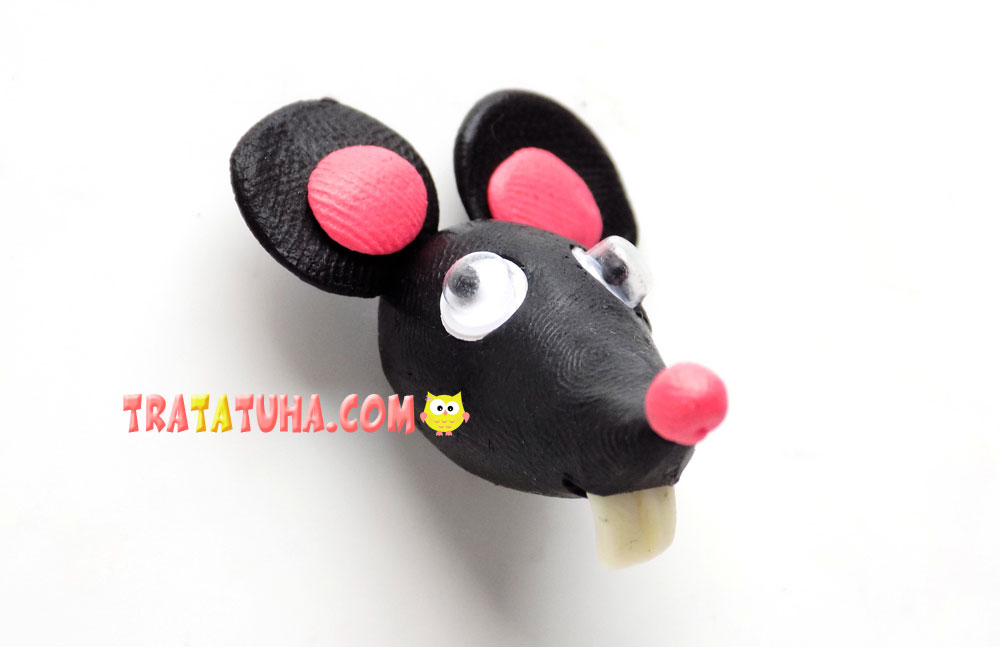
Let’s not forget about the small nose, it will be a ball of pink clay. And from a piece of white clay we will make teeth for our rodent.
We connect the head and torso together.

It remains to blind the tail of our rat. It will be a thin flagellum rolled from pink clay. Here we have such a funny clay rat.
See more ideas about Clay Crafts.
Clay Animals – art and craft ideas for all ages.
Crafts for Kids – learn how to make craft at home! Super cute crafts for all age groups!
Related Post: